Showing posts with label Pollen. Show all posts

Friday, May 15, 2015

First Full Inspection: 2015-05-13

The 2015 Beekeeping season is now officially in full swing!  I've done my first complete inspection of both hives and things are looking good so far.

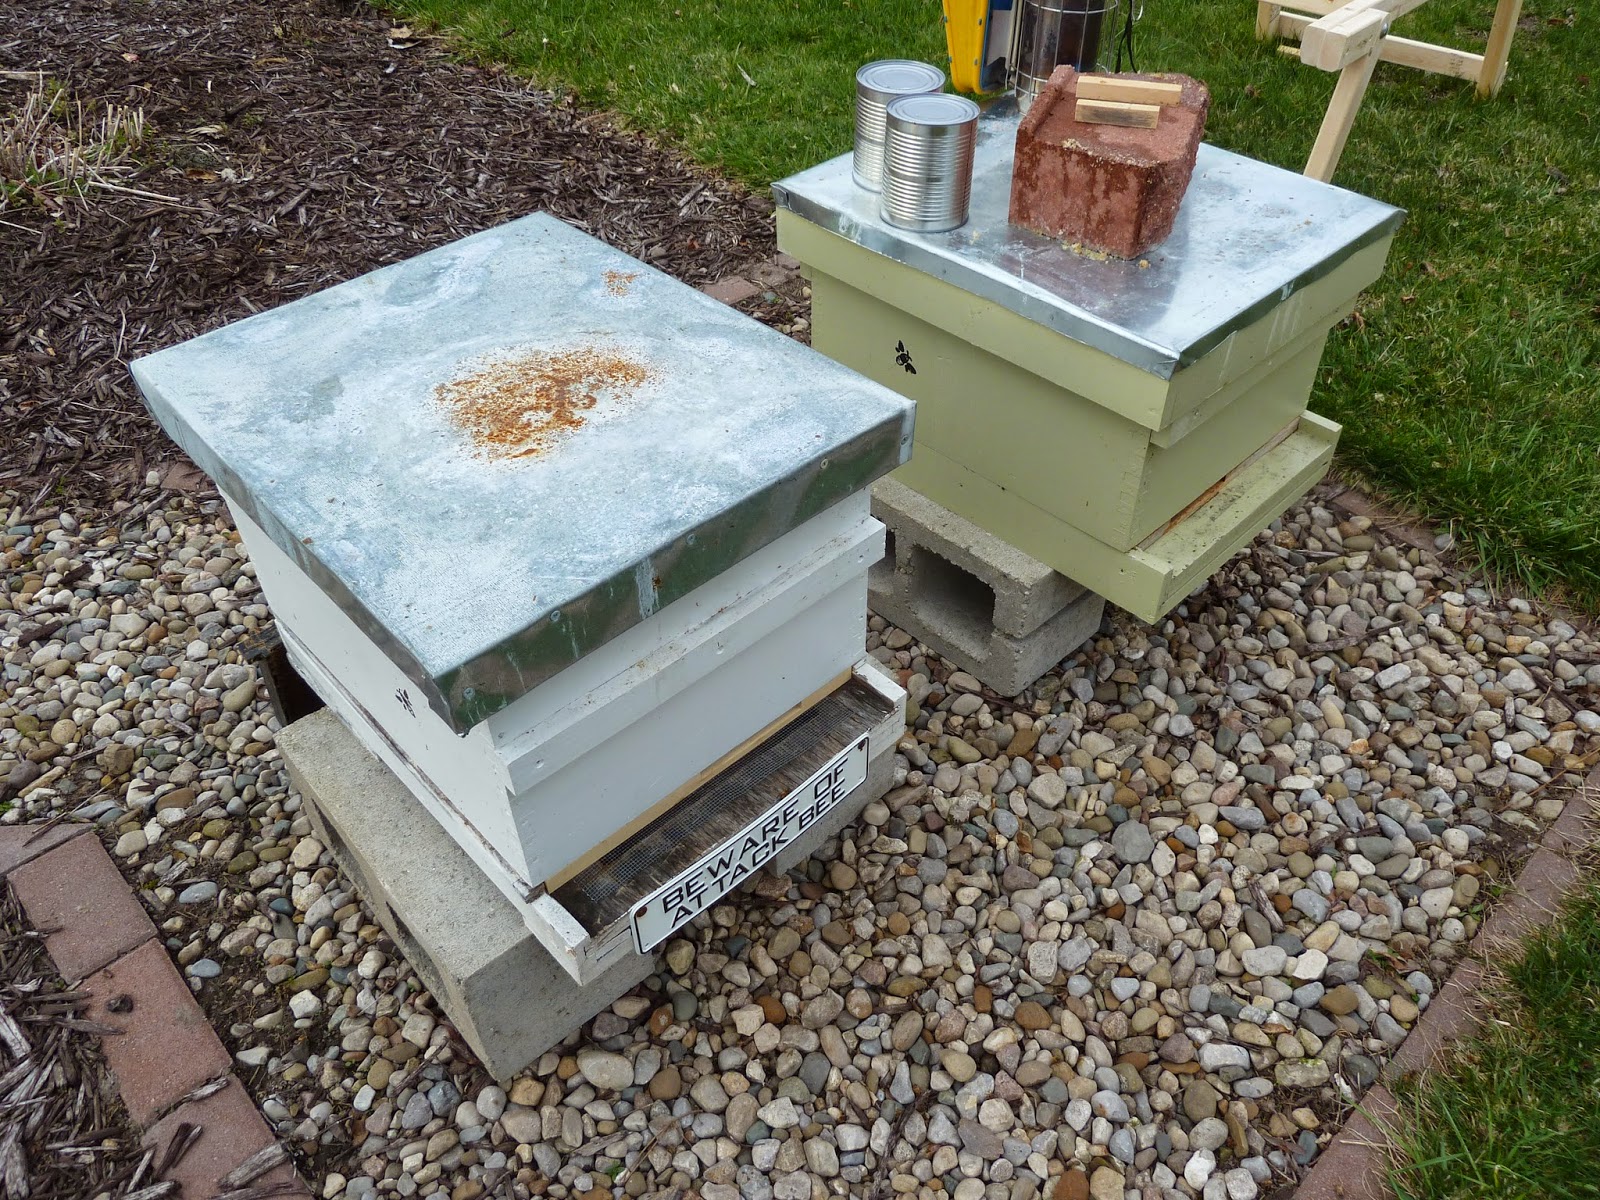
White and Green Hives.  Life long buddies.

White Hive:

Upon opening the hive up, the first thing I found was that instead of hanging out in the middle of the hive, they've chosen one side over the other.  It must smell better over there or maybe there was more honey and pollen left on those frames from last year?

The Left side is where the cool kids hang out
Anyway, it made it easy to figure out which side to start my inspection on.  So I pulled out the frames on the empty side and quickly worked my way toward the middle.  On frame 6 I found a nice frame of fresh, colorful pollen.

Pollen


Some pretty typical orange and yellow colors for this time of year.  I was hoping that the bees would have a chance of gathering some steel blue colored pollen from the Siberian Squill I planted but the blooms were already spent by the time the bees arrived.  Maybe next year.

Moving on to frame 7 I spotted the first frame of capped brood.

Future baby bees

It has only been about 14 days since the bees were installed and usually it takes a few days for the queen to be released from her cage, and then maybe a few more days before she even starts laying eggs.  The eggs hatch into larvae and then the cell is sealed on day 9.  So, I'm guessing these cells have only been capped for a few days at most.  If that means the eggs were laid 12 days ago, then in 9 more days they will start hatching.  Then we'll get to see what this queen's genetics are going to look like.  This hive has been a bit more "touchy" than the Green Hive so far.  Hopefully when the new bees take over they will have a little calmer disposition.


Green Hive:

I love the look of new comb on foundationless frames!  Green Hive did not disappoint me either.

New comb being formed
It is fascinating to watch as the bees drawn down a sheet of hexagons on the frame.  The new wax is a nice pale yellow color and it is just waiting to store something!

Well, this queen has been filling the frames with brood.

Pretty solid brood
Sometimes new queen have a very spotty brood pattern when they first start.  This frame looks pretty good to me.  You can also see that there is a cluster of drone brood along the bottom of this frame.  Right before I took this picture the bees were doing there job, covering the frame and keeping the brood warm.  If you blow on them, they don't like it and they move out of the way rather quickly.  I think it has something to do with the CO2 that we exhale.

A few frames over I was able to grab a nice close up of the developing larva.

"C" shaped larva
Notice the different sizes of the larva.  The queen usually lays her eggs in a circular spiral pattern.  So the larva in the center of the frame are bigger (older) and the ones toward the outside edge are smaller.  If you zoom in really close on this photo you can even see the eggs to the right of the smallest larva.

I'm really glad to see both hives getting off to a really good start so far in 2015!

Next Steps:

I have completed my solar Arduino setup and I plan on deploying that again soon.  I also plan on taking some of the remaining honey frames from the hive that died this past winter and feeding it back to the bees.

Until next time, thanks for reading!

Thursday, April 30, 2015

New Beeginnings: 2015-04-30

B-Day has finally arrived!! 

Over the last week I had been cleaning out the hive that had died over the winter so that it would be ready for the new bees.  The lucky new arrivals would be taking advantage of the hard work of the bees from the previous year.  I'm sure the new bees would be happy to see the frames of honey, pollen and bee bread waiting for them instead of a bunch of empty frames.

My friend Keith was getting a package of bees this year so we made the quick run to pick up the new packages of bees.  The packages looked really nice and had very few dead bees on the bottom.  The package seller even slammed the packages on the ground to knock the bees down so we could make sure the queen was alive in her cage.  I went over to Keith's house and helped him install his package into his Top Bar hive.  It went very quickly and I was soon home and ready to install my two packages.

White Hive:

This hive has the Honey Supercell frames in it.  These are the fully formed, small-cell, plastic frames.  So after removing some frames to make room, I popped open the package, pulled the queen cage, put it between the frames, slammed the package on the ground and dumped the bees in.  I've stopped worrying about spraying them with sugar water or putting the lid back on the package after I've pulled the can of sugar syrup out or which end of the queen cage should be up or down.  A lot of wasted effort I think.

Green Hive:

This hive has mostly foundationless frames.  A majority of them have drawn comb with lots of honey.  The problem with these frames is that the honey was put into large bulges of comb that extended well past the width of the frame.  So after I removed the frames and dumped the bees in, I used my uncapping knife to saw the comb even with the frame.  Of course this made honey ooze out all over the place but I figured the bees would be eager to clean it up.

Beware of Attack Bee

Queen Release:

After three days I went out to make sure the queens had been released from their cages.  When I pulled the cages the sugar plugs were almost completely eaten away!  After I removed the queen cages I also had to remove all the comb that the bees had built in the extra space that the queen cage was occupying.


A few swipes with the hive tool and the excess comb was removed.  Before adding the frames back in, I took a look for the queen and spotted her quickly.

Can you see the queen in the middle of this picture?
Everything looked great and I closed up White Hive.

Green Hive went very smoothly as well.  Move the frames apart, pull the queen cage, check some frames for the queen (no luck spotting her this time) and push the frames back together.  Done.

Plastic tab attached to the queen cage

 Everything is now good to go for the 2015 bee season!

Next inspection in about a week so that I can make sure the queens are laying eggs.  Until then, thanks for reading!

Wednesday, September 24, 2014

Bee Blog Slacker: 2014-09-20

Well a lot has happened in the bee world since my last post in June.  I guess things get crazy here in Michigan during the summer time when it seems so short but that is no excuse!  Thank you to my lovely daughter for reminding me that people are worried about the bees and they are left in suspense if I don't write these posts.....heheheheh  =)

Here is a quick summary of what has happened since:

Green Hive:  

Doing OK but not strong.  Had some queen drama where I found no brood in the hive during an inspection on 7/24 and found capped queen cells in White Hive.  I transferred the capped queen cells to the Green Hive and after looking through the photos I took during the inspection I spotted that there was a queen in Green Hive after all!!!  So either the queen in Green Hive was a virgin or not laying eggs for some other reason.

White Hive:  

Strong compared to Green Hive for sure.  This hive may have swarmed since I spotted all the capped and uncapped queen cells.  Usually they build swarm cells along the bottom of the comb so this does follow that pattern.  If they did swarm then about half of this colony is hopefully living in a cozy tree somewhere!

Lots of capped Drone brood and a few queen cells
So now fast forward from then end of July and into the end of September (that sounds really depressing actually).  I just did a full top to bottom inspection of Green Hive and I checked the honey super on White Hive to see if it was ready to come off.

Green Hive: 

The top box had about 4 totally empty frames.  It is too late in the year now for the bees to have enough incoming nectar to make wax.  So they will stay empty for the rest of this year.  There was one frame of solid honey and the rest of the frames had a mixture of honey, nectar and bee bread.

What the heck is bee bread you ask?  When bees bring the pollen back to the hive, another worker bee packs the pollen into a cell and adds some honey or nectar and enzymes to it.  This causes some fermentation to occur and breaks the pollen down into a more consumable form for the bees.

Lots of maroon colored bee bread on this frame
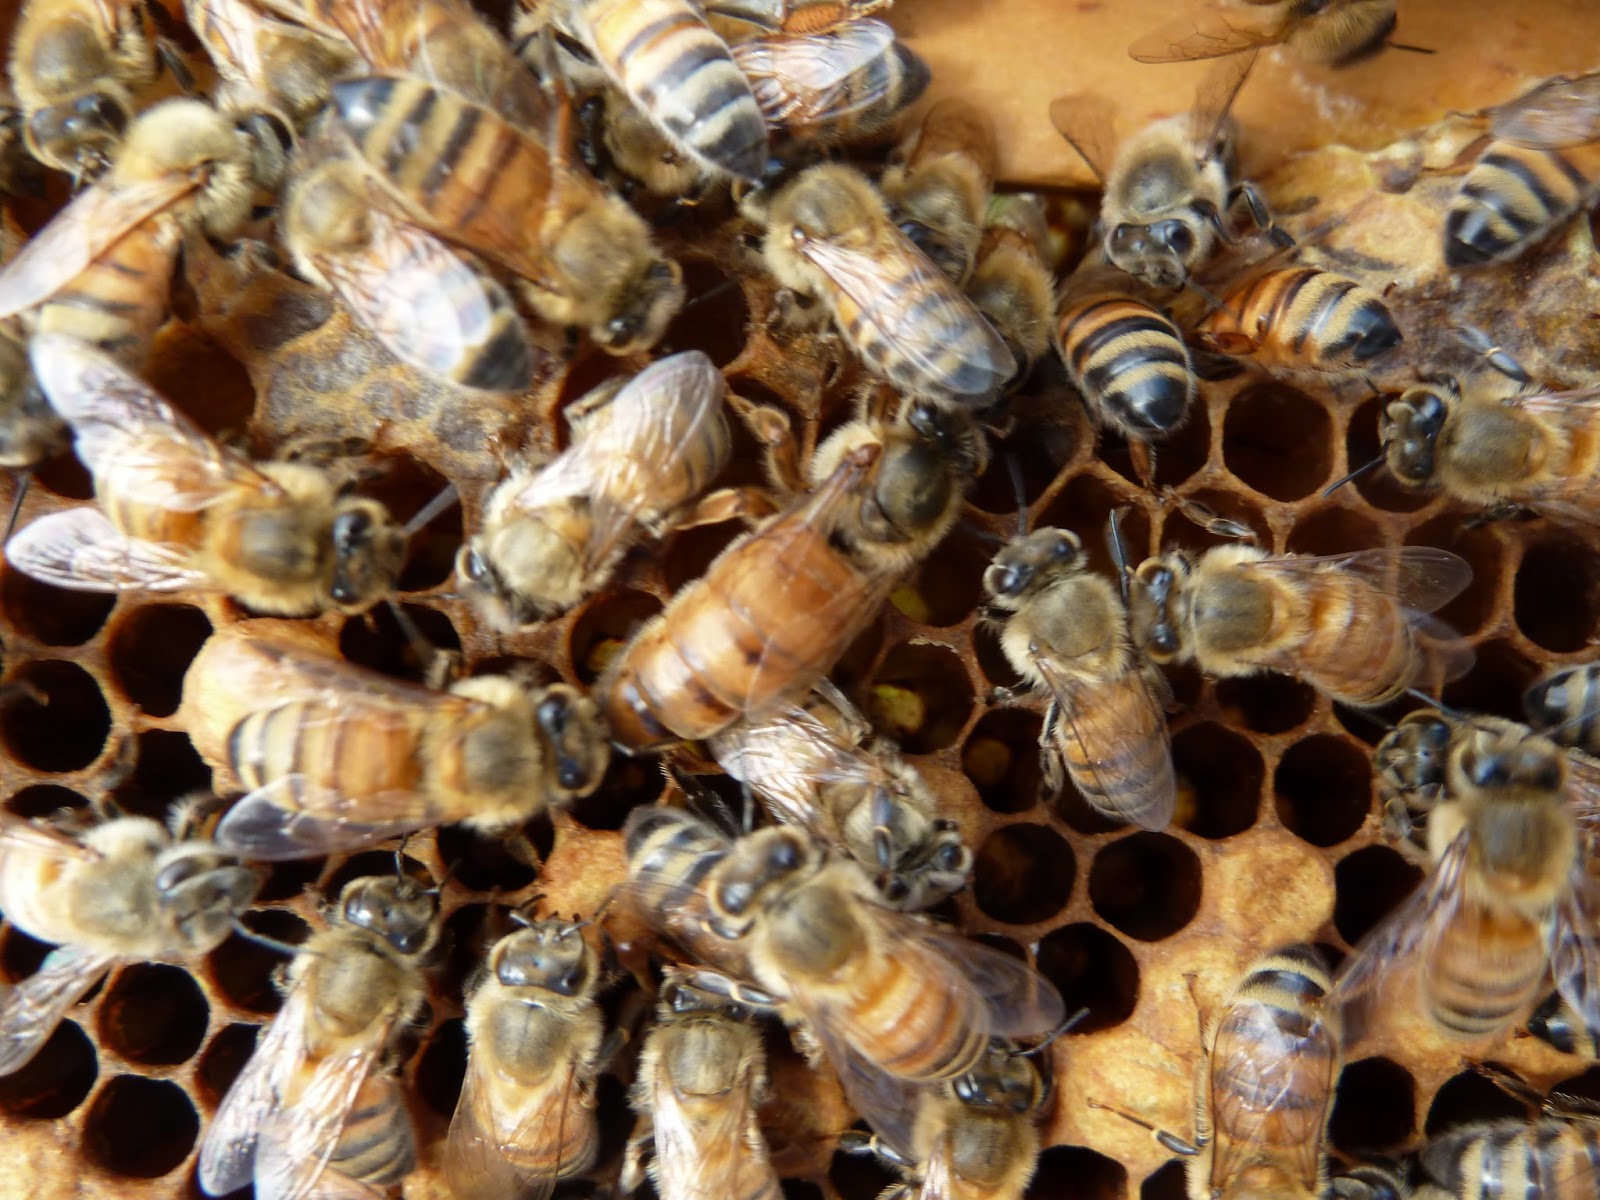
Compare the color of the bee bread to the color of the fresh yellow pollen on the back of this bees leg in this photo:


This bee bread is the primary source of food for developing brood.  Since this hive doesn't have any brood, they have a lot of bee bread stored.

The bottom box has only two empty frames and most of the remaining frames are packed full of bee bread or honey with very few empty cells.

Solid frame of honey

The bottom line for Green Hive is that they appear hopelessly queenless.  This late in the year there is really no possibility of buying a replacement queen.  I did check around online and every place I looked is sold out (and probably were sold out months ago).  Also, there is no hope of the bees having enough time to raise their own queen if I donated some eggs from White Hive.  It would take at least 16 days for a new queen to hatch.  By then it would be the middle of October and there would be no drones for her to mate with.  Matter of fact, during my inspection, I witnessed numerous drones being dragged out of the hive by their loving sisters.  I think the only option I have now is to combine this hive with White Hive (Newspaper Combine).  After I do that my remaining hive will go into Winter with FOUR deeps of food and bees.  No matter how bad the upcoming Winter is, that should be plenty to get them through it.

White Hive:

Even with the possibility that this hive swarmed earlier, it is still a strong hive.  They have managed to fill about half of a honey super.  Not great but better than nothing.  I plan to take this honey off when I combine Green Hive with this one.  I might be able to get 1 gallon of honey from this box.

What's Next:

I'm planning on doing the combine, removing the honey and doing a mite sampling tonight.  If I have enough time I'll extract the honey this weekend.  The next blog post will be up shortly!

As always, thanks for reading!

Wednesday, June 11, 2014

Second Inspection: 2014-06-10

I was very eager to complete this second inspection for a few reasons.  First, I was very eager to retrieve my fist set of Arduino Smart Hive data!  Second, the hives are currently at Installation +30 days (Bee Math) and there should be many more young bees in the hive.  Not only will these bees be nurses for the next generation, but they will also be wax comb builders (Honey Bee Worker Jobs).  So, they should be expanding the nest area and allowing more bees to forage for nectar and pollen.  The increasing number of bees also means they will be running out of space soon.  Normally in nature, the size of the cavity the bees live in does not increase and when they run out of room they swarm.  Part of being a beekeeper is controlling the bee's swarming nature by adding more space (boxes) and I needed to see if it was time to add another box or not.  If your hive does swarm you've lost probably half of your bees and your old queen.  Not a good thing if you actually want any honey.  Plus most of your neighbors probably wouldn't appreciate a swarm of bees landing in their yard!  Well, onto the inspections...

Green Hive:

I opened the lid and found that my ventilation board with my electronics in it was nicely stuck to the top of the lid.  There must have been some propolis left on the underside of the lid and it works really nicely as glue.  I spent a few minutes trying to remove the ventilation form and when I finally removed it, I notice a LARGE, furry black spider resting comfortably on the underside of the lid.  Thankfully I was armed with a steel hive tool and dispatched the menace quickly.  I really dislike spiders but I also know they do eat "bad" insects, so I try to leave them alone when I spot them in the garden.  But when they are around my bees I show now mercy!  I'm sure beekeepers in Arizona, Florida or Australia can get some really nasty surprises around their hives.  Yikes. 

Anyway, after all that drama, I pulled the SD memory card from the Arduino and downloaded the data.  My first disappointment was that it appeared that it only logged about 3 days worth of data.  It appears my 6 AA battery pack didn't last very long at all.  I'll be looking into an alternate power source for sure now.

Arduino Smart Hive data

With that said, it was cool to see that the general data collection does work!  From the data it looks like the external sensor might be a little flaky since the humidity spiked at 100% a number of times and the temperature measured at 103.82 F on June 2, 3:22 PM.  According to the weather report on that day, the highest it hit was 82 F.  Other than that oddity, the data looks consistent.  What I really like seeing are the readings from the brood area.  The temperature reading is a very flat, steady line, right around 95 F.  Despite what the outside temperature is, they do a fantastic job of maintaining the same temperature and humidity levels where the baby bees are being raised.

Pulling the first two frames from the hive, I saw they were still empty.  The third frame in was built much wider because of the empty space next to it.  With the top down view in the photo below, you can see how the wax sticks out past the top bar of frame 3.

Green Hive
Frame 3 was heavy with honey and frame 4 was the first to have brood on it.  Typically the brood nest is toward the middle of the hive so it was no surprise to see frame 5 had a lot of brood on it.  The other side of this frame had a large empty area where all the baby bees had already hatched out of their cells.

Hatched Brood
Frame 6 looked very similar to 5.  Frame 7 was about 50% covered with capped brood and had a large section of new wax drawn out.  Looking closely I could see there were eggs in almost every cell in the new section of wax.

Frame 7
Frame 8 and 9 actually had some large patches of brood on them with an empty queen cup as well.

Queen Cup
Thankfully there wasn't anything in the cup so it doesn't look like they are preparing to swarm or replace the queen.  The last frame hadn't really been touched by the bees since the last inspection.  So in total there are still 3 empty frames in Green Hive.  Looks like I'll be ready to add another box during my next inspection.  They are coming along nicely!

White Hive:

The first thing I noticed after removing the inner cover of White Hive was that I could see bees looking up from between almost every frame!  This hive in increasing in numbers more quickly than Green Hive for sure.

Looking into White Hive
The bees had stored quite a bit of nectar and pollen and the brood nest started a few frames in.  The queen in this hive knows how to lay some eggs!  Look at the photo below.  This frame is wall to wall brood with very few empty cells.  They will be bursting at the seems very soon.  I will need to add a second box for sure next week!

Lots of future bees
You can also see the patch of drone brood that was built along the bottom of this frame.  And speaking of drones, I was able to witness one being born.  Very cool!  You can watch the 30 second video here: http://youtu.be/X1rwGvIbuck

The last thing I did before concluding the inspection, was to change the entrance reducers on both hives from the small opening to the medium sized opening.  The population should be steadily increasing now on both hives so they should have no trouble defending a larger entrance.  This will also help alleviate any congestion as the foragers come and go all day long.

Looks like I have a lot to prepare for the next inspection.  New boxes to add and hopefully another way to power my Arduino.  So, until then thanks for reading!

Monday, June 2, 2014

First Inspection of the year : 2014-06-01

Twenty one days since I installed my two packages and I finally opened the hives up to take a look.  I should have done so much sooner but it sure seems like everything needs to be done all at the same time during the late spring.  It is always exciting to dive in and see what the girls have decided to do inside the hive despite the guidance the beekeeper has given them!  Bees don't read beekeeping books to figure out what they are suppose to do  =)

Green Hive:

The one nice thing about the inspections early in the year is that there aren't as many bees as there are during summer.  It makes it much easier to pull frames and move things around when there aren't bees covering everything.  You also don't need to use as much smoke since a few puffs can easily get most of the bees to move.  I was able to pull the first three frames quickly since the bees hadn't even touched them.  They are foundationless frames, so they are completely empty and the bees haven't thought about drawing out new comb on them yet.  I reached frame 4 and I could see the beginning of the honey and pollen storage. 

First inspection of Green Hive

Frame 5 had more pollen and honey and frame 6 was the first brood frame.  Interesting pattern on this frame with bits of pollen scattered among the brood cells.  About a third of the frame (on the right side of the photo) was all drone brood.

Brood frame

A little spotty so far but not something I'm too concerned about at this point.  It can be common in new queens.  I'm happy the queen is raising brood and she is fertile enough to have worker brood.  Next frame over was almost identical with drone on one side and worker brood on the other.  I spotted a queen cup but it was empty.  It is not uncommon to see queen cups.  The bees like to make them just in case they need them.  Frame 8 had some new, white comb drawn by the bees and they were starting to bridge it over into the next frame.  This is one of the struggles of letting the bees build their own comb.  They don't always build it in perfectly straight sections.  I cut some of the comb out and mashed some more together to try and make it straight.  I also swapped frame 9 with 8 in the hopes that they would make the small amount of comb there straight.  The last frame was empty. 

I did not spot the queen and I didn't specifically see any eggs but they seem to be going along pretty well.  As long as I see some new larva during my next inspection, I'll know the queen is still there.

So, besides doing my first inspection on Green Hive, I was also ready to deploy my Smart Hive Arduino system I have been working on.  It was a bit of a pain to run the one sensor through the inner cover without having someone to hold it but I was able to position it between frame 5 and 6.  Now I can only hope the bees don't chew through the wire insulation or decide to build bridge comb all around it and make a mess.  The second sensor goes out the side vent hole to measure the outside temp and humidity.  The third sensor rests near the Arduino in the vent board.

Arduino deployment

I'm looking forward to posting the first data points in my next blog entry!!

White Hive:

 The frames in the White Hive are fully drawn out plastic Honey Super Cell frames.  They fit much tighter in the box than the wooden frames in Green Hive do.  I have a "J-Hook" hive tool and it really helps to pull that first frame out.  A few bees danced across the frame I removed and I began to pull the second frame out.  For some reason, I did a mental double take and picked the first frame back off the ground where I had set it.  My eyes popped open when I realize there was the queen!!!  Running around on the frame with only a handful of other bees there!  Very unusual since the queen usually has a group of bees around her taking care of her needs at all time.  I quickly picked the frame up and hovered it back over the middle of the hive until I saw her walk off the frame and back down into the box.  That could have been bad if she had walked off into the grass or dirt somewhere!

The next two frames were empty like the first but on frame 4 I found the first scattering of brood.

Drone comb on plastic frames

On the bottom of this frame you can see that the bees decided to build some comb off of the bottom of the plastic frame.  Since the bees cannot enlarge the plastic cells, they have to build spots of comb with cells large enough for the queen to lay drones in. The next frame had a little brood on it and some nice colored pollen in the upper cells........plus the queen I almost squashed earlier!

Hi queenie!
Can you spot the queen the frame?  Starting from the middle bottom, about a third of the way up, just a bit to the right of center she sits in all her glory.  I pulled the next frame and was pleased to see it was solid brood!  A really nice pattern with very few cells still empty.  To my surprise, the next two frames were packed with brood too!  Wow!!  This queen is really a good egg layer.  I pulled frame 9 and it looked almost entirely empty until I held it up with the sun at my back.  When the light revealed the bottom of the cells, they were filled with tiny eggs.  This hive is going to be booming in a short period of time with this queen!

It is looking like a nice start to the 2014 beekeeping season.  The first new bees should start hatching any day now so the currently diminishing population of bees will make a nice turn the other direction building up to the hive's peak population in the summer.

Until the next inspection report, thanks for reading!


Monday, September 9, 2013

Busy Bees: 09-08-2013

I decided to take my camera and record a little video at the hive entrance.  The activity here is the definition of the phrase "busy as a bee".  Note the bright orange pollen coming in on quite a few of the bee's legs.  I would think that with all the Goldenrod in bloom right now, that it would be the source of the pollen.  But the pollen isn't yellow in color at all.  Hmmmm, what else is in bloom?

Enjoy the video:
White Hive Activity

Wednesday, August 7, 2013

Anti Robin Hood: 08-06-2013

You've all heard of Robin Hood, who robs from the rich and gives to the poor, right?  Well, in the bee world, their hero is the Anti Robin Hood!  They rob from the poor and give to the rich and powerful!  This is the sight I beheld as I approached the split hive to begin my inspection.

Split Hive:

As I came upon the split hive I immediately noticed a cloud of bees swirling around the outside of the hive.  Instantly odd since the population was so low that even basic in and out traffic was not very prolific.  The other thing that was odd was the majority of the cloud of bees were attempting to enter the hive under the telescoping cover instead of the actual entrance.  These were all signs that the hive was in the process of being robbed.  When a strong hive finds a weak hive that cannot defend the supply of honey they have, then they overpower the guard bees and steal the honey.  Not a good situation since bees are killed during the fighting and the weak hive can either be greatly damaged or destroyed.

Here is a photo of what a honey frame looks like when it has been robbed.  The cells have been torn open during the frantic raiding and have a very jagged appearance.
Robbed Frame
I had placed the entrance reducer on the smallest setting when I first set up the split hive and I thought that would be enough.  Not only did I made a mistake by putting the split into a full sized deep box (instead of a 5 frame nucleus hive), but adding a second box of honey wasn't good either.  I set them up to fail by giving them way too much space to defend with way too few bees.  Learning from mistakes are the best lessons, right?

Upon opening the hive it was obvious to me that the only bees present were the ones robbing out the honey.  There was very little honey left in any of the frames and I quickly went through both boxes looking for any sign of the virgin queen that was spotted two inspections ago or any sign of eggs or larvae.  She was no where to be found and the small cluster of about 50 dead bees on the bottom board told me that if I did find her, she would probably be amongst the dead.  I combed through the dead bees and did not find her.  I did find a dead yellow jacket and a bee with its stinger and venom sac exposed.  No doubt, she died in battle.

With nothing else left to do with the split hive (or ex-split hive), I decided to add the now mostly empty brood box onto White Hive.

White Hive:

My goal this time with White Hive is to verify that what I thought might have been eggs really were freshly laid eggs.  As you may recall, I spotted the queen during my last inspection.  If she was from the queen cell I installed, I wouldn't have known for sure that she had flown out and successfully mated.  If I find eggs that tells me that she did.

The first few frames were honey with some pollen as I expected, but as I pulled frame 4 I hit the jackpot.

Larvae!
Since I know the "bee math" http://www.bushfarms.com/beesmath.htm, I know that when an egg is laid it takes 3 days to hatch, spends 6 more days as an open larvae before it is capped (total of 9 days) and then 12 more days before a new bee emerges (total of 21 days).  This photo shows big fat open (uncapped) larvae that will be capped any day now.  So they are probably somewhere between 6 to 8 days old and that places them as eggs during my last inspection on 7-30!  I love it when I can actually figure things out!

On the other side of frame 4 I was able to spot a baby bee emerging from her cell (dead center), some very tiny larvae (two cells down to the left) and what looks like a tiny grain of rice......an egg (one cell down to the left and another one two cells down to the right)!

Eggs and Larvae
Now that I know the Queen is laying for sure, I can stop worrying so much about White Hive.  She should really be cranking out those eggs, possibly 2-3 THOUSAND every day!  More than her own body weight!

Continuing on, I found what I think was one of the old Queen Cups that the bees decided they do not need anymore.  They look like they are in the process of tearing it down.


The remaining frames had more honey, pollen, open larvae, capped larvae and a small patch of drone brood that is just about to hatch on frame 7.  White Hive looks really good and with a new Queen going full bore, they should be very strong going into Winter. 

Speaking of changing seasons, I saw some Goldenrod in bloom.  That sure heralds the end of summer doesn't it?  Lame!

Until next time, thanks for reading!

Thursday, August 1, 2013

Post Action Assessment: 07-30-2013

Task number one during this inspection was to check the split hive and hopefully find evidence of a laying queen or at least find the (hopefully) non-virgin queen.  Task number two was to check White Hive to see if the queen cells spotted last time were completed or destroyed and if I actually have a laying or virgin queen in that hive as well.

Split Hive:

The population in this hive is still very low.  I had put the extra box of honey on the hive to make sure they had enough but I think I have given them too much space for too few bees.  There are lots of ants roaming around unchallenged eating honey.  They don't bother the bees but in a strong hive they wouldn't be in there at all.  The low population does make it much easier to inspect the hive and spot a queen though!  I quickly went through the box of honey and found a few bees but no queen (nor did I expect to find her there).  Going through the brood box I found some honey and nectar and a tiny bit of pollen but I found no evidence of a queen (virgin or otherwise) and no evidence of eggs, or larvae.  Based on the "bee math" I provided a link to in the last blog post, it could still be a bit early for the hatched queen to have flown out, mated and returned to lay eggs.  I'm really hoping that we did not scare her off during our last inspection and she did not come back!  At this point, I will give it one more week before I take some other action.  It is pretty late in the season, so the only practical option may be to just recombine this hive back into White Hive.

White Hive:

One of my goals this year was to keep better records.  But I am finding that I just don't have enough hands to record things on paper, plus take pictures, all while trying to manipulate frames and smoke, etc.  So this time I tried to just take a photo of each side of every frame.  It was still very clumsy but I made it happen.  Photos are great because you can often spot things that you did not see while inspecting the frames.

Inspecting the top box, it was mostly filled with honey along with a few frames of foundation that the bees have barely touched.  Having a filled frame next to an empty one just makes the bees want to draw out the filled frame even more, so I have some giant frames of honey in there!  I'll pull those for sure this fall.

The bottom box also had a lot of honey and the pollen stores seemed much larger this time.  Possibly this is because there are no larvae to feed the pollen to! 
Honey and Pollen on frame 2

I kept moving through the frames hoping to find the hatched queen or the queen cups I had spotted last time.  I hit frame number four and there was the queen!
Queen Spotting can be challenging!
Can you see her?  It always gives me a jolt when I finally spot her. 

She is in the middle of the frame a few inches down from the top.  Here she is a bit closer:

I spotted the queen, but is she the old queen or the new queen?  And what about those queen cups I saw last time?  To answer these questions I need to see if this queen is laying eggs and if the bees destroyed the queen cups.  Onward!

I continued to find patches of brood that have not hatched yet as well and large open areas with nothing in them.  Some pollen and honey on almost every frame though.  On frame 7 I hit a small patch of drone brood and this is the frame I spotted the queen cups on.

This picture wasn't as good as the one from last time, but you can see they are still open and have not been capped and turned into full queen cells.  It looks to me like the bees removed the two larvae that were in these cups.  I assume they realized they had a queen and no longer needed to raise a new one.  This is a good sign!  My main goals accomplished, I finished inspecting the remaining frames and closed up the hive.  I looked very closely at each frame and I could not find any eggs or larvae for sure.  On the photos for frame 6, if I zoom in very closely, I can see what MIGHT be a few eggs but I'm not sure.  I guess I will know which frame to look on during the next inspection to see if those phantoms have turned into larvae!
Possible eggs in the empty area to the right of the capped brood?
All in all I was pretty happy to "bee" back on track with at least one hive!  We shall see what the next inspection reveals!

On a side note, I planted some Borage this year in my garden because I had read that bees really like it.  I'd never even heard of the plant before, but as you can see in the photo, they like it!

Until next time, thanks for reading!

Monday, July 22, 2013

Mistakes Were Made: 07-21-2013

Sunday was a great day to work the bees for a number of reasons.  First off, my son-in-law Chris and my daughter are visiting from California and he wanted to dive into the hives with me!  Second, the weather was just perfect.  Temps in the 70s, clear and sunny.  If any of you other beekeepers out there are anything like me (and I'm sure you are), then you love teaching others about bees.  This was a great opportunity, even though I didn't expect to be able to show Chris any stages of brood development (see the last two posts).  As you are about to read, this was not the case!!

Since the split and insertion of the two queen cells during my last inspection, my plan was to get in and first check to see if they have hatched.  Hopefully I could spot a virgin queen running around in the process.  I already know that the split hive has significantly less bees in it, as there is very little activity at the hive entrance.  Because of this, I also planned on either moving a frame of bees into the split hive or just shaking them off the frames and into the split hive.  With plan in place, Chris and I suited up, lit the smoker and headed out to the split hive.

Split Hive:

This was going to be a good training and teaching hive because there were not going to be a lot of bees and it would be much easier to point things out.  Plus, not having a bunch of bees flying around your head is a bit less intimidating for someone's first time.  We opened the hive and I was able to go through the honey super pretty quickly.  There were only a few bees there and solid honey frames all look the same after seeing  a few.  I removed that box and started digging through the brood box, eager to get to the frame with the queen cell on it!  After prying back the fourth frame, I could see the bottom of the queen cell was opened so the queen was out somewhere!  We removed the queen cell and started in on the next frame and BAM there was the hatched virgin queen!  I pointed her out to Chris and in the 10 seconds it took to get the camera out to grab of picture of her........she as gone.  I flipped the frame over and back again a few times and she was no longer there.  She must have gotten spooked and flew off.  Camera shy I guess.  We went through the rest of the frames and we found a bunch more honey, but I was concerned that I didn't find any stored pollen.  That might be OK for the moment, but if the virgin queen does fly out and mate, comes back and starts laying eggs, there had better be some pollen in there to feed the baby bees!  We put the honey super back on the hive and put the inner cover back on.  I left the telescoping cover off at this point in case the queen came back she could get back in the hive a bit easier.  On to White Hive.

White Hive:


We opened up this hive and there were a lot more bees here as expected.  After a bit more smoke into the hive (Chris was my head smoker and picture taker) we dove in and quickly went through the honey super and set it to the side.  After a bit of coaxing I was able to get the first frame out and begin the inspection.  With the first few frames inspected, I was really pleased to see some pollen and "bee bread" packed into the cells.
After inspecting the next few frames, we came across a frame that had a bunch of drones and a queen cup on it.

I love spotting drones, especially when I am trying to teach someone about bees.  They are easy to distinguish because their large size and big eyes stand out so much.  Can you spot the drones in this picture?  There is a hole close to the middle of the frame with two drones above it and a queen cup to the right. 

I checked inside the queen cup just to make sure there was nothing in it, and there was nothing in there.  I continued on and began checking the next frame in line.  I slowed down a bit since the closer I was to the frame with the queen cell, the higher the probability that I would be able to spot the emerged virgin queen (if she was there at all).  I pulled the frame with the queen cell and sure enough, she had hatched.  The bottom of the cell was open and hopefully she was running around inside the hive.  I proceeded to move the frame out of the way and pulled the next frame out and I find..........BROOD?!?!?!  What??

At first I thought it must be all drone brood and perhaps I had laying workers but after seeing this on the next two frames and spotting a few actual drone cells, this must be worker brood.  How is this possible?  Well, the answer is that I screwed up.  I must have missed the eggs and larvae in these frames during my last few inspections and/or I simply didn't pull the frames that had the brood on them, so I never spotted it.  So now what?  I would think that if there is a laying queen in this hive, that she would have instantly killed the virgin queen inside the queen cell.  This wasn't the case because the virgin hatched out and was not dead inside the cell.  Perhaps the laying queen didn't spot the queen cell until after the virgin hatched and they eventually found each other and fought to the death?  Which one survived?  By this time I am scrutinizing every inch of each frame trying to find either queen.  I pull the next frame and I spot this....

If you look closely, not only are there two queen cups here, but this time they are full of royal jelly and I can spot a larvae in one of them (no doubt there is a larvae in the other one as well).  What the heck is going on?  If there is an existing laying queen, why were the bees trying to create a new queen?  If there are larvae in these queen cups, then that means they are somewhere between 4 and 8 days old (http://www.bushfarms.com/beesmath.htm) right around the time I placed the queen cell in this hive.  Coincidence?  I think I need to give Sherlock Holmes a call because I can't quite sequence the timing and all the possibilities together to form a rock solid answer to what is going on.  Usually, queen cells built in the center of the frame like this are considered Supercedure cells.  This means the bees have decided that the old queen is beginning to fail and they have determined to replace her.  Maybe that is what was going on and my timing was just really bad?  Who knows?

We finished inspecting the remaining frames and failed to spot either the old queen or the virgin queen.  At this point there wasn't much left to do but close up the hive.  I did take two of the frames out and after closely inspecting them (and not finding any queens), I took them over to the split hive and shook the bees into it.  Hopefully that will give them a few more bees to supplement their numbers until the virgin queen mates and starts laying eggs to make new bees!

Hopefully, I will open the hive in another week and what I find will give more answers to the mystery.  All in all it was a very educational inspection, not only for "newbee" Chris but for me as well!! 

Thanks again for reading

Chris and Mark about to embark on an adventure!


Thursday, June 6, 2013

Hive Inspection: 06-04-2013

It is always fun for me to be able to share my beekeeping experiences with people.  During this inspection I had a friend of mine along to help.  I also enjoy teaching "newbees" all about the different miracles in the hive.  This inspection allowed me a lot of opportunities to do so!

We saw pollen, nectar, capped honey, open brood, capped brood, drone brood, hatching baby bees, queen cups and the queen!  I'm not sure what else there would be in a hive that I would even want to show someone.  It is really hard to see eggs and I don't care to show someone Varroa mites!

I've come to realize that people judge the strength of their hive by how many frames the bees are actually covering.  So I made sure to take note of this.  As of last inspection, I knew the queen was in the top honey super after the long, cold winter and there was plenty of brood there.  I was hoping all the brood had hatched out (new egg to hatching = 21 days) and the queen had moved down into the bottom two brood boxes.  Well, I had half of it correct.  She has moved down and been laying in the bottom boxes but she must have also laid a few more eggs in the honey super as well.  Here is a really weird brood pattern because of this:

Not only is there uncapped nectar and pollen scattered around, but there are little pockets of brood here and there and a few drone cells along the bottom edge toward the right.  I was hoping all the brood would be out of there so I can use these frames for honey later in the year.  I could use this frame as a part of the split I plan to do in the next week or so.

One of the greatest things in the hive to witness is a new bee being "born" or emerging from its cell for the first time.  Watching them poke out and move their antennae around is amazing!  Look right in the center patch of capped brood and you can see two little heads poking through and looking around!

 The bees were only covering about 5 / 10 frames in the top box and most of the empty frames hadn't really been built out much.  So, onto the next box!

It took me a while to figure out how to get the first frame out without squashing a bunch of bees, but with a little smoke and hive tool manipulation, I was able to get it started.  On this frame I was very pleased to see a SOLID patch of open brood.  You can see right along the center of the photo a whole bunch of pearly white glistening larvae!  Nice!

I would suspect the queen is probably actively laying eggs somewhere in this box.  I was really hoping to spot her too so that I could show my friend the queen in all her glory.  On the very next frame I pulled out, there she was!

Can you spot her?  No?

How about now?
I know, they all look like "bees", right?  Well, if you still can't spot her, she is just slightly above dead center in the photo.  Her abdomen is darker brown and less striped looking.  Also, her abdomen sticks out way past her wings.  Hopefully you spotted her!

At this point in the inspection I decided not to go through every frame in the box.  And I decided not to go into the very bottom box either.  I had seen and shown all the really important things and the inspections always take longer than you'd like to think.  The bees were probably covering 8 / 10 hives so that box was pretty strong.  I closed the hive up and called it a day. 

I was happy to see that the queen was strongly laying in the lower box and that there were a few drone cells dotting the bottom of some frames.  I did not see any drones walking around but I'm sure they will be out within a few days for sure.  This is important because I intend to split the hive and have them raise their own queen.  A new virgin queen will need drones and if there aren't any around then she isn't going to be properly mated.  Not that she would mate with her own drones, but if you have drones in your own hive, then there are probably drones out in the wild too!

Next post I hope to be showing you my new split.  Until then, thanks for reading!

Friday, May 3, 2013

You Take the Good, You Take the Bad: 2013-04-30

We have had really nice weather here in Michigan for about the last week.  It was a long time in coming but it is finally here.  So, of course, I was eager to get into the hive(s) and see what the girls are up to.  I had a few tasks left over from winter that I needed to attend to as well.  First off, removing and cleaning up my dead hive, Green Hive.  I began to disassemble Green Hive and quickly noted that the bees from White Hive were greedily robbing out all the remaining honey left over in Green Hive!  It didn't take them long to find an undefended honey source!  I pried each box apart and hauled them away from the bee yard.  I then applied a liberal amount of smoke to each box to try and drive the remaining bees out.  Finally, the last box was removed and only the bottom board remained with the deceased remnants of Green Hive gathered in a sad pile.


I scanned through the dead bees to see if I could find the queen and I did not see her.  I plan on going through all the frames from each box and decide if I will melt down the wax or keep them for later use.  Hopefully I will find what was left of the winter cluster somewhere in there.

The second task I needed to complete was the remove the extra sugar I had placed in White Hive as emergency winter feed.  I'm not sure they really ate much of it.  Anyway, I removed it and put some empty frames back in.  Now onto the inspection!

Typically the bees will start in the bottom boxes during the beginning of winter and gradually move up through the hive over the course of the winter, eating honey as they go.  So, come the spring, you expect to find them at the top of your hive and that is where they were.  I pulled the first frame and BAM, there was the queen!  I'd like to think my queen spotting abilities have improved but this time was way too easy.  She just visually jumped right out to me.  I could see that she was doing her job as the frame was fairly well covered in sealed brood, eggs and larvae.  The workers have also packed quite a lot of pollen along the top of this frame as well.

Brood Frame
I zoomed in a bit with the camera once I saw the larvae because I usually cannot spot eggs unless I'm looking at a photo.  The eggs are about the size of a grain of rice, so I don't think my vision is that bad yet.  Can you see the larvae of various ages tucked in their cells?  They look like little 'C' shaped grubs.

Larvae
Here is a slightly closer look with a lot of pollen packed in near the off to the lower right in the photo.  Pollen is very important in raising new bees so they keep it stored close!
Larvae with pollen
As I continued my inspection, I became concerned when I saw brown spots along the top and sides of some of the frames.  These brown spots are also referred to as bee poo  =)  Normally bees are very sanitary and never "go" inside the hive.  If they go inside the hive it can be the sign of a disease called "Nosema".  It is a spore that infects the gut of a bee and causes intestinal problems.  I've also read that it could be simply "bee dysentery" and could easily clear up on its own.  I will have to closely monitor this in the future.  I may decide to swap out some of these frames once all the brood has hatched out of them.

Nosema or bee dysentery?
 During an inspection you check for a few things:  Queen?  Check!  Eggs?  Check!  Open and Closed Brood?  Check!  Pollen?  Check!  Honey?  Check!  Things are looking pretty good.  The last thing I'm looking for are drones.  Spring time is also swarm time and usually the first drones are emerging at the same time.  I'm also planning on splitting this hive and you need drones in the air to mate with a new queen.  I did not spot any drones nor did I see any drone brood, so it looks like they might be a few weeks away yet.  I saw the first dandelion in the yard so I think a nectar flow is coming soon!


All in all I guess you take the good (they survived the winter) and you take the bad (maybe have Nosema), you take 'em both and there you have the facts of life.  Sorry.  Really bad but I couldn't resist!

Until next time, thanks for reading.