Showing posts with label Burr Comb. Show all posts

Thursday, August 13, 2015

2015-08-10: Back In The Game

After my rather dramatic post last time, I just couldn't wait anymore and had to get out to see the bees.  I armed myself with some Benadryl, my EpiPen and my friend Keith and headed out to do some inspections!  I actually donned the FULL bee suit as well, which I haven't worn since I did the shed cut-out.  Dang is that thing hot!  My goals were to check and see if the cut-out hive had successfully re-queened themselves and to check the nuc hives to see how they were doing with the new queens in them.

Cut-Out Hive / Yellow Hive:

I had Keith do all the work and I just barked orders the entire time.  Thankfully Keith is a really good sport and was happy to help me out.  He removed the cover, took off the extra boxes that were covering the honey feeder and got into the first box.  The bees were pretty sparse here and there were only a few frames with any wax drawn at all.  And even those frames only had a few spots on them with any wax.  That box came off and we were into the next box.  Slightly more wax built out in this box but about half the frames were still untouched.  Finally after getting to the last three frames we were able to see some good drawn frames.

Plastic Frames being filled
About 3/4 of the frame was drawn and there was some capped honey and some nice pollen in the cells.  The next frame was very similar and I was able to spot some larva scattered here and there.  This was the first good sign that a queen was present.  We grabbed the last frame and look who we spotted!

Cut Out has a new Queen!
She's a beauty!  Look at how dark she is.  She definitely has some non-Italian genetics in her.  I'm hoping she has "Winter Survivor" written all over her!  I followed her around with the camera for a bit and if you zoom in on this photo you can see she has eggs in every cell.  Good job!

New Queen and Eggs
At this point I really didn't need to go into the last box since I know they were able to re-queen themselves.  I had Keith take a few frames from the top box that had some wax on them and swap them with some of the frames that had no wax on them.  Then we removed the top box entirely.  They have a lot of wax to draw still and they don't really need that extra space to police.  I also decided that since there weren't really a lot of bees in the hive that I would put the entrance reducer on.  We are probably due for a nectar dearth and I don't want the strong neighboring hives to bust in and rob this hive out.  I'll probably make up some syrup to feed them and this should get them to draw out some more wax.  I need them to fill out three medium boxes before Winter sets in.

Speaking of Winter, I see the Goldenrod starting to bloom in my area.  That always signals the approach of Fall.  Many of my late blooming flowers are also in full bloom.

Coneflowers in bloom
Green Nuc:

Since my Nuc hives only have 5 frames, it makes them really quick and easy to check.  Most of the honey frames that I put in are still full.  They have eaten a little bit and replaced it with pollen which is a good thing.  Two frames in and we hit the first solid brood frame.  The new queen looks like she is settling in nicely!

Solid brood pattern
The very next frame over I was able to spot her majesty.  The green dot on her back makes it a little too easy to spot her.

Queenie
This hive is doing pretty well with two frames of brood front and back and two frames of honey and pollen.  The one empty frame I had given them sadly remained empty.  They had a few blobs of comb ridges created but I didn't care too much for them.  I had Keith scrape some it off the frame.  I'm hoping when all these sealed brood start hatching out that there will be a lot of new bees that will be primed to start drawing wax.  I need to get busy building some boxes so I can move these nucs into full sized hives soon.

Yellow Nuc:

Very similar to the Green Nuc.  Two honey frames that the bees had eaten a little from and replaced with either pollen or more nectar.  Two pretty solid frames of capped brood.

Capped brood on Honey Super Cell plastic frames
This hive seemed to be much more interested in drawing some comb on the new plastic frames though.

New comb and brood
Since this was a medium sized frame that I placed into a deep sized box, the bees have drawn comb off the bottom of the frame to fill in the space.  Bees are sure efficient!

On the opposite side of this frame they decided to draw a few of the same ridges I described in the last nuc.  At least they've drawn plenty of normal looking comb too.

Comb ridges
I'm wondering if they were just stealing wax from one part of the comb to make this instead of drawing new wax? 

We spotted the queen on the next frame and that was the last thing I needed to see.  This was a very successful inspection.

Next Steps:

I plan on making some 1:1 sugar syrup to feed to the hives trying to draw new wax.  I need to get the full sized boxes ready to move the nucs into.  I also need to give Green Hive a check to see how much of the two honey supers they have filled and also to see if the new queen is doing alright in there as well.  I'd also like to do some Varroa monitoring with a powdered sugar shake.  That sounds like a lot to do and we are already half way through August!

As always, thanks for reading!

Thursday, April 30, 2015

New Beeginnings: 2015-04-30

B-Day has finally arrived!! 

Over the last week I had been cleaning out the hive that had died over the winter so that it would be ready for the new bees.  The lucky new arrivals would be taking advantage of the hard work of the bees from the previous year.  I'm sure the new bees would be happy to see the frames of honey, pollen and bee bread waiting for them instead of a bunch of empty frames.

My friend Keith was getting a package of bees this year so we made the quick run to pick up the new packages of bees.  The packages looked really nice and had very few dead bees on the bottom.  The package seller even slammed the packages on the ground to knock the bees down so we could make sure the queen was alive in her cage.  I went over to Keith's house and helped him install his package into his Top Bar hive.  It went very quickly and I was soon home and ready to install my two packages.

White Hive:

This hive has the Honey Supercell frames in it.  These are the fully formed, small-cell, plastic frames.  So after removing some frames to make room, I popped open the package, pulled the queen cage, put it between the frames, slammed the package on the ground and dumped the bees in.  I've stopped worrying about spraying them with sugar water or putting the lid back on the package after I've pulled the can of sugar syrup out or which end of the queen cage should be up or down.  A lot of wasted effort I think.

Green Hive:

This hive has mostly foundationless frames.  A majority of them have drawn comb with lots of honey.  The problem with these frames is that the honey was put into large bulges of comb that extended well past the width of the frame.  So after I removed the frames and dumped the bees in, I used my uncapping knife to saw the comb even with the frame.  Of course this made honey ooze out all over the place but I figured the bees would be eager to clean it up.

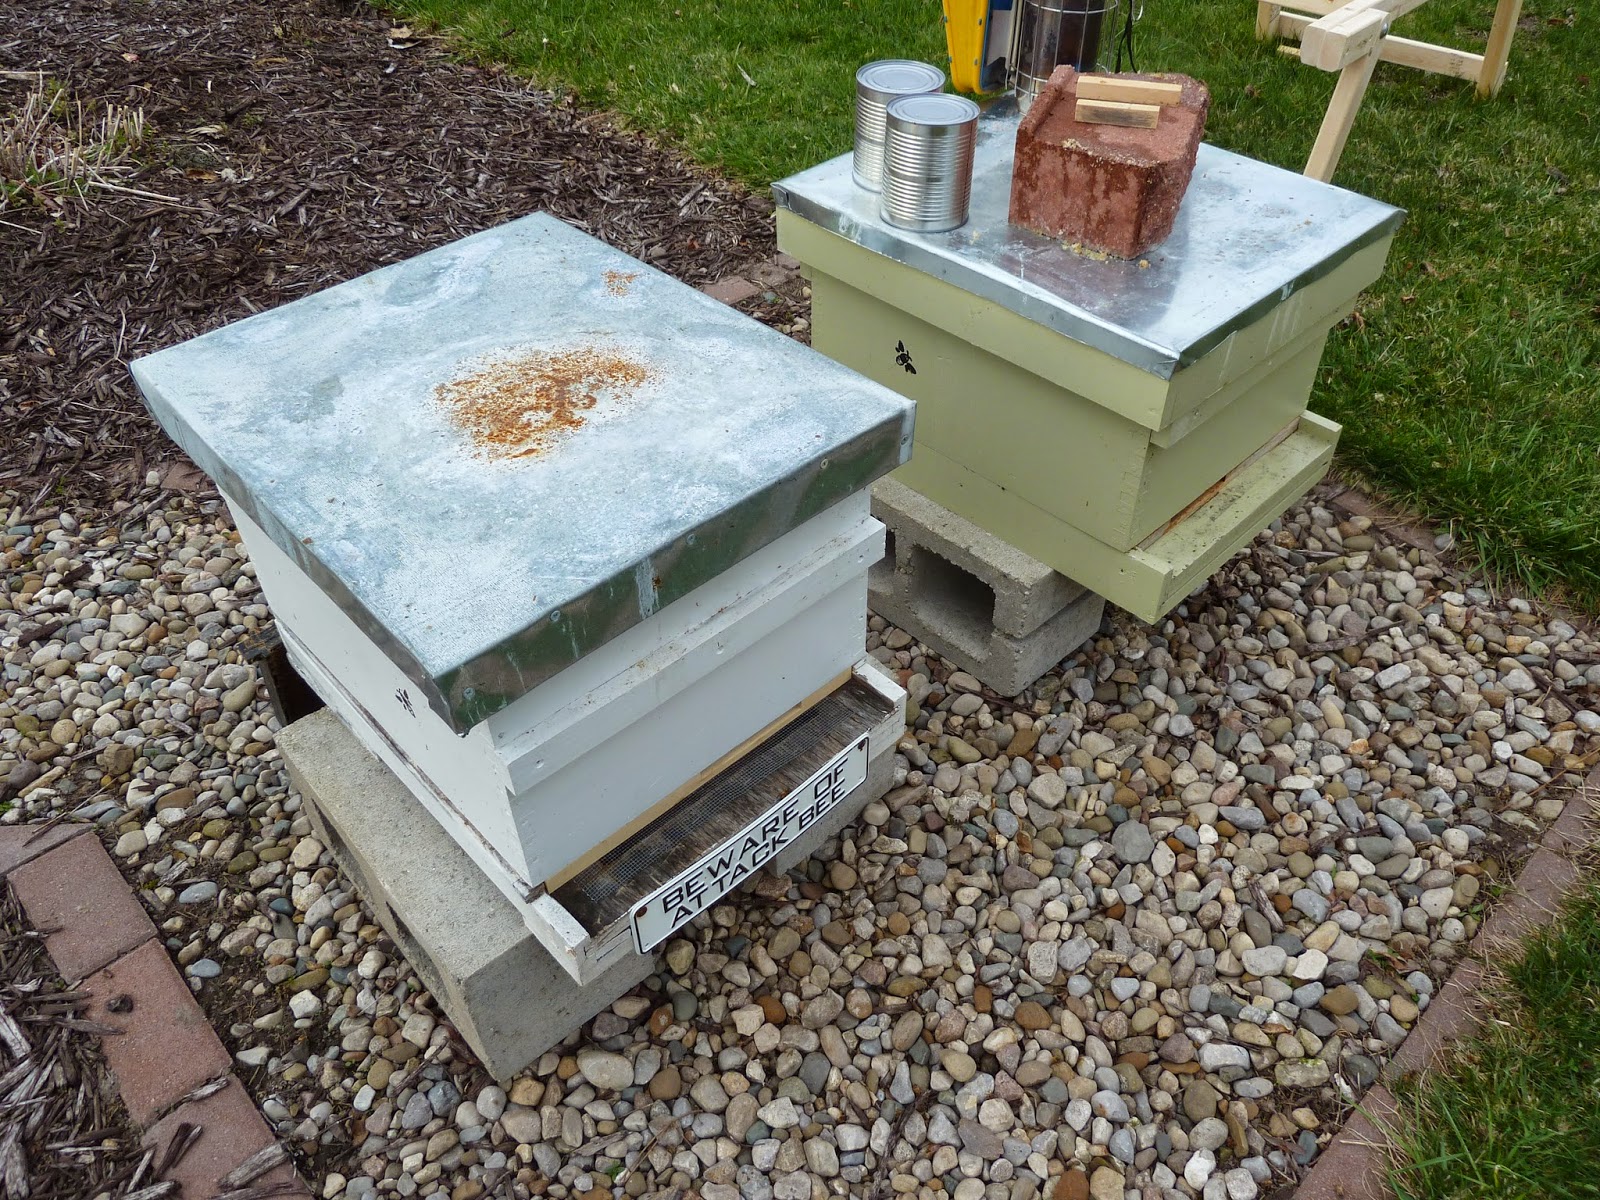
Beware of Attack Bee

Queen Release:

After three days I went out to make sure the queens had been released from their cages.  When I pulled the cages the sugar plugs were almost completely eaten away!  After I removed the queen cages I also had to remove all the comb that the bees had built in the extra space that the queen cage was occupying.


A few swipes with the hive tool and the excess comb was removed.  Before adding the frames back in, I took a look for the queen and spotted her quickly.

Can you see the queen in the middle of this picture?
Everything looked great and I closed up White Hive.

Green Hive went very smoothly as well.  Move the frames apart, pull the queen cage, check some frames for the queen (no luck spotting her this time) and push the frames back together.  Done.

Plastic tab attached to the queen cage

 Everything is now good to go for the 2015 bee season!

Next inspection in about a week so that I can make sure the queens are laying eggs.  Until then, thanks for reading!

Monday, June 2, 2014

First Inspection of the year : 2014-06-01

Twenty one days since I installed my two packages and I finally opened the hives up to take a look.  I should have done so much sooner but it sure seems like everything needs to be done all at the same time during the late spring.  It is always exciting to dive in and see what the girls have decided to do inside the hive despite the guidance the beekeeper has given them!  Bees don't read beekeeping books to figure out what they are suppose to do  =)

Green Hive:

The one nice thing about the inspections early in the year is that there aren't as many bees as there are during summer.  It makes it much easier to pull frames and move things around when there aren't bees covering everything.  You also don't need to use as much smoke since a few puffs can easily get most of the bees to move.  I was able to pull the first three frames quickly since the bees hadn't even touched them.  They are foundationless frames, so they are completely empty and the bees haven't thought about drawing out new comb on them yet.  I reached frame 4 and I could see the beginning of the honey and pollen storage. 

First inspection of Green Hive

Frame 5 had more pollen and honey and frame 6 was the first brood frame.  Interesting pattern on this frame with bits of pollen scattered among the brood cells.  About a third of the frame (on the right side of the photo) was all drone brood.

Brood frame

A little spotty so far but not something I'm too concerned about at this point.  It can be common in new queens.  I'm happy the queen is raising brood and she is fertile enough to have worker brood.  Next frame over was almost identical with drone on one side and worker brood on the other.  I spotted a queen cup but it was empty.  It is not uncommon to see queen cups.  The bees like to make them just in case they need them.  Frame 8 had some new, white comb drawn by the bees and they were starting to bridge it over into the next frame.  This is one of the struggles of letting the bees build their own comb.  They don't always build it in perfectly straight sections.  I cut some of the comb out and mashed some more together to try and make it straight.  I also swapped frame 9 with 8 in the hopes that they would make the small amount of comb there straight.  The last frame was empty. 

I did not spot the queen and I didn't specifically see any eggs but they seem to be going along pretty well.  As long as I see some new larva during my next inspection, I'll know the queen is still there.

So, besides doing my first inspection on Green Hive, I was also ready to deploy my Smart Hive Arduino system I have been working on.  It was a bit of a pain to run the one sensor through the inner cover without having someone to hold it but I was able to position it between frame 5 and 6.  Now I can only hope the bees don't chew through the wire insulation or decide to build bridge comb all around it and make a mess.  The second sensor goes out the side vent hole to measure the outside temp and humidity.  The third sensor rests near the Arduino in the vent board.

Arduino deployment

I'm looking forward to posting the first data points in my next blog entry!!

White Hive:

 The frames in the White Hive are fully drawn out plastic Honey Super Cell frames.  They fit much tighter in the box than the wooden frames in Green Hive do.  I have a "J-Hook" hive tool and it really helps to pull that first frame out.  A few bees danced across the frame I removed and I began to pull the second frame out.  For some reason, I did a mental double take and picked the first frame back off the ground where I had set it.  My eyes popped open when I realize there was the queen!!!  Running around on the frame with only a handful of other bees there!  Very unusual since the queen usually has a group of bees around her taking care of her needs at all time.  I quickly picked the frame up and hovered it back over the middle of the hive until I saw her walk off the frame and back down into the box.  That could have been bad if she had walked off into the grass or dirt somewhere!

The next two frames were empty like the first but on frame 4 I found the first scattering of brood.

Drone comb on plastic frames

On the bottom of this frame you can see that the bees decided to build some comb off of the bottom of the plastic frame.  Since the bees cannot enlarge the plastic cells, they have to build spots of comb with cells large enough for the queen to lay drones in. The next frame had a little brood on it and some nice colored pollen in the upper cells........plus the queen I almost squashed earlier!

Hi queenie!
Can you spot the queen the frame?  Starting from the middle bottom, about a third of the way up, just a bit to the right of center she sits in all her glory.  I pulled the next frame and was pleased to see it was solid brood!  A really nice pattern with very few cells still empty.  To my surprise, the next two frames were packed with brood too!  Wow!!  This queen is really a good egg layer.  I pulled frame 9 and it looked almost entirely empty until I held it up with the sun at my back.  When the light revealed the bottom of the cells, they were filled with tiny eggs.  This hive is going to be booming in a short period of time with this queen!

It is looking like a nice start to the 2014 beekeeping season.  The first new bees should start hatching any day now so the currently diminishing population of bees will make a nice turn the other direction building up to the hive's peak population in the summer.

Until the next inspection report, thanks for reading!


Wednesday, May 9, 2012

First Hive Inspection: 05-08-2012

Weather Report:
High 60's, mostly cloudy and breezy

Finally the weather has cooperated and we were able to do our first inspection.  I swear every time I saw a decent weather forecast and planned on the inspection, the weather would turn to crap hours before!  Grrrrr.

So, why do an inspection anyway?  Well, we are looking for the general health and well being of the colony.  We want to see that the bees are gathering food (nectar and pollen).  We also want to see if they are raising baby bees (eggs, uncapped and capped larva).  The typical stages of a worker bee can be expressed by this simple formula (start at three and double the number): 3 + 6 + 12.  Three days as an egg, six days as a larva (the cell is capped over at nine days) and twelve days as a pupa before the baby bee emerges.  A total of twenty one days from the day the egg is laid until the new bee come out.  We are also checking for any pests, diseases or other problems that may arise.  What did we find?

Inspection Report:
White Hive:
After lighting the smoker and blowing a few puffs of smoke into the front entrance, I cracked open the lid and found that the feeder jar was empty.  I brought the little remaining sugar syrup that I had left and filled it about half way.  Time to make up some more syrup!  I removed the top box holding the feeder jar and blew some more smoke into the hole in the inner cover.  After waiting for a bit for the smoke to take effect, I removed the inner cover which the bees had lightly glued down.  It was a bit sticky but I was able to lift it without using the hive tool to pry it off.  What I found was a bunch of burr comb hanging down!

Looks like they have been busy!  Don't they know they aren't suppose to build comb like that?  =)  Basically bees work within "bee space" or about 3/8 of an inch.  It was discovered that when given more space than 3/8" the bees will fill it with wax comb.  If given less space than 3/8" they will fill in the gap with "bee glue" or otherwise called propolis.  For more information about this interesting phenomenon: http://en.wikipedia.org/wiki/Langstroth_hive

After scraping this offending comb off of the inner cover, I started pulling the frames and taking a look.  The first five frames were mostly empty with only a few bees hanging out there.

On frame number six I found some stored pollen and nectar!  The nectar looks like glossy pools of water in the cells.  The cells filled with yellow and orange are pollen from different types of flowers.  Very cool!  It is interesting to see how they have outlined the rim of the plastic cells with a small bead of light yellow wax comb.  I am very happy to see this because I have read that sometimes bees will have trouble accepting fully drawn out plastic frames like this.  Glad to see that will not be a problem!

Frame number seven seemed to be more of the same but I'd really like to see some evidence that the queen has started laying eggs.  Frame number eight is looking the same too isn't it?


Can you spot the different kinds of bees in this close up photo?  There are three different kinds of bees.  The queen who lays all the eggs in the hive.  The workers who are all female and make up 90% or more of the total bees in the hive.  And finally the male bees, the drones.  I describe them as unemployed guys who sit on the couch all day drinking beer, yelling at the girls to bring him a sandwich and checking out the hot chicks all day long!  =)  The drones do no work, the female worker bees feed and clean them and the drone serves one purpose.......to mate with a virgin queen.  If the drone is successful, he dies as his insides are ripped out (I'm being polite when I say "insides").  If a drone fails to mate, and survives into the fall, he is eventually kicked out of the hive by his sisters to starve, freeze to death or get eaten by another critter.  Bummer.

On to frame nine....finally there they are!  Larva in the cells!  They look like shiny little grubs shaped like the letter "C" right in the middle of the frame.  I also see what might be drone brood.  Since a drone is physically larger than a worker bee, the cell that they are raised in has an enlarged, dome shaped cap on it that protrudes from the frame.  Because of this they are sometimes called "bullet brood".  Spot any drones yet?  The key is the eyes.  Since the drone depends on his eyesight to spot a flying queen, his eyes cover almost his entire head.


Finally, frame number ten.  Wow, they sure built some weird looking comb on this frame.  A large section of comb protruding with tunnels underneath it!  After looking at this frame and the one next to it, I can see that this frame is warped away from the neighboring frame causing extra space there.  And bees fill extra space with comb!  I might have thought about removing this comb but I see lots of eggs in it and I really don't want to loose all those baby bees.  They really have everything in this weird comb!  Brightly colored pollen, glistening nectar, larva, capped larva (pupa) and if you really zoom in,

you can see tiny things that look like grains of rice.  Those are eggs the queen has laid.  Since we know that an egg changes after three days into a larva, we know that the queen was at this spot sometime in the last few days.  It would be nice to spot the queen, but this is the next best thing.  I'm wondering if the bees were in the process of capping a few of those cells of larva, or if I somehow tore them open by accident.  The edges of the cells look a bit ragged and I'm not quite experienced enough to be able to distinguish some of these subtle differences.

I find it really beautiful all the many different colors of pollen they have stored on the left hand side of this frame.  Orange, yellow and almost a white color.  Which flowers are providing all this color?!

Green Hive:
Sadly the camera battery died just as we were closing up the white hive, so have no pictures of the inspection on green hive!  =(  The top feeder was empty when I opened it up but I counted almost thirty dead (drowned) bees in the feeder and mold had started to grown on the floats.  I am not happy with this feeder.  I decided it is coming off and I will replace it with an inverted jar feeder just like on the white hive.  The inverted jar is much easier to maintain and doesn't drown any bees.  I have the foundationless frames on this hive and the bees had comb drawn on four of the ten frames.  About 3/4, 1/2, 1/2, and 1/4 of those four frames were filled with comb.  I found it very difficult to see what was in the cells of those frames.  I did spot lots of nectar but there were so many bees covering the comb that I couldn't tell for sure if I saw capped honey or capped brood.  How do you other beekeepers get your bees to move out of the way so you can see this stuff?  Do you brush them off or use your fingers to move them aside?

All in all I was very happy to see that the bees were drawing out comb, storing pollen and nectar and making more bees!  I would have liked to have spotted the queens but I was happy spotting eggs in the white hive.  I'm hoping that in my next inspection that I will have a better technique and a camera with a fully charged battery!

Until next time, thanks for reading.