Showing posts with label White Hive. Show all posts

Monday, October 26, 2015

2015-10-25: Winter Prep

We've finally hit a few nights of freezing temps so that means it is time to complete any winter prep that needs to be done on the hives.  I have empty feeder jars that need to be removed, boxes with no stores in them that need to be taken off (the bees don't need a bunch of extra space that serves no purpose) and mouse guards to be placed on.  I also need to decide what to do with my newly established nuc hives.

Old Nucs - Yellow/Green hives:

These are the splits I made some time ago that were moved into full sized boxes last month.  They've been feed 2 quarts of syrup each in the hopes that they would draw the empty frames with wax and start filling them up.  If I found 10 good frames then I was thinking to take two nuc bodies (5 frames each) and stack them.  It is suppose to be easier for the bees to move up in the winter and it would be easier for the bees to cover 5 frames at a time instead of 10.

Yellow Nuc:

I had suspicions during the last inspection that I had waited too long to transfer this nuc to a full sized hive and they decided to swarm (I saw some torn open queen cells).  The bees seemed "flighty" and the only brood I saw were drones.  The number of drones walking around the frames was high, especially since they should all be kicked out of the hive by now!  I did spot some eggs and developing larva but something was telling me that this was not right. 

Drones, lava and eggs but no queen

So, either I have the start of laying workers or I have a queen laying all drones.  On top of that, the bees had not touched a single new frame that I had placed into the hive.  Stay tuned for more on the Yellow Nuc during my inspection of the Green Nuc....

Green Nuc:

I was a bit annoyed after pulling the first few frames since the bees had not touched them at all.  Thankfully the original 5 frames that were moved into the hive looked pretty good.  Lots of capped honey and worker brood!  Two more frames in and I spotted the queen with her pretty green dot. 

Queen with a pretty green dot

I was even nicely surprised that after I moved past these 5 frames the bees were actually drawing out one of the new frames! 

Drawing out a frame with new wax
Have I mentioned how I love festooning bees before?  =) 

Festooning bees
 Based on my findings between both nucs, I decided the one was probably queenless and had the start of laying workers and the other was queen right.  I thought it would be a good idea to take two 5 frame nuc boxes and stack them with the best frames from each hive.  I unscrewed the bottom from one of the nuc boxes and stacked it on top of another nuc box.  Crap!  They are not made to stack.  There was a large gap between the two that would be open to the air.  Ugh.  I guess I need to deal with the full sized boxes instead.  I decided to do a newspaper combine and thankfully I had one sheet of newspaper left!  I placed it across the top of Green nuc, picked up the Yellow nuc off of its bottom board and placed it on top of the Green nuc.  The bees will eventually chew through the paper and this slow integration will hopefully prevent any fighting between the bees before they merge together into one happy family.  I'm just hoping that there wasn't some drone laying queen that I didn't spot in the Yellow nuc that ends up battling with Green nuc's queen.

Newspaper combine complete

Where did that orange pollen come from?
Yellow Hive:

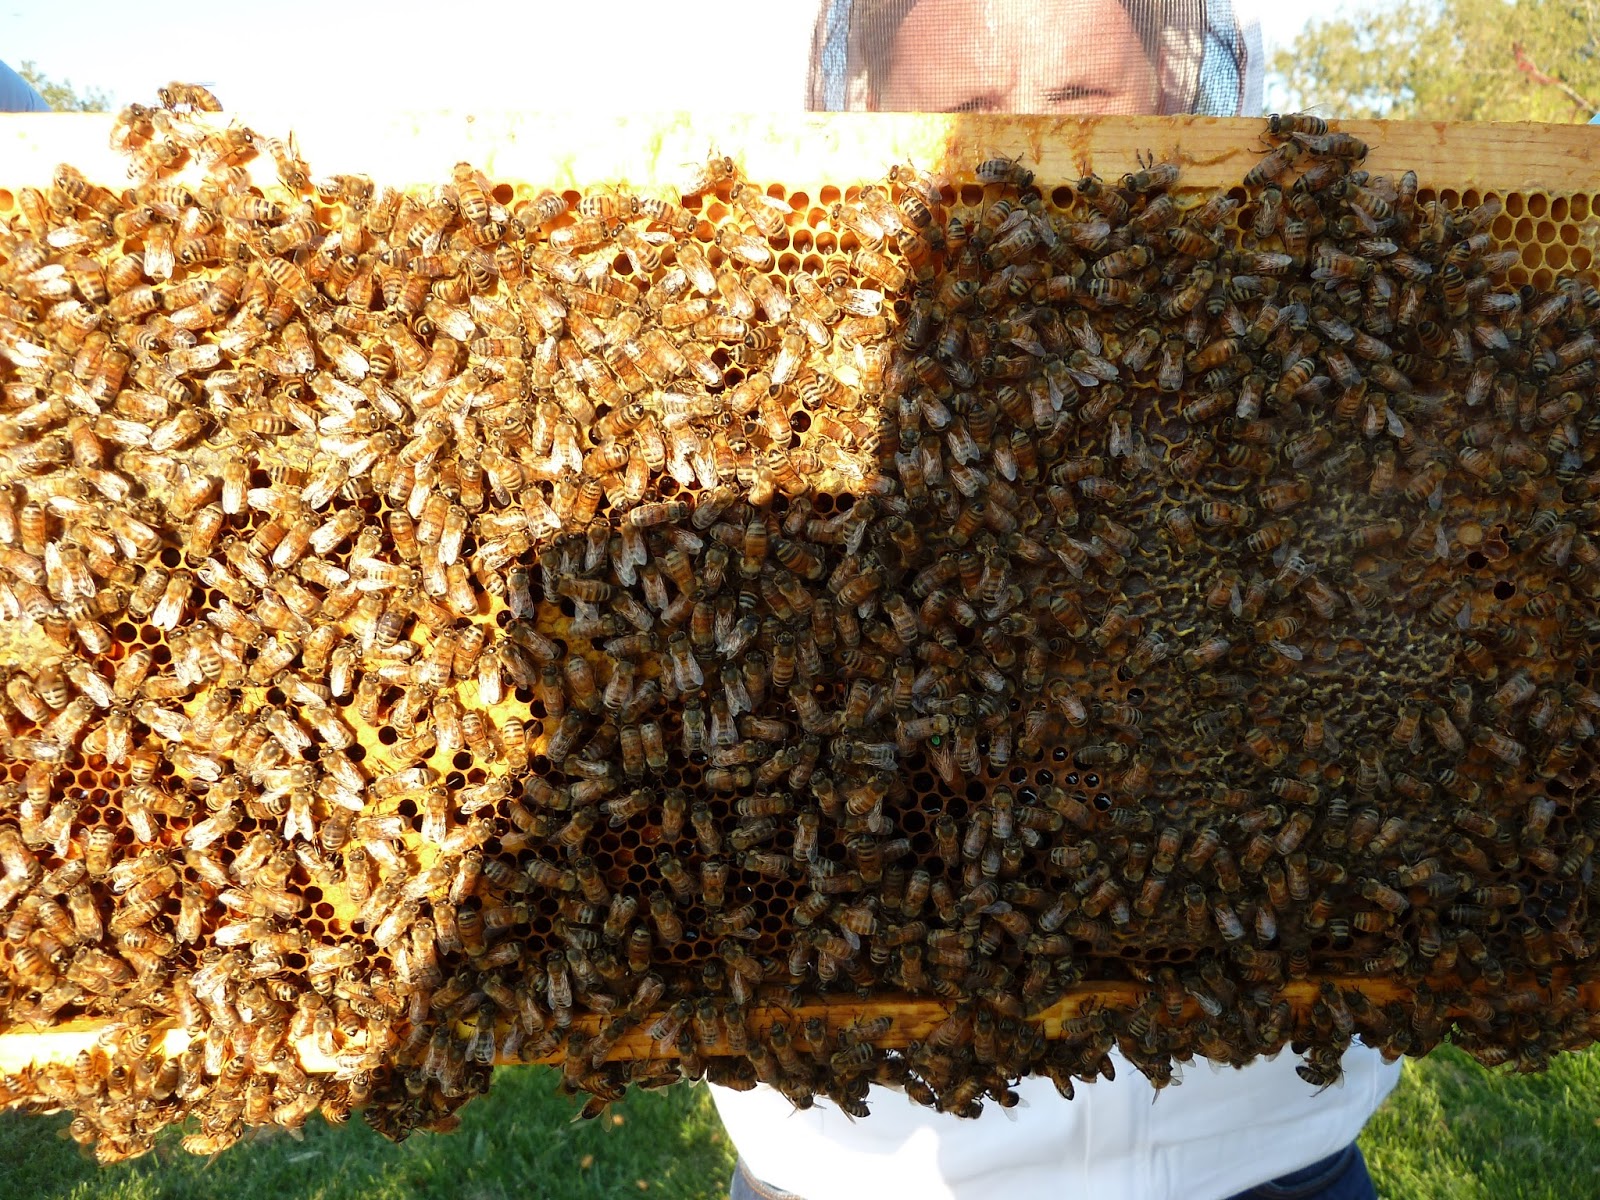
This is my cutout hive that has made some really good progress over the summer.  I removed the empty feeder jar and took a look through the top box.  The bees were covering about 6 frames and had most of them drawn out. 

Yellow Hive bees

Quite a few were filled with capped honey.  Looking down into the box below I saw lots of bees and some rubber bands still on the frames from the cutout!!  They typically chew through them and dispose of them but I'm guessing they've propolised them right onto the frames now.  I'll have to remove them during the first inspection in the Spring.

Green Hive:

The top honey super on this hive was filled with drawn combs that were completely empty.  I thought for sure that when I added them that the bees would fill them quickly with the Goldenrod flow.  No such luck.  I pulled this box off after clearing a few stray bees off the frames.  I pulled a few frames from the next honey super and at least there was some capped honey there.  Looks like that box will stay on for the Winter.

White Hive:

Looking at the top honey super on this hive I could see that it was packed.  I knew this from my last inspection but I had also seen a large pile of dead bees in front of the hive.  I was concerned that this hive had been robbed out by other bees.  Well not a single frame of honey appeared to be touched so this hive should have some great stores going into Winter.  It also had a nice population of bees and when I looked closely at the pile of dead bees I saw numerous dead yellow jackets in the pile.  Maybe they tried to raid the hive and picked the wrong one to screw with!

Battle aftermath
To complete my tasks I needed to put the mite sampling boards back into the hives that had screened bottoms to prevent any wind drafts blowing up from the bottom of the hives.  With that done I also wanted to put my mouse guards on but with the entrance reducers on it didn't really look like they would fit properly.  Based on http://www.honeybeesuite.com/what-size-hardware-cloth-is-best-for-beehives/ it looks like #4 hardware cloth is the proper size for a mouse guard.  So I think I'll grab some and use that instead.

I'm also considering getting or building some candy boards that come with a top entrance.  This would allow the bees to leave the hive for a cleansing flight during the Winter if the bottom entrance happened to be plugged up with dead bees.

With four hives going into Winter and some diversified genetics (one Italian, one cutout wild open mated and two "northern" queens), I'm hoping to have some better luck overwintering this year.  Wish for a mild Winter and wish the girls luck!

Until next time, thanks for reading!

Friday, September 18, 2015

2015-09-17: Hive Inspection

I had a number of tasks that needed to be accomplished for a while now.  My top priority was to get the nuc hives transferred to full sized hive bodies so they can build up enough stores to last the Winter.  I'm hoping they can both build up to two full deeps in time.  Believe it or not, Winter is coming.  Especially in honey bee terms.  Second on my list was to make sure the cutout hive is built up to four full medium boxes.  Last on my list was to check the status of Green Hive's honey supers and if the top one was full remove it for processing.  I have to thank Byron for coming out to help me again.  Having an extra set of hands is always appreciated!

Nuc hives:

The nucs are each currently resting on a single cinder block.  So we had to throw down another cinder block and level it to the existing one to make room for the full sized hive bodies.  Byron was able to unstrap each nuc and move it a few feet out of the way while I set the other block in place and checked it for level.  With a little adjusting and stomping on the blocks, they were level.  The new hives were set in place and frames removed to make room for the five frames from the nucs.  All that was left was to remove the frames from the nucs and put them into the new hives.

Byron transferring frames
This went really fast since I wasn't really focused on inspecting every frame.  But I did notice a number of queen cups and what looked to be a torn open queen cell on one of the frames.

Queen cups
I did not spot the queen during the transfer of these five frames.  It is quite possible that they actually swarmed....taking my new purchased queen with them.  She should have been easy to spot since she was marked.  I'll need to check this one closely next time and see if I can spot the marked queen or if they requeened themselves.  If they did swarm there isn't much hope for that swarm to establish and overwinter this late in the year.

After we finished moving the frames over, the inner cover went on and a jar of sugar syrup went on top of that to feed them.  This should give them the sugar they need to draw out the empty frames in the new hive.

The second nuc went just as quickly.  Thankfully this time I was able to spot the queen and there were no queen cups to be found on any of these frames.  Can you find her in the picture below?

Spot the queen with the green dot on her back!
The were some really nice frames in both nuc hives with plenty of honey and pollen.  Hopefully they have the resources to increase their populations and expand like crazy!

Drawn frame with honey and capped brood
Cutout Hive:

We opened up the cutout hive and checked to see how many of the existing frames had been drawn out.  I was a little bummed to see that they only had about 7 of the frames drawn.  I thought for sure with all the Goldenrod blooming around my house that they would have tons of nectar to make wax and honey.  Maybe these bees don't like the smell of sweaty gym socks because that is what Goldenrod nectar smells like!

I decided to add the fourth box to the hive and put a sugar syrup feeder on as well.  Go bees go!

Green Hive:

A quick look into the top honey super on this hive did not give me what I wanted.  The entire super had only one frame with any honey in it and a number of the frames were still undrawn.  Looks like no honey for harvest this year.  The second honey super wasn't much better.  That box was given all drawn frames and there were only a few frames with any honey or nectar in them at all.  I'll probably have to combine the best frames from the two honey supers into one box and feed this hive too.

White Hive:

This hive has one honey super on it and I expected to see the same lack of use.  I was so glad to be wrong!!  The bees had this super completely filled and capped.  Since this hive was the only one that wasn't requeened this year, I wonder if that is why they were able to make a surplus.  I know of a beekeeper's saying that may explain this - "You can make honey or bees but not both".

What's Next:

I will check the hives in a week to see how much of the feed they consumed and how many of the frames they are building up. 

Until next time, thanks for reading!!

Thursday, August 13, 2015

2015-08-10: Back In The Game

After my rather dramatic post last time, I just couldn't wait anymore and had to get out to see the bees.  I armed myself with some Benadryl, my EpiPen and my friend Keith and headed out to do some inspections!  I actually donned the FULL bee suit as well, which I haven't worn since I did the shed cut-out.  Dang is that thing hot!  My goals were to check and see if the cut-out hive had successfully re-queened themselves and to check the nuc hives to see how they were doing with the new queens in them.

Cut-Out Hive / Yellow Hive:

I had Keith do all the work and I just barked orders the entire time.  Thankfully Keith is a really good sport and was happy to help me out.  He removed the cover, took off the extra boxes that were covering the honey feeder and got into the first box.  The bees were pretty sparse here and there were only a few frames with any wax drawn at all.  And even those frames only had a few spots on them with any wax.  That box came off and we were into the next box.  Slightly more wax built out in this box but about half the frames were still untouched.  Finally after getting to the last three frames we were able to see some good drawn frames.

Plastic Frames being filled
About 3/4 of the frame was drawn and there was some capped honey and some nice pollen in the cells.  The next frame was very similar and I was able to spot some larva scattered here and there.  This was the first good sign that a queen was present.  We grabbed the last frame and look who we spotted!

Cut Out has a new Queen!
She's a beauty!  Look at how dark she is.  She definitely has some non-Italian genetics in her.  I'm hoping she has "Winter Survivor" written all over her!  I followed her around with the camera for a bit and if you zoom in on this photo you can see she has eggs in every cell.  Good job!

New Queen and Eggs
At this point I really didn't need to go into the last box since I know they were able to re-queen themselves.  I had Keith take a few frames from the top box that had some wax on them and swap them with some of the frames that had no wax on them.  Then we removed the top box entirely.  They have a lot of wax to draw still and they don't really need that extra space to police.  I also decided that since there weren't really a lot of bees in the hive that I would put the entrance reducer on.  We are probably due for a nectar dearth and I don't want the strong neighboring hives to bust in and rob this hive out.  I'll probably make up some syrup to feed them and this should get them to draw out some more wax.  I need them to fill out three medium boxes before Winter sets in.

Speaking of Winter, I see the Goldenrod starting to bloom in my area.  That always signals the approach of Fall.  Many of my late blooming flowers are also in full bloom.

Coneflowers in bloom
Green Nuc:

Since my Nuc hives only have 5 frames, it makes them really quick and easy to check.  Most of the honey frames that I put in are still full.  They have eaten a little bit and replaced it with pollen which is a good thing.  Two frames in and we hit the first solid brood frame.  The new queen looks like she is settling in nicely!

Solid brood pattern
The very next frame over I was able to spot her majesty.  The green dot on her back makes it a little too easy to spot her.

Queenie
This hive is doing pretty well with two frames of brood front and back and two frames of honey and pollen.  The one empty frame I had given them sadly remained empty.  They had a few blobs of comb ridges created but I didn't care too much for them.  I had Keith scrape some it off the frame.  I'm hoping when all these sealed brood start hatching out that there will be a lot of new bees that will be primed to start drawing wax.  I need to get busy building some boxes so I can move these nucs into full sized hives soon.

Yellow Nuc:

Very similar to the Green Nuc.  Two honey frames that the bees had eaten a little from and replaced with either pollen or more nectar.  Two pretty solid frames of capped brood.

Capped brood on Honey Super Cell plastic frames
This hive seemed to be much more interested in drawing some comb on the new plastic frames though.

New comb and brood
Since this was a medium sized frame that I placed into a deep sized box, the bees have drawn comb off the bottom of the frame to fill in the space.  Bees are sure efficient!

On the opposite side of this frame they decided to draw a few of the same ridges I described in the last nuc.  At least they've drawn plenty of normal looking comb too.

Comb ridges
I'm wondering if they were just stealing wax from one part of the comb to make this instead of drawing new wax? 

We spotted the queen on the next frame and that was the last thing I needed to see.  This was a very successful inspection.

Next Steps:

I plan on making some 1:1 sugar syrup to feed to the hives trying to draw new wax.  I need to get the full sized boxes ready to move the nucs into.  I also need to give Green Hive a check to see how much of the two honey supers they have filled and also to see if the new queen is doing alright in there as well.  I'd also like to do some Varroa monitoring with a powdered sugar shake.  That sounds like a lot to do and we are already half way through August!

As always, thanks for reading!

Tuesday, June 9, 2015

2015-06-06: Movin' on up!

...not to the East side, but to another box on the hives!  =)  If you're old like me then you probably get the quote.  Otherwise you'll just have to Google it.

The big accomplishment during this inspection was putting the second box on each hive and deploying my solar powered Arduino.  As you can see in the picture below, my deployment consists of a mesh lined ventilation board that I built.  The Arduino Uno sits nicely bridged to a small breadboard that all three DHT-22 temp/humidity sensors are attached to.  One sensor sits next to the Arduino, another runs outside the hive to measure ambient temperature and the last one runs down under the Arduino into the brood nest.  The other components here are a 2000 mAh LiPo battery, a Sunny Buddy solar charger controller from SparkFun and a 5v boost up converter that takes the 3.7v from the battery and pumps it up to 5.2v that feeds the USB connection to the Arduino.  Sitting on top of the Arduino is a data collection shield that has a Real Time Clock and an SD card reader.

Arduino Deployment

I'm really hopeful that the battery/solar combo will actually last more than a few days (unlike the 6 AA battery pack that I tried before).  I plan to walk out the the hive this weekend with my laptop and pull the SD card and download the data.

Green and White Hives: 

Since both hives seem to have good queens and have used about 80% of the frames, it is time to add the second box.  You can really see the evidence of the increase in hive population.  Bees are covering most of the frames with very solid frames of brood.

I chose to deal with two issues at once when I added the second boxes.  Many of the frames of honey from the hive that died last year were very "wonky".  There were large lobes of honey that stuck out so far from the side of the frame that another frame couldn't fit next to it in the proper bee space.  So as I added these frames to the new box, I took my uncapping knife and shaved them down flat.  I fed a few empty frames in between so it should give the bees a good guide to build straight combs.  Plus all that open honey should give plenty of fuel for the bees to build new wax.

The added box was especially helpful to White Hive since that is the hive that has the Honey Super Cell plastic frames in it.  Since the bees cannot make drone cells on the fully drawn plastic, they build drone cells on the bottom of the frames.  These cells tend to tear open when you do an inspection so you loose some drone larva in the process.  The good thing about this is that I did not notice any varroa mites on the open drone larva!  That is typically where the mites would be so maybe the mite numbers are really low so far.


New boxes going on

After I added the boxes, I put the Arduino board on top and plugged it into the solar panel.  All systems Go!

Deployment complete

Next steps:

As I mentioned, I will be pulling the first week of Arduino data this weekend.  After the bees have established themselves in the second box I will be gearing up to do two splits.  I really want to increase my genetic diversity this year.  I may sacrifice any honey production this year by doing these splits but I'm hoping to actually have a few hives survive the winter this time!

Until next time, thanks for reading!

Friday, May 15, 2015

First Full Inspection: 2015-05-13

The 2015 Beekeeping season is now officially in full swing!  I've done my first complete inspection of both hives and things are looking good so far.

White and Green Hives.  Life long buddies.

White Hive:

Upon opening the hive up, the first thing I found was that instead of hanging out in the middle of the hive, they've chosen one side over the other.  It must smell better over there or maybe there was more honey and pollen left on those frames from last year?

The Left side is where the cool kids hang out
Anyway, it made it easy to figure out which side to start my inspection on.  So I pulled out the frames on the empty side and quickly worked my way toward the middle.  On frame 6 I found a nice frame of fresh, colorful pollen.

Pollen


Some pretty typical orange and yellow colors for this time of year.  I was hoping that the bees would have a chance of gathering some steel blue colored pollen from the Siberian Squill I planted but the blooms were already spent by the time the bees arrived.  Maybe next year.

Moving on to frame 7 I spotted the first frame of capped brood.

Future baby bees

It has only been about 14 days since the bees were installed and usually it takes a few days for the queen to be released from her cage, and then maybe a few more days before she even starts laying eggs.  The eggs hatch into larvae and then the cell is sealed on day 9.  So, I'm guessing these cells have only been capped for a few days at most.  If that means the eggs were laid 12 days ago, then in 9 more days they will start hatching.  Then we'll get to see what this queen's genetics are going to look like.  This hive has been a bit more "touchy" than the Green Hive so far.  Hopefully when the new bees take over they will have a little calmer disposition.


Green Hive:

I love the look of new comb on foundationless frames!  Green Hive did not disappoint me either.

New comb being formed
It is fascinating to watch as the bees drawn down a sheet of hexagons on the frame.  The new wax is a nice pale yellow color and it is just waiting to store something!

Well, this queen has been filling the frames with brood.

Pretty solid brood
Sometimes new queen have a very spotty brood pattern when they first start.  This frame looks pretty good to me.  You can also see that there is a cluster of drone brood along the bottom of this frame.  Right before I took this picture the bees were doing there job, covering the frame and keeping the brood warm.  If you blow on them, they don't like it and they move out of the way rather quickly.  I think it has something to do with the CO2 that we exhale.

A few frames over I was able to grab a nice close up of the developing larva.

"C" shaped larva
Notice the different sizes of the larva.  The queen usually lays her eggs in a circular spiral pattern.  So the larva in the center of the frame are bigger (older) and the ones toward the outside edge are smaller.  If you zoom in really close on this photo you can even see the eggs to the right of the smallest larva.

I'm really glad to see both hives getting off to a really good start so far in 2015!

Next Steps:

I have completed my solar Arduino setup and I plan on deploying that again soon.  I also plan on taking some of the remaining honey frames from the hive that died this past winter and feeding it back to the bees.

Until next time, thanks for reading!

Thursday, April 30, 2015

New Beeginnings: 2015-04-30

B-Day has finally arrived!! 

Over the last week I had been cleaning out the hive that had died over the winter so that it would be ready for the new bees.  The lucky new arrivals would be taking advantage of the hard work of the bees from the previous year.  I'm sure the new bees would be happy to see the frames of honey, pollen and bee bread waiting for them instead of a bunch of empty frames.

My friend Keith was getting a package of bees this year so we made the quick run to pick up the new packages of bees.  The packages looked really nice and had very few dead bees on the bottom.  The package seller even slammed the packages on the ground to knock the bees down so we could make sure the queen was alive in her cage.  I went over to Keith's house and helped him install his package into his Top Bar hive.  It went very quickly and I was soon home and ready to install my two packages.

White Hive:

This hive has the Honey Supercell frames in it.  These are the fully formed, small-cell, plastic frames.  So after removing some frames to make room, I popped open the package, pulled the queen cage, put it between the frames, slammed the package on the ground and dumped the bees in.  I've stopped worrying about spraying them with sugar water or putting the lid back on the package after I've pulled the can of sugar syrup out or which end of the queen cage should be up or down.  A lot of wasted effort I think.

Green Hive:

This hive has mostly foundationless frames.  A majority of them have drawn comb with lots of honey.  The problem with these frames is that the honey was put into large bulges of comb that extended well past the width of the frame.  So after I removed the frames and dumped the bees in, I used my uncapping knife to saw the comb even with the frame.  Of course this made honey ooze out all over the place but I figured the bees would be eager to clean it up.

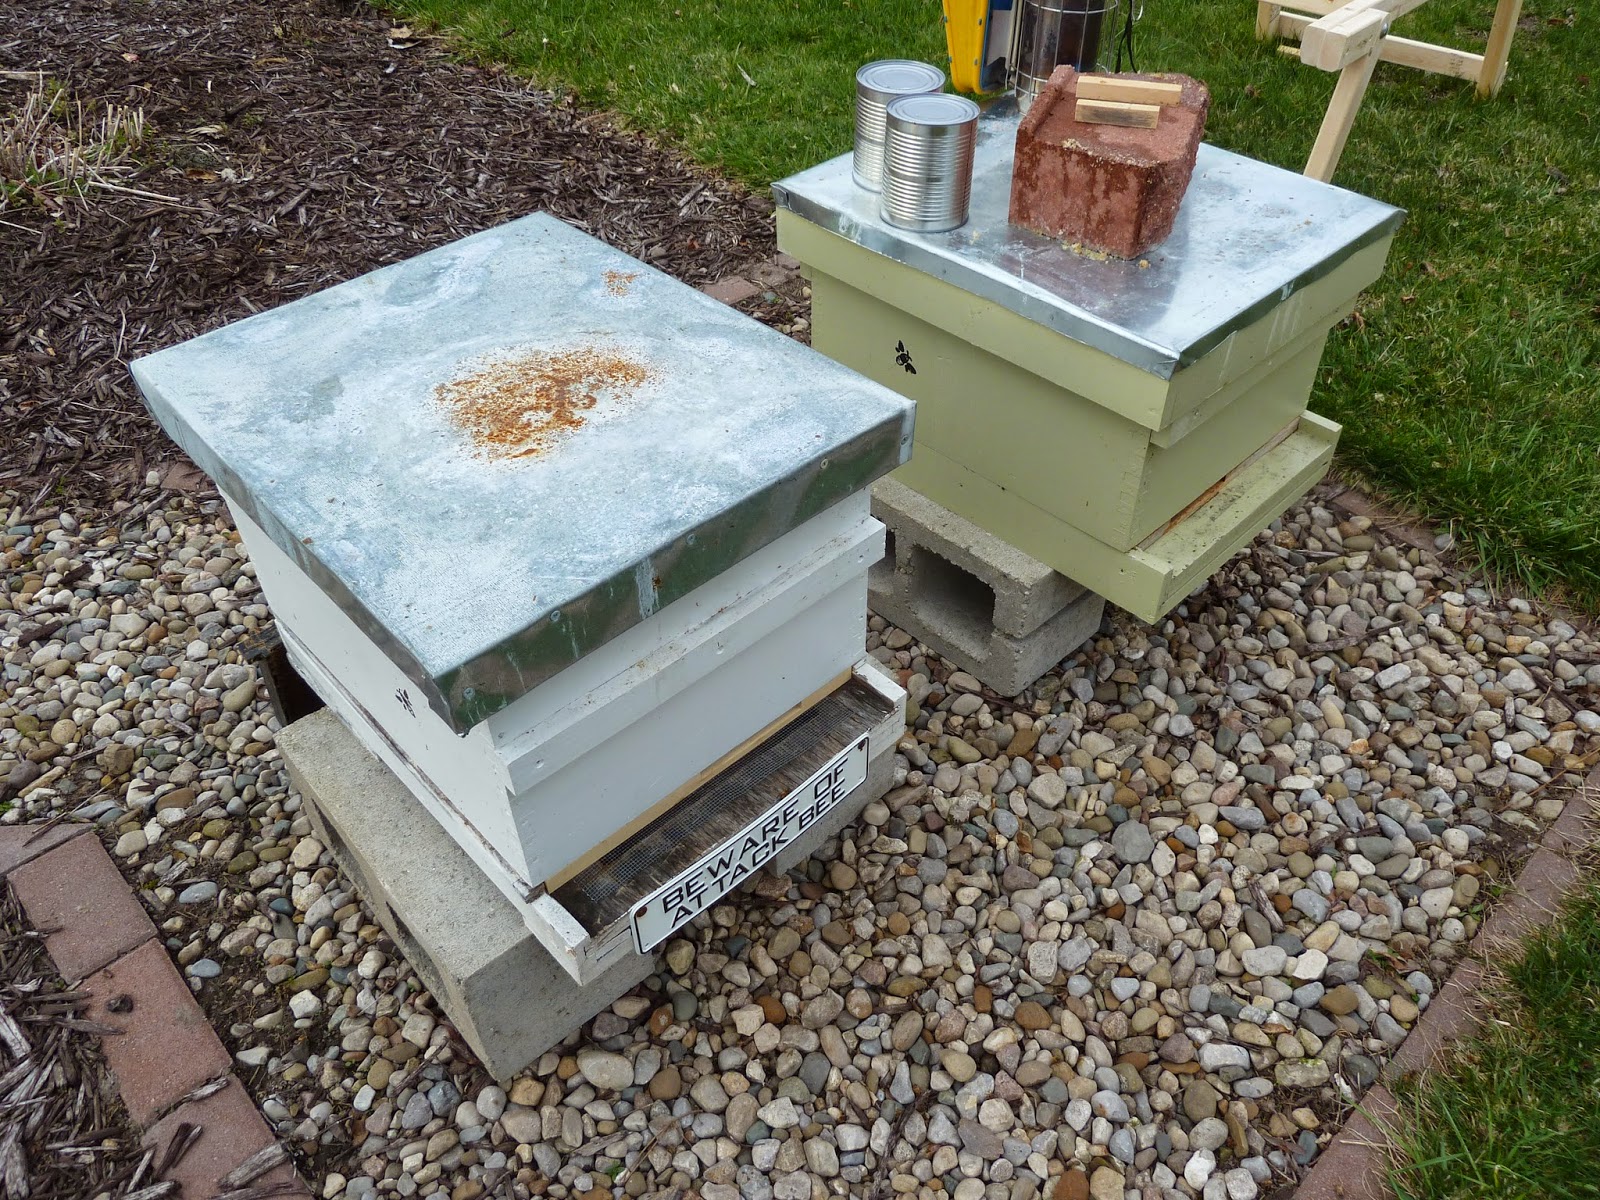
Beware of Attack Bee

Queen Release:

After three days I went out to make sure the queens had been released from their cages.  When I pulled the cages the sugar plugs were almost completely eaten away!  After I removed the queen cages I also had to remove all the comb that the bees had built in the extra space that the queen cage was occupying.


A few swipes with the hive tool and the excess comb was removed.  Before adding the frames back in, I took a look for the queen and spotted her quickly.

Can you see the queen in the middle of this picture?
Everything looked great and I closed up White Hive.

Green Hive went very smoothly as well.  Move the frames apart, pull the queen cage, check some frames for the queen (no luck spotting her this time) and push the frames back together.  Done.

Plastic tab attached to the queen cage

 Everything is now good to go for the 2015 bee season!

Next inspection in about a week so that I can make sure the queens are laying eggs.  Until then, thanks for reading!

Monday, September 29, 2014

Fall Prep: 2014-09-24

During this latest visit to the bee hives, I set out to accomplish the stated goals at the end of the previous bee blog:
  • Remove the honey from White Hive
  • Perform a powdered sugar roll mite sampling
  • Combine the two hives into one
With the help of my friend Keith, I was able to make it all happen in one evening.  You wouldn't think that you would open the hives up at 7 PM and a short time later you are loosing all the light because the sun is setting!  You sure don't worry about that during the summer when the sun doesn't set until well after 9:30 PM.

Step 1 - Remove the honey:  Since I have only ever had one hive that I need to remove honey from, I use a simple method of doing so.  Get an empty hive box and cover it with a damp cloth.  Remove a frame with honey on it.  Shake the frame with a sharp jerking motion until most of the bees are removed and brush the rest off.  Put the bee-free frame into the empty box and drape the damp cloth back over the box so bees don't get back onto the frames.  Someday if I have 5 hives all with multiple boxes of honey on them, then I may have to change my methodology.  Until then, this works just fine.

Step 2 - Perform mite sampling:  We live in a time when our European honey bees are plagued by an aptly named mite called Varroa Destructor.  This mite is a parasite of the Asian honey bee but was introduced here in the 1980's.  Our honey bees had no real resistance to them and they have been a huge problem ever since.  I won't treat my colonies with chemicals but it is a good idea to know if you have a really bad infestation of mites or not.  One of the methods of determining your mite level is called a powdered sugar roll.  First you take a jar with a mesh screened lid and get a 1/2 cup of bees in it (approximately 300 bees) from a brood frame.

Selecting a brood frame for mite sampling
Then you put the lid on and put some powdered sugar in the jar and then roll the sugar and bees around and around for a minute or two.

Where did this sugar blizzard come from?
The sugar causes the mites to loose their grip on the bees and they fall off.  You then shake the sugar out of the jar and the mites come with it.  Once you have shaken the sugar out, rolled the bees around some more and shaken it out again, you dump the disoriented bees back into the hive.  Their sisters are more than happy to groom the sugar off of them!  Since the sugar is white and the mites are red, it is very easy to spot them.  You spray a little water on the sugar and it quickly dissolves leaving you the mites and perhaps a few small pieces of debris.  Count the mites and you use the formula (mites / 3) * 2 = % infestation level.  You multiply the "mites per bee" number by 2 because you are assuming many more mites are in brood cells (University of Minnesota mite sampling method).

Stunned "ghost" bees poured back into the hive
For this exercise, I sampled one frame and had 4 mites.  So that gives me (4 / 3) * 2 = 2.67 % infestation level.  If you were really serious then you would do this to multiple brood frames in multiple boxes.  Or you would do this across multiple hives.  If your infestation level was high enough you would then decide to treat your hives or not.  A typical treatment threshold is somewhere around 10%.  For me, I just wanted to go through the exercise to really see how it was done.  I was also inspired by Bill over at the TheBeeVlog to get a digital microscope and take a closer look at the mites causing all these problems.  If you watch the video in that link, you will see some interesting detail on how they do the sampling.  Especially the little trick they use to get the bees in the jar.  It works!

Here are a few of the microscope photos of these nasty little buggers.

Varroa mite (top)

Varroa mite (bottom)

Mite with extended forelegs
So how would you like to carry one of these blood suckers around all day?  And you thought a Monday without coffee was rough??   =)

Step 3 - Combine the hives:  With Green Hive queenless and no hope of replacing her this late in the season, I did a "newspaper combine" of the two hives into one.  You just lay a sheet of newspaper over the top of one hive and stack the boxes from the other hive on top of the newspaper.  This allows the scents of one hive to mingle with the other before the bees are blended together.  This reduces or eliminates any fighting between the two colonies.

Newspaper combine of White and Green hives
Over the next few days the bees will chew through the sheet of newspaper and will be one big happy family ready to tough it out through the Winter.

This will be my last major beekeeping task for the year.  I did decide to buy some winter wraps and I will be putting them on the hive before the first "Polar Vortex" gets here.  I will also be placing a mouse guard on the entrance to prevent any unwanted residents during the Winter months.


As twilight descends on this inspection, it also descends on this beekeeping season.  I did not achieve most of my goals this year but I am hopeful that the bees will come through this Winter will flying colors.  I'm sure they will be eagerly awaiting Spring as much as I will be!

Until next time, thank you always for reading!

Wednesday, September 24, 2014

Bee Blog Slacker: 2014-09-20

Well a lot has happened in the bee world since my last post in June.  I guess things get crazy here in Michigan during the summer time when it seems so short but that is no excuse!  Thank you to my lovely daughter for reminding me that people are worried about the bees and they are left in suspense if I don't write these posts.....heheheheh  =)

Here is a quick summary of what has happened since:

Green Hive:  

Doing OK but not strong.  Had some queen drama where I found no brood in the hive during an inspection on 7/24 and found capped queen cells in White Hive.  I transferred the capped queen cells to the Green Hive and after looking through the photos I took during the inspection I spotted that there was a queen in Green Hive after all!!!  So either the queen in Green Hive was a virgin or not laying eggs for some other reason.

White Hive:  

Strong compared to Green Hive for sure.  This hive may have swarmed since I spotted all the capped and uncapped queen cells.  Usually they build swarm cells along the bottom of the comb so this does follow that pattern.  If they did swarm then about half of this colony is hopefully living in a cozy tree somewhere!

Lots of capped Drone brood and a few queen cells
So now fast forward from then end of July and into the end of September (that sounds really depressing actually).  I just did a full top to bottom inspection of Green Hive and I checked the honey super on White Hive to see if it was ready to come off.

Green Hive: 

The top box had about 4 totally empty frames.  It is too late in the year now for the bees to have enough incoming nectar to make wax.  So they will stay empty for the rest of this year.  There was one frame of solid honey and the rest of the frames had a mixture of honey, nectar and bee bread.

What the heck is bee bread you ask?  When bees bring the pollen back to the hive, another worker bee packs the pollen into a cell and adds some honey or nectar and enzymes to it.  This causes some fermentation to occur and breaks the pollen down into a more consumable form for the bees.

Lots of maroon colored bee bread on this frame
Compare the color of the bee bread to the color of the fresh yellow pollen on the back of this bees leg in this photo:


This bee bread is the primary source of food for developing brood.  Since this hive doesn't have any brood, they have a lot of bee bread stored.

The bottom box has only two empty frames and most of the remaining frames are packed full of bee bread or honey with very few empty cells.

Solid frame of honey

The bottom line for Green Hive is that they appear hopelessly queenless.  This late in the year there is really no possibility of buying a replacement queen.  I did check around online and every place I looked is sold out (and probably were sold out months ago).  Also, there is no hope of the bees having enough time to raise their own queen if I donated some eggs from White Hive.  It would take at least 16 days for a new queen to hatch.  By then it would be the middle of October and there would be no drones for her to mate with.  Matter of fact, during my inspection, I witnessed numerous drones being dragged out of the hive by their loving sisters.  I think the only option I have now is to combine this hive with White Hive (Newspaper Combine).  After I do that my remaining hive will go into Winter with FOUR deeps of food and bees.  No matter how bad the upcoming Winter is, that should be plenty to get them through it.

White Hive:

Even with the possibility that this hive swarmed earlier, it is still a strong hive.  They have managed to fill about half of a honey super.  Not great but better than nothing.  I plan to take this honey off when I combine Green Hive with this one.  I might be able to get 1 gallon of honey from this box.

What's Next:

I'm planning on doing the combine, removing the honey and doing a mite sampling tonight.  If I have enough time I'll extract the honey this weekend.  The next blog post will be up shortly!

As always, thanks for reading!

Friday, June 27, 2014

Guest Beekeeper : 2014-06-25

One of the fun things about beekeeping for me is teaching others about bees.  I have found many seemingly willing students.  Or at least ones that feign interest while I blab on and on about the bees.  I have also tried to get as many of these people as possible into the beehives.  For this inspection, I was fortunate enough to have Byron be my guest beekeeper.  It sure doesn't hurt to have an extra set of hands either!


My main concern for this inspection was to make sure the bees hadn't run out of room, since each hive consisted of only one box.  At this point they should be covering most of the frames and be ready for a second box to be added.  I was also hoping I hadn't waited too long and they weren't preparing to swarm!

Green Hive:

I took my time going through this hive since I wanted to be able to show Byron all the facets of beekeeping.  How to separate and manipulate the frames.  How to use the smoker and hive tool.  And what to look for in the hive: nectar, pollen, honey, eggs, larvae, capped cells, workers, drones and the queen.  The bees had just started to draw wax on the first two frames in the hive so I was able to show him how they create the wax in an empty frame.  He was also able to see the festooning behavior of the bees as they constructed the new wax comb.  The queen in this hive remained elusive and we did not spot her.  Although we did see some eggs and very young lava so she was there somewhere.  A second deep box of empty frames is now on this hive.  I have a feeling I should have used a technique called pyramiding to encourage them to move into the new box.  If they haven't done so by the next inspection I will make it so.

White Hive:

This hive had a second box added with some frames from the hive that died this past winter.  Some were empty brood frames and some were filled with honey.  Since this hive appears stronger, the bees were already working these frames.  After going through these I let Byron take over the inspection.  I'm sure it was his observation of my fantastic abilities that allowed him to jump right in like a pro!!  LOL

Byron inspecting the hive
The queen in this hive seems incredible to me.  She has solid brood patters across almost every single frame.  This hive will sure need the room in that second box!

Lots of brood
Even more brood
I never get tired of seeing new bees being born and emerging from their cells.  This inspection was no disappointment when we spotted 3 drones being born at the same time!

Welcome to the hive boys

After Byron had pulled 8 frames I thought for sure I was going to strikeout in showing him the queen.  But when we pulled frame 9 there she was!

Smile Queeny!
After watching her run around for a bit, we completed the inspection and closed up the box.

All in all, both hives are doing well and it was a great evening for an inspection.  Next inspection I will hopefully see that the queens have moved up into the second box and started laying eggs there.  I'm also planning on creating one or two nucleus hives and buying a "northern" queens to put in them.  At worst, this will allow me to have some backup hives in case one of the hives fails.  At best they will become fully established hives with better genetics for surviving these horrible Michigan winters!

Until next time, thanks for reading!