Showing posts with label Installation. Show all posts

Friday, September 18, 2015

2015-09-17: Hive Inspection

I had a number of tasks that needed to be accomplished for a while now.  My top priority was to get the nuc hives transferred to full sized hive bodies so they can build up enough stores to last the Winter.  I'm hoping they can both build up to two full deeps in time.  Believe it or not, Winter is coming.  Especially in honey bee terms.  Second on my list was to make sure the cutout hive is built up to four full medium boxes.  Last on my list was to check the status of Green Hive's honey supers and if the top one was full remove it for processing.  I have to thank Byron for coming out to help me again.  Having an extra set of hands is always appreciated!

Nuc hives:

The nucs are each currently resting on a single cinder block.  So we had to throw down another cinder block and level it to the existing one to make room for the full sized hive bodies.  Byron was able to unstrap each nuc and move it a few feet out of the way while I set the other block in place and checked it for level.  With a little adjusting and stomping on the blocks, they were level.  The new hives were set in place and frames removed to make room for the five frames from the nucs.  All that was left was to remove the frames from the nucs and put them into the new hives.

Byron transferring frames
This went really fast since I wasn't really focused on inspecting every frame.  But I did notice a number of queen cups and what looked to be a torn open queen cell on one of the frames.

Queen cups
I did not spot the queen during the transfer of these five frames.  It is quite possible that they actually swarmed....taking my new purchased queen with them.  She should have been easy to spot since she was marked.  I'll need to check this one closely next time and see if I can spot the marked queen or if they requeened themselves.  If they did swarm there isn't much hope for that swarm to establish and overwinter this late in the year.

After we finished moving the frames over, the inner cover went on and a jar of sugar syrup went on top of that to feed them.  This should give them the sugar they need to draw out the empty frames in the new hive.

The second nuc went just as quickly.  Thankfully this time I was able to spot the queen and there were no queen cups to be found on any of these frames.  Can you find her in the picture below?
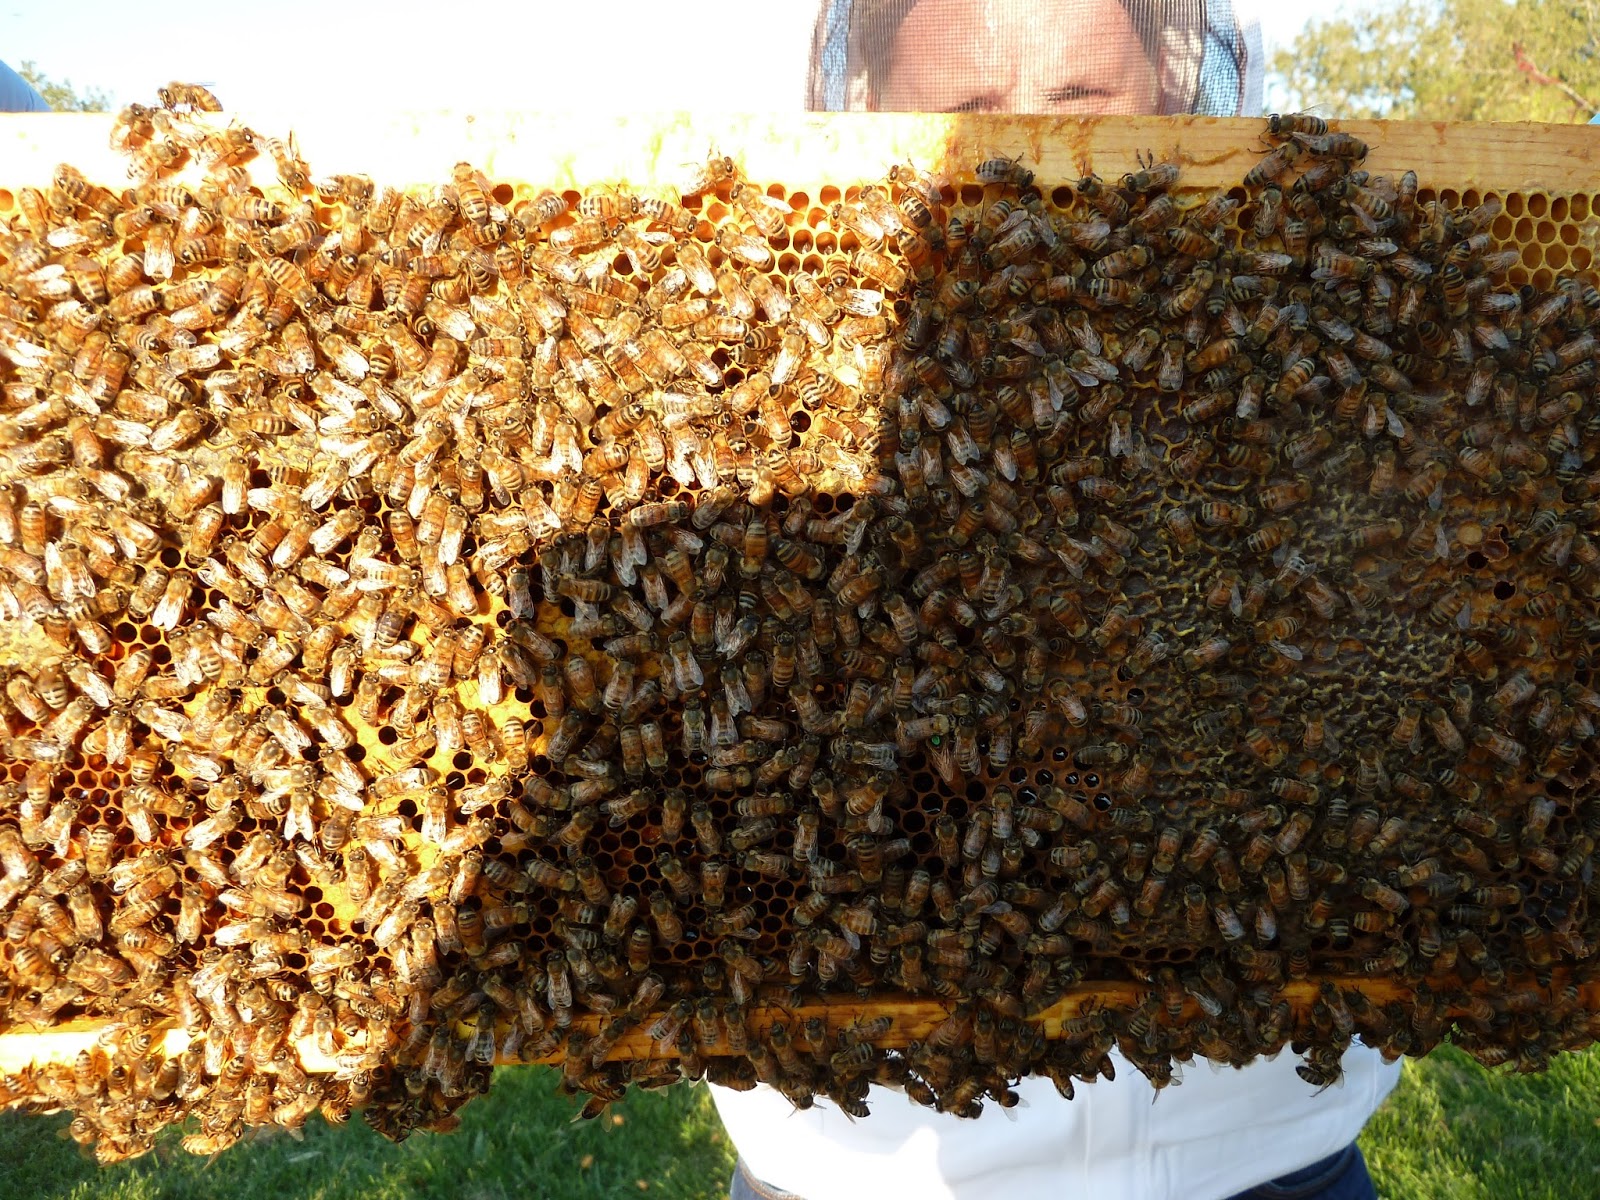
Spot the queen with the green dot on her back!
The were some really nice frames in both nuc hives with plenty of honey and pollen.  Hopefully they have the resources to increase their populations and expand like crazy!

Drawn frame with honey and capped brood
Cutout Hive:

We opened up the cutout hive and checked to see how many of the existing frames had been drawn out.  I was a little bummed to see that they only had about 7 of the frames drawn.  I thought for sure with all the Goldenrod blooming around my house that they would have tons of nectar to make wax and honey.  Maybe these bees don't like the smell of sweaty gym socks because that is what Goldenrod nectar smells like!

I decided to add the fourth box to the hive and put a sugar syrup feeder on as well.  Go bees go!

Green Hive:

A quick look into the top honey super on this hive did not give me what I wanted.  The entire super had only one frame with any honey in it and a number of the frames were still undrawn.  Looks like no honey for harvest this year.  The second honey super wasn't much better.  That box was given all drawn frames and there were only a few frames with any honey or nectar in them at all.  I'll probably have to combine the best frames from the two honey supers into one box and feed this hive too.

White Hive:

This hive has one honey super on it and I expected to see the same lack of use.  I was so glad to be wrong!!  The bees had this super completely filled and capped.  Since this hive was the only one that wasn't requeened this year, I wonder if that is why they were able to make a surplus.  I know of a beekeeper's saying that may explain this - "You can make honey or bees but not both".

What's Next:

I will check the hives in a week to see how much of the feed they consumed and how many of the frames they are building up. 

Until next time, thanks for reading!!

Thursday, April 30, 2015

New Beeginnings: 2015-04-30

B-Day has finally arrived!! 

Over the last week I had been cleaning out the hive that had died over the winter so that it would be ready for the new bees.  The lucky new arrivals would be taking advantage of the hard work of the bees from the previous year.  I'm sure the new bees would be happy to see the frames of honey, pollen and bee bread waiting for them instead of a bunch of empty frames.

My friend Keith was getting a package of bees this year so we made the quick run to pick up the new packages of bees.  The packages looked really nice and had very few dead bees on the bottom.  The package seller even slammed the packages on the ground to knock the bees down so we could make sure the queen was alive in her cage.  I went over to Keith's house and helped him install his package into his Top Bar hive.  It went very quickly and I was soon home and ready to install my two packages.

White Hive:

This hive has the Honey Supercell frames in it.  These are the fully formed, small-cell, plastic frames.  So after removing some frames to make room, I popped open the package, pulled the queen cage, put it between the frames, slammed the package on the ground and dumped the bees in.  I've stopped worrying about spraying them with sugar water or putting the lid back on the package after I've pulled the can of sugar syrup out or which end of the queen cage should be up or down.  A lot of wasted effort I think.

Green Hive:

This hive has mostly foundationless frames.  A majority of them have drawn comb with lots of honey.  The problem with these frames is that the honey was put into large bulges of comb that extended well past the width of the frame.  So after I removed the frames and dumped the bees in, I used my uncapping knife to saw the comb even with the frame.  Of course this made honey ooze out all over the place but I figured the bees would be eager to clean it up.

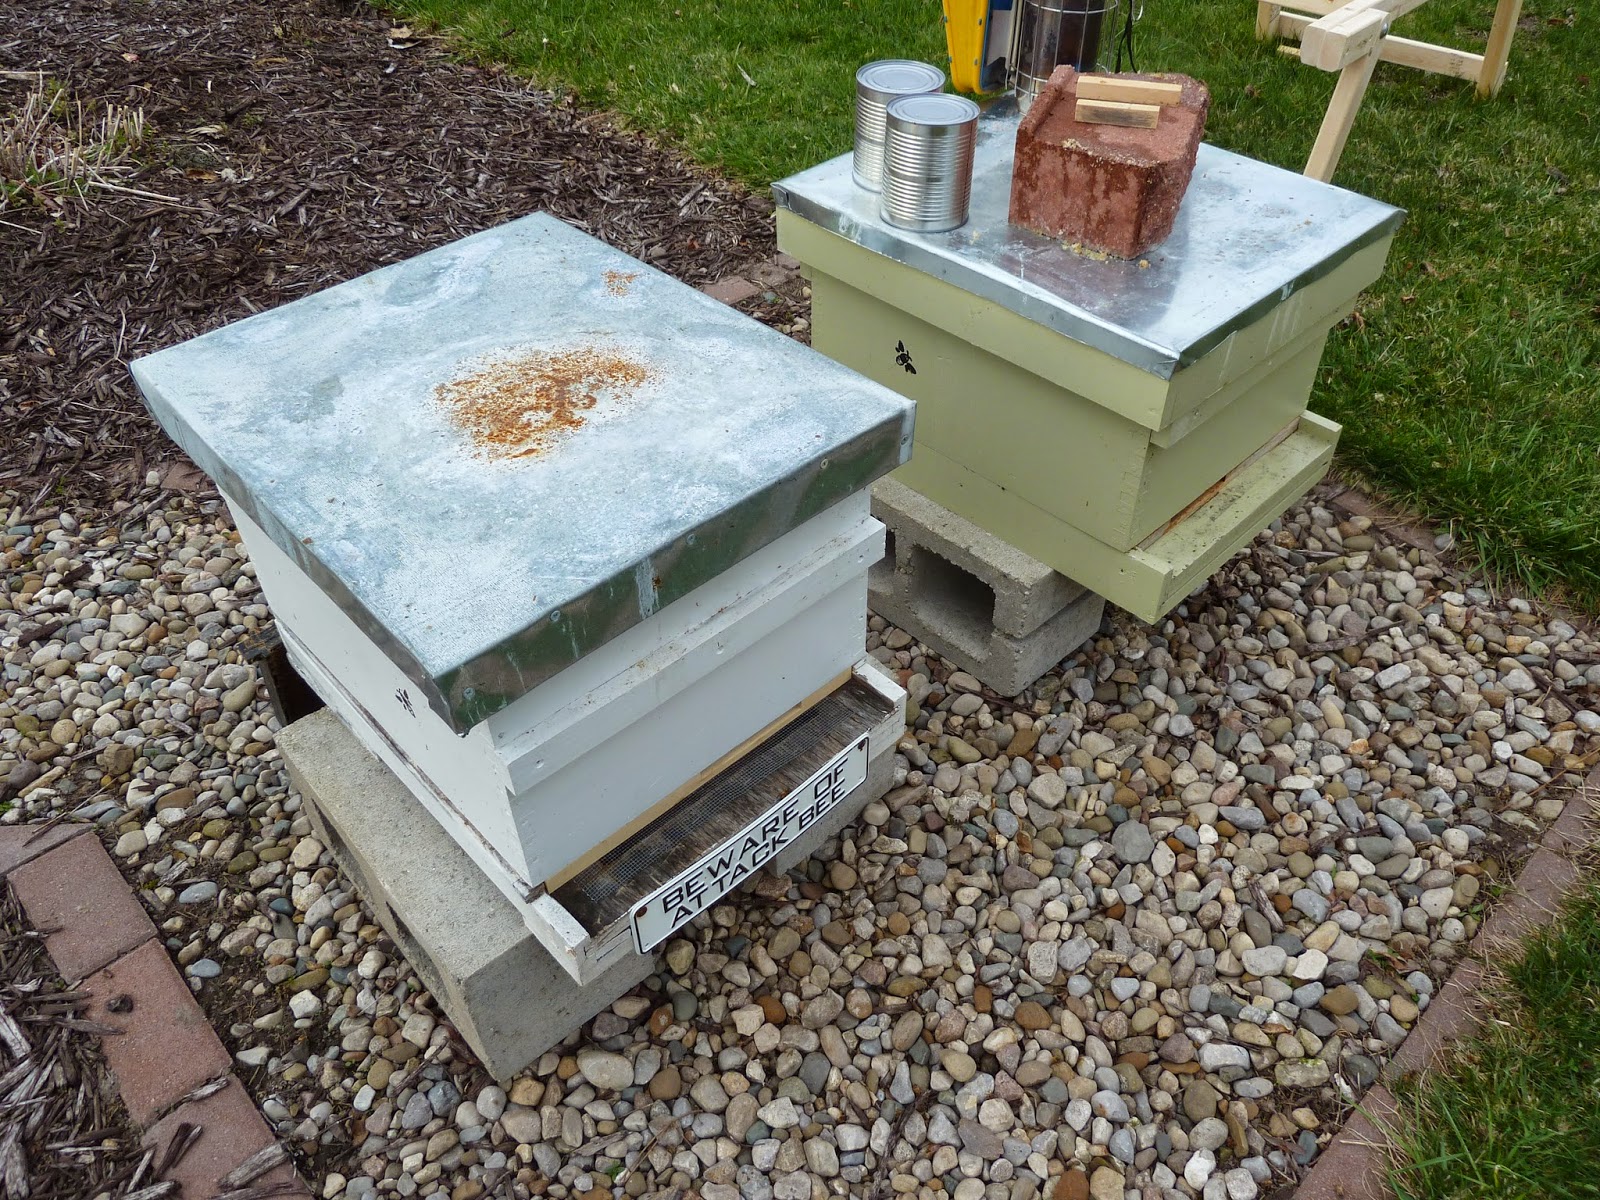
Beware of Attack Bee

Queen Release:

After three days I went out to make sure the queens had been released from their cages.  When I pulled the cages the sugar plugs were almost completely eaten away!  After I removed the queen cages I also had to remove all the comb that the bees had built in the extra space that the queen cage was occupying.


A few swipes with the hive tool and the excess comb was removed.  Before adding the frames back in, I took a look for the queen and spotted her quickly.

Can you see the queen in the middle of this picture?
Everything looked great and I closed up White Hive.

Green Hive went very smoothly as well.  Move the frames apart, pull the queen cage, check some frames for the queen (no luck spotting her this time) and push the frames back together.  Done.

Plastic tab attached to the queen cage

 Everything is now good to go for the 2015 bee season!

Next inspection in about a week so that I can make sure the queens are laying eggs.  Until then, thanks for reading!

Wednesday, December 10, 2014

Winer Prep: 2014-11-28

I'm trying a few new things to prepare the hive for Winter this year.  Ideally I would have two hives of similar strength and try something new on one hive and not the other.  Then I could compare the results in the Spring and see if it made any difference.  Not exactly a complete scientific study, but it would be a start.  Alas, I only have the combined Green/White hive to overwinter this year, so it is all or nothing. 

The first thing I am trying is adding wood shavings to the ventilation board on top of the hive. 

Vent board.  Notice the propolis on the edges and center of the screen
During the Winter, the bees generate heat to keep the cluster warm.  That warm, moist air rises in the hive and when it hits the inner cover can possible condense.  This water can eventually build up and drip back down on the bees.  Not good.  Bees don't have too much trouble handling the cold.  But if they are cold AND wet, it is a death sentence.  So, the idea is that the warm moist air rises up through the hole in the inner cover and then through the wood shavings in the ventilation board.  If it does condense at all, the wood shavings absorb the moisture and it cannot drip back down on the bees.  I think the loose wood shavings also allow for some air circulation from the bottom of the hive without creating some sort of wind tunnel.

Wood shavings added
The second thing I am trying is using a Winter wrap on the hive. 

I put velcro on the wraps to attach them
In the past I used a wind break to keep most of the wind chill off the hives.  They were big, bulky and heavy sheets of plywood that I would stake into the ground.  I would then have to put braces on them so they wouldn't blow over.  Way too much of a pain.  My thought on the Winter wrap is that it would serve the same purpose as a wind break and be much easier to use and store.  From all that I have read, the opinions really go back and forth on the benefit of using them.  They do help to block the wind for sure but they also may block the solar radiation on a nice sunny day from warming the hive.  Even though they are made of black plastic that would absorb some sun, there is a very thin layer of foam on the back side of the plastic.  I think that would prevent the warmth from actually reaching the hive.  Any heat transfer experts out there that can weigh in on this?  I know of others who staple black tar paper directly to their hives.  That may actually allow the heat to transfer into the hive enough for the bees to move around and get to other sources of honey.  I really wish I had my Arduino hive monitor running so I could see the temp difference from outside and inside the hive on a sunny day!  Maybe next year.

All tucked in for Winter
The last thing I did (which is no different than previous years) is to take the entrance reducer off and put the mouse guard on.

I have also gone out to the hive about once a week and used my J-Hook style hive tool to scoop out the dead bees from the bottom of the hive. 

Bring out yer dead!  (And look out for the 1 attack bee)
You don't want so many dead bees to build up on the bottom that they can no longer get out of the hive.  What has really amazed me is that I am still seeing drones!!  I really thought that every last drone would have been expelled from the hive two months ago!

So far, December has been mild.  Cold, but not horrible.  The end of this week is suppose to reach 40 degrees F.  I'll take it!  All I can really hope for is that this Winter isn't as bad as last Winter.  Waiting is the hardest part  =)

Until next time, thanks for reading!

Monday, May 12, 2014

Hail Hail The Girls Are Here! : 2014-05-11

Let the 2014 beekeeping season begin!  Nothing like installing new packages of bees to remove a bit of the frustration from loosing the previous hives.  The new bees should have an even better start since I'm now able to use honey and drawn comb from the old hives.  No need to feed sugar this time!

Packages of bees waiting for their new home

Green and White hive were set up to make their encore performances.  I made a slight change this year and oriented them so they both face the same direction next to each other.

Ready to install
White hive is fitted with my fully drawn plastic Honey Supercell Frames.  Green Hive is starting with a number of drawn foundationless frames and a few that are empty foundationless frames.  My first year installing packages I sprayed them down with sugar water to keep the bees occupied with eating the sugar and it also serves to help clump them together.  This year with a little more experience under my belt and also from reading more from Michael Bush  http://www.bushfarms.com/beespackages.htm I decided not to do this and as my friend Scott says.......Release the Kraken!!  I removed the feeding can and the queen cage and after removing a few frames from the hive, I slammed the box on the ground and dumped the bees right in there!  I replaced the frames, removed the cork from the queen cages and wedged the queen cages between the frames.  I no time at all I had two newly installed hives.

Packages installed
I'm now praying for a fantastic 2014 season!  In a few days I will go back and make sure the queens have been released from their cages.  If not, I will then release them myself.  Next project after that is to turn one of the hives into my Arduino based smart hive!!  More on that when the time comes.  Until then, thanks for reading!