Showing posts with label Queen. Show all posts

Thursday, August 13, 2015

2015-08-10: Back In The Game

After my rather dramatic post last time, I just couldn't wait anymore and had to get out to see the bees.  I armed myself with some Benadryl, my EpiPen and my friend Keith and headed out to do some inspections!  I actually donned the FULL bee suit as well, which I haven't worn since I did the shed cut-out.  Dang is that thing hot!  My goals were to check and see if the cut-out hive had successfully re-queened themselves and to check the nuc hives to see how they were doing with the new queens in them.

Cut-Out Hive / Yellow Hive:

I had Keith do all the work and I just barked orders the entire time.  Thankfully Keith is a really good sport and was happy to help me out.  He removed the cover, took off the extra boxes that were covering the honey feeder and got into the first box.  The bees were pretty sparse here and there were only a few frames with any wax drawn at all.  And even those frames only had a few spots on them with any wax.  That box came off and we were into the next box.  Slightly more wax built out in this box but about half the frames were still untouched.  Finally after getting to the last three frames we were able to see some good drawn frames.

Plastic Frames being filled
About 3/4 of the frame was drawn and there was some capped honey and some nice pollen in the cells.  The next frame was very similar and I was able to spot some larva scattered here and there.  This was the first good sign that a queen was present.  We grabbed the last frame and look who we spotted!

Cut Out has a new Queen!
She's a beauty!  Look at how dark she is.  She definitely has some non-Italian genetics in her.  I'm hoping she has "Winter Survivor" written all over her!  I followed her around with the camera for a bit and if you zoom in on this photo you can see she has eggs in every cell.  Good job!

New Queen and Eggs
At this point I really didn't need to go into the last box since I know they were able to re-queen themselves.  I had Keith take a few frames from the top box that had some wax on them and swap them with some of the frames that had no wax on them.  Then we removed the top box entirely.  They have a lot of wax to draw still and they don't really need that extra space to police.  I also decided that since there weren't really a lot of bees in the hive that I would put the entrance reducer on.  We are probably due for a nectar dearth and I don't want the strong neighboring hives to bust in and rob this hive out.  I'll probably make up some syrup to feed them and this should get them to draw out some more wax.  I need them to fill out three medium boxes before Winter sets in.

Speaking of Winter, I see the Goldenrod starting to bloom in my area.  That always signals the approach of Fall.  Many of my late blooming flowers are also in full bloom.

Coneflowers in bloom
Green Nuc:

Since my Nuc hives only have 5 frames, it makes them really quick and easy to check.  Most of the honey frames that I put in are still full.  They have eaten a little bit and replaced it with pollen which is a good thing.  Two frames in and we hit the first solid brood frame.  The new queen looks like she is settling in nicely!

Solid brood pattern
The very next frame over I was able to spot her majesty.  The green dot on her back makes it a little too easy to spot her.

Queenie
This hive is doing pretty well with two frames of brood front and back and two frames of honey and pollen.  The one empty frame I had given them sadly remained empty.  They had a few blobs of comb ridges created but I didn't care too much for them.  I had Keith scrape some it off the frame.  I'm hoping when all these sealed brood start hatching out that there will be a lot of new bees that will be primed to start drawing wax.  I need to get busy building some boxes so I can move these nucs into full sized hives soon.

Yellow Nuc:

Very similar to the Green Nuc.  Two honey frames that the bees had eaten a little from and replaced with either pollen or more nectar.  Two pretty solid frames of capped brood.

Capped brood on Honey Super Cell plastic frames
This hive seemed to be much more interested in drawing some comb on the new plastic frames though.

New comb and brood
Since this was a medium sized frame that I placed into a deep sized box, the bees have drawn comb off the bottom of the frame to fill in the space.  Bees are sure efficient!

On the opposite side of this frame they decided to draw a few of the same ridges I described in the last nuc.  At least they've drawn plenty of normal looking comb too.

Comb ridges
I'm wondering if they were just stealing wax from one part of the comb to make this instead of drawing new wax? 

We spotted the queen on the next frame and that was the last thing I needed to see.  This was a very successful inspection.

Next Steps:

I plan on making some 1:1 sugar syrup to feed to the hives trying to draw new wax.  I need to get the full sized boxes ready to move the nucs into.  I also need to give Green Hive a check to see how much of the two honey supers they have filled and also to see if the new queen is doing alright in there as well.  I'd also like to do some Varroa monitoring with a powdered sugar shake.  That sounds like a lot to do and we are already half way through August!

As always, thanks for reading!

Thursday, July 16, 2015

2015-07-15: Cut Out Hive and New Queens!

I've finally accomplished two of the goals I set for this year: split my hives and get some better genetics with some Michigan raised "survivor" queens!  I learned about the Northern Bee Network at the Michigan Beekeepers conference in the Spring, so I went through their list of Queen breeders and found one that followed practices I conform to.  I placed an order for three queens and on Wednesday morning I received a phone call at 6 AM from the post office telling me to come get my bees.

Three Queens
The Splits:

The basic concept of how I was going to do my splits was to select two frames of open/capped brood and two frames of honey/pollen from the donor hive and place them into the 5 frame nuc box.  The remaining frame would be an empty frame with plastic foundation with the new queen cage on it.  Key number one is making sure you don't accidentally transfer your existing queen into the new hive!

I began in Green Hive by quickly scanning a few frames in the honey supers just to see how they were doing.  Almost every frame of foundation was drawn and filled with nectar.  They are doing great!  I then removed the two honey supers and started going through the brood boxes.  The first few frames on the outside were solid honey.  After I made a few adjustments to the bulges in the comb, I transferred them to the nuc box.  Two honey frames done.  Now to find the brood frames and the queen.  Next few frames had some eggs and a lot of honey so I didn't take them.  Frame five had some nice capped brood, so I meticulously studied it looking for the queen.  Flipped the frame over and looked for her again.  Back and forth two more times after that and I was satisfied she wasn't there.  I walked over to put it into the nuc and checked it one more time.  In it went.  Frame number six was another good brood frame.  Looking....looking....flip....looking....bam!  There she is hiding in the gap between the frame and the comb.  Each time I flipped the frame she'd run back to the other side.  Sneaky!  I took a queen marking cup my wife had bought for me and scooped her up into it and set her off to the side (more on this later).

Queen in the marking cup
I took this frame and into the nuc it went.  I pulled out the first queen cage and the queen looked alive and well inside.  I then noticed it had a piece duct tape over the end.

Queen cage
I assumed the duct tape was to prevent the candy from being eaten by the bees during shipment, but since the end is stuck down into a hole in the shipping cage, I'm not really sure how they would get to it.  Anyway, I removed the tape, exposed the candy and wedged the cage in between two of the frames.  First nuc complete!  I took another one of the queen cages and put her into the donor hive and closed it up.

First nuc complete
The second nuc was a bit more difficult.  After pulling off the honey super I went through the entire first brood box and only found one good frame of honey and one good frame of brood.  I did spot the queen and made sure that frame was out of the way.  I had to go into the bottom box to look for two more frames.  Generally I don't really go into the bottom box unless I really have to.  You always end up crushing some bees when moving boxes around and they are also really heavy!  Thankfully I pulled the first frame in the bottom box and it was solid honey.  Into the nuc with you!  The next frame was a fantastic brood frame!  Nuc #2 was complete with the added plastic frame and queen cage.  I replaced the frames from the donor hive with the same empty plastic frames and put the boxes back together.

This all sounds pretty simple but all told it took about 3.5 hours!

Requeening:

Remember that queen I had removed and put into the marking cup?  Well, the reason I removed her from the hive was because I was noticing many signs from this hive of what I think is Chronic Bee Paralysis Virus. The characteristic symptoms are bees with a greasy black shiny appearance, trembling bees unable to fly, clusters of bees walking on the ground and healthy bees trying to drag the sick bees out of the hive.  I was able to spot all of these symptoms.

Sick "greasy" looking bee
Clusters of bees walking on the ground
Sick bees being dragged out
This disease is typically vectored in from the dreaded Varroa mite.  I haven't done mite counts yet this year but when I do I wouldn't be surprised to see a higher count in this hive.  Since they don't have treatments for this disease, the recommendation is to requeen the hive.  This will give some new genetics that hopefully won't be as susceptible to the disease, as well as giving a break in the brood cycle while the new queen is being released and eventually begins to lay eggs.  The break in the bee's brood cycle also gives a break to the Varroa mite's cycle as well since they only reproduce in capped brood.

So as far as requeening goes, putting a new queen into the hive is one thing.  Removing the old queen is another.  And dispatching the old queen yet another.  Is it sad that I was getting all worked up over having to kill the old queen?  Well, I couldn't get myself to just "pinch" her.  Since you can make a swarm lure by soaking dead queens in alcohol, I though about just tossing her into a jar of alcohol.  But the thought of drowning freaks me out so I couldn't do that either.  I finally decided to put her in the refrigerator.  If it is anything like dying from hypothermia, then slowly "going to sleep" from the cold might not be such a bad way to go.  I hope it works that way anyway!  Green Hive queen is dead.  Long live the new queen!

Cut Out Hive:

 The bees from the cut out seem to be settling into their new home, Yellow Hive.  I have fed them two mason jars filled with honey so far to make up for all the honey I stole from them during the cut out.  I found the girls have done a really good job of attaching the combs rubber banded into the frames.  And they've started to chew through the rubber bands as well.

Cut out comb
 There are plenty of larva on the frames as well as nectar and pollen so that is a good sign.  The not so great sign is that I did NOT get the queen.  Here is the evidence:

Emergency Queen cells
I spotted numerous capped and uncapped emergency queen cells across a number of frames.  Probably around 8 in total.  The good thing is that at least they had some viable larva that they could start turning into queens.  I had thought about ordering another queen to place into this hive but since they already have some capped cells, I decided to let them raise their own queen.  A capped queen cell should emerge in about 8 days from now.  Twelve days after that (assuming she has good weather for her mating flights and doesn't get eaten by a bird) she should be laying eggs.  So, sometime in mid August Yellow Hive should be back in action again!


Next Steps:

I'll be checking the hives to make sure the new queens have been released in a few days.  After that I will do another full inspection to make sure there are new eggs and larva.  I'll plan on doing some mite sampling at that time as well.

Until then.......thanks for reading!

Thursday, April 30, 2015

New Beeginnings: 2015-04-30

B-Day has finally arrived!! 

Over the last week I had been cleaning out the hive that had died over the winter so that it would be ready for the new bees.  The lucky new arrivals would be taking advantage of the hard work of the bees from the previous year.  I'm sure the new bees would be happy to see the frames of honey, pollen and bee bread waiting for them instead of a bunch of empty frames.

My friend Keith was getting a package of bees this year so we made the quick run to pick up the new packages of bees.  The packages looked really nice and had very few dead bees on the bottom.  The package seller even slammed the packages on the ground to knock the bees down so we could make sure the queen was alive in her cage.  I went over to Keith's house and helped him install his package into his Top Bar hive.  It went very quickly and I was soon home and ready to install my two packages.

White Hive:

This hive has the Honey Supercell frames in it.  These are the fully formed, small-cell, plastic frames.  So after removing some frames to make room, I popped open the package, pulled the queen cage, put it between the frames, slammed the package on the ground and dumped the bees in.  I've stopped worrying about spraying them with sugar water or putting the lid back on the package after I've pulled the can of sugar syrup out or which end of the queen cage should be up or down.  A lot of wasted effort I think.

Green Hive:

This hive has mostly foundationless frames.  A majority of them have drawn comb with lots of honey.  The problem with these frames is that the honey was put into large bulges of comb that extended well past the width of the frame.  So after I removed the frames and dumped the bees in, I used my uncapping knife to saw the comb even with the frame.  Of course this made honey ooze out all over the place but I figured the bees would be eager to clean it up.

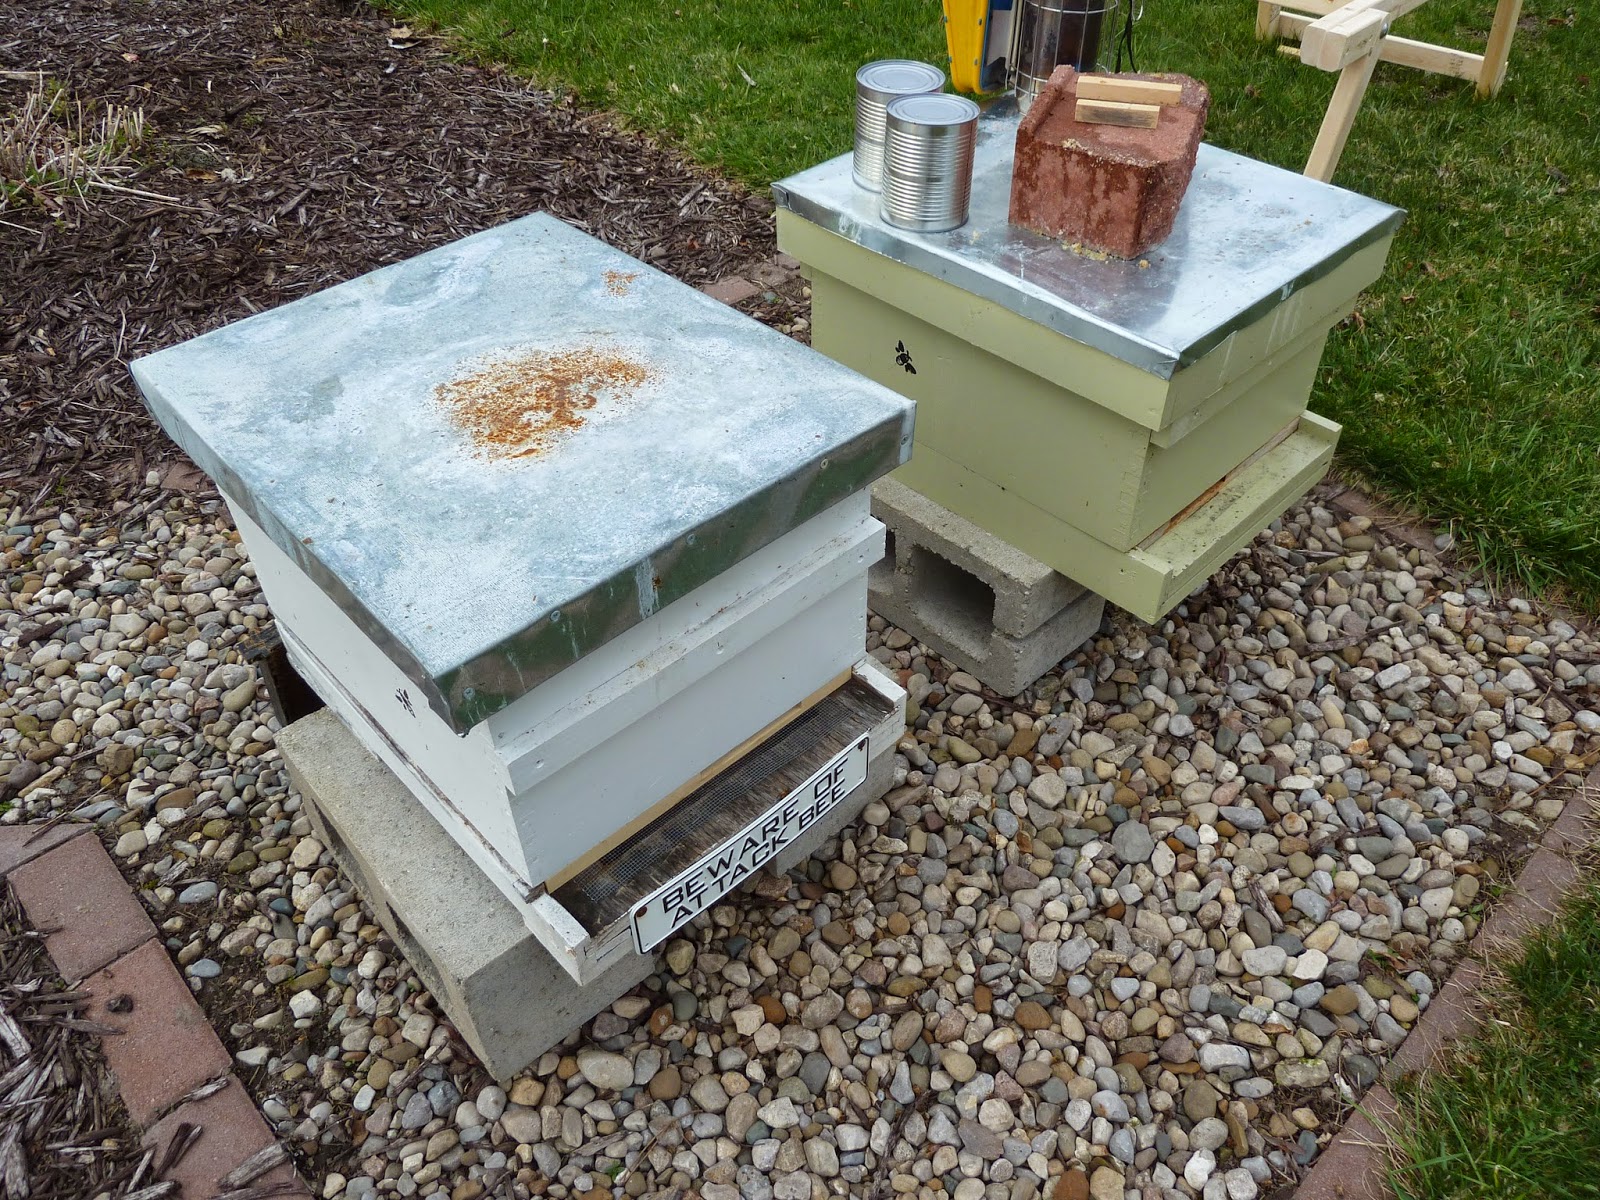
Beware of Attack Bee

Queen Release:

After three days I went out to make sure the queens had been released from their cages.  When I pulled the cages the sugar plugs were almost completely eaten away!  After I removed the queen cages I also had to remove all the comb that the bees had built in the extra space that the queen cage was occupying.


A few swipes with the hive tool and the excess comb was removed.  Before adding the frames back in, I took a look for the queen and spotted her quickly.

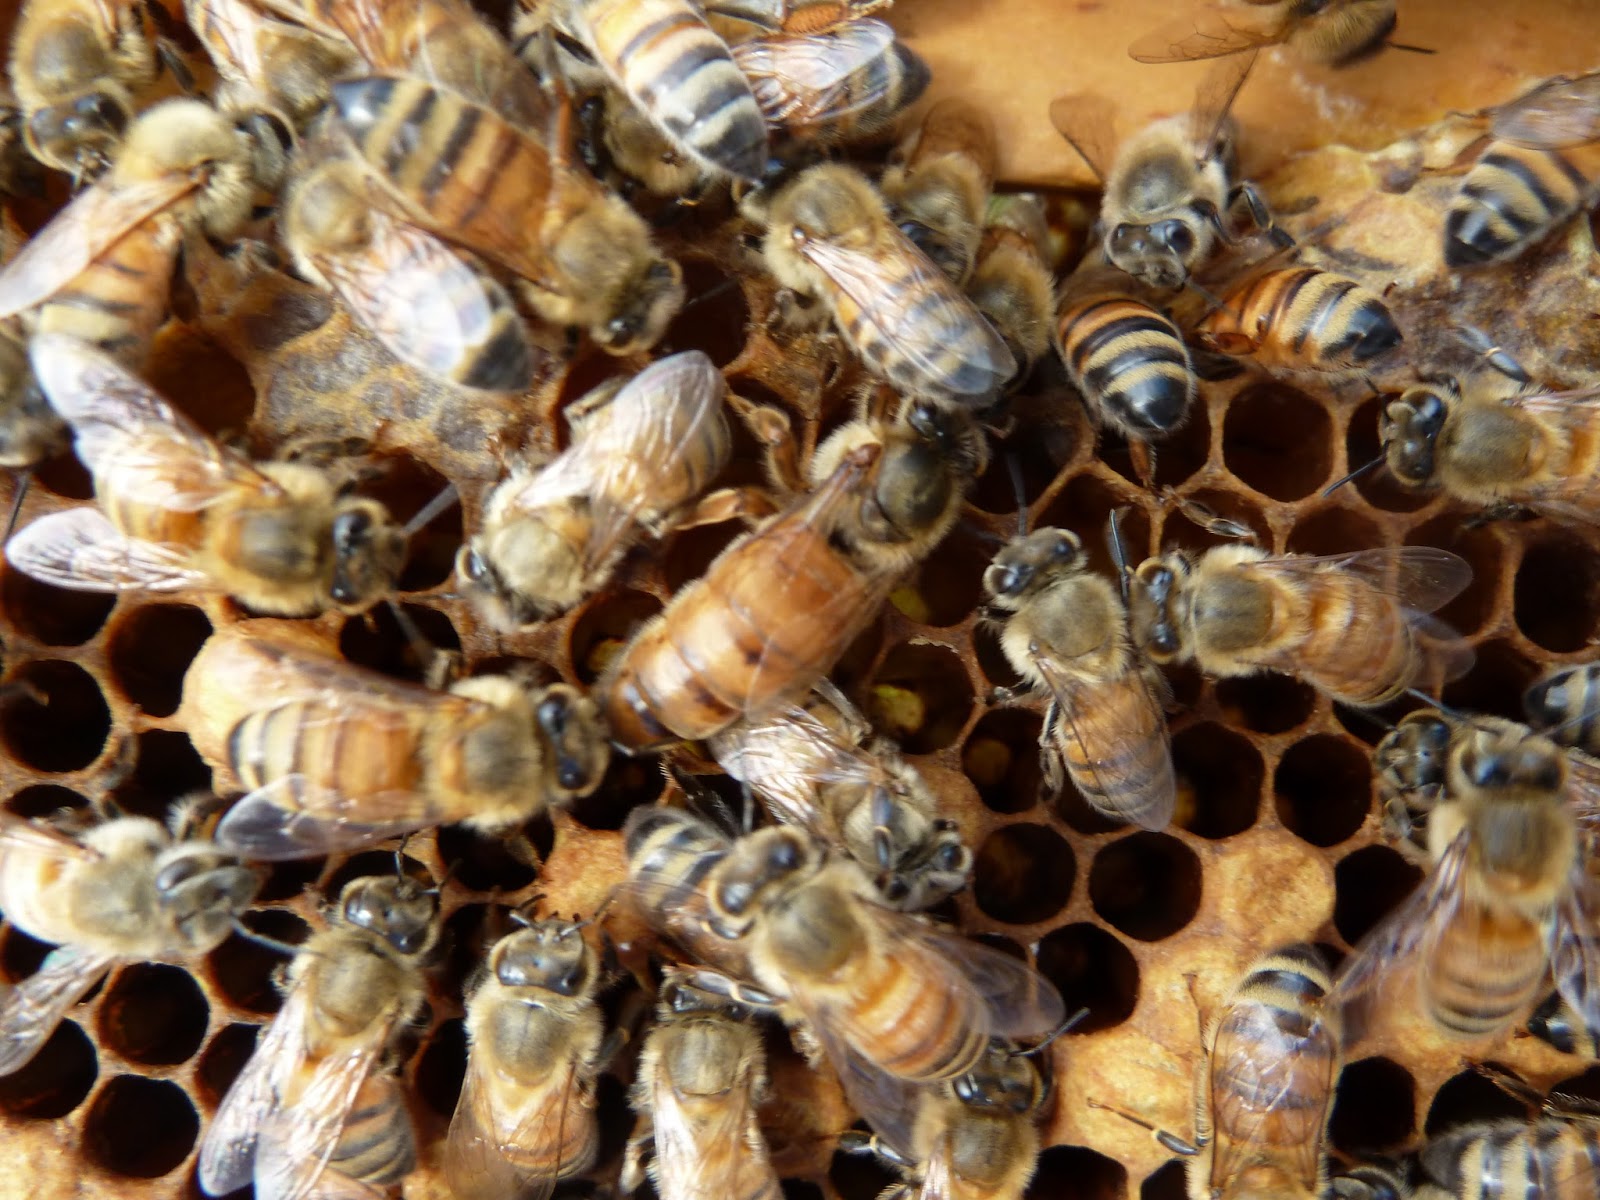
Can you see the queen in the middle of this picture?
Everything looked great and I closed up White Hive.

Green Hive went very smoothly as well.  Move the frames apart, pull the queen cage, check some frames for the queen (no luck spotting her this time) and push the frames back together.  Done.

Plastic tab attached to the queen cage

 Everything is now good to go for the 2015 bee season!

Next inspection in about a week so that I can make sure the queens are laying eggs.  Until then, thanks for reading!

Friday, June 27, 2014

Guest Beekeeper : 2014-06-25

One of the fun things about beekeeping for me is teaching others about bees.  I have found many seemingly willing students.  Or at least ones that feign interest while I blab on and on about the bees.  I have also tried to get as many of these people as possible into the beehives.  For this inspection, I was fortunate enough to have Byron be my guest beekeeper.  It sure doesn't hurt to have an extra set of hands either!


My main concern for this inspection was to make sure the bees hadn't run out of room, since each hive consisted of only one box.  At this point they should be covering most of the frames and be ready for a second box to be added.  I was also hoping I hadn't waited too long and they weren't preparing to swarm!

Green Hive:

I took my time going through this hive since I wanted to be able to show Byron all the facets of beekeeping.  How to separate and manipulate the frames.  How to use the smoker and hive tool.  And what to look for in the hive: nectar, pollen, honey, eggs, larvae, capped cells, workers, drones and the queen.  The bees had just started to draw wax on the first two frames in the hive so I was able to show him how they create the wax in an empty frame.  He was also able to see the festooning behavior of the bees as they constructed the new wax comb.  The queen in this hive remained elusive and we did not spot her.  Although we did see some eggs and very young lava so she was there somewhere.  A second deep box of empty frames is now on this hive.  I have a feeling I should have used a technique called pyramiding to encourage them to move into the new box.  If they haven't done so by the next inspection I will make it so.

White Hive:

This hive had a second box added with some frames from the hive that died this past winter.  Some were empty brood frames and some were filled with honey.  Since this hive appears stronger, the bees were already working these frames.  After going through these I let Byron take over the inspection.  I'm sure it was his observation of my fantastic abilities that allowed him to jump right in like a pro!!  LOL

Byron inspecting the hive
The queen in this hive seems incredible to me.  She has solid brood patters across almost every single frame.  This hive will sure need the room in that second box!

Lots of brood
Even more brood
I never get tired of seeing new bees being born and emerging from their cells.  This inspection was no disappointment when we spotted 3 drones being born at the same time!

Welcome to the hive boys

After Byron had pulled 8 frames I thought for sure I was going to strikeout in showing him the queen.  But when we pulled frame 9 there she was!

Smile Queeny!
After watching her run around for a bit, we completed the inspection and closed up the box.

All in all, both hives are doing well and it was a great evening for an inspection.  Next inspection I will hopefully see that the queens have moved up into the second box and started laying eggs there.  I'm also planning on creating one or two nucleus hives and buying a "northern" queens to put in them.  At worst, this will allow me to have some backup hives in case one of the hives fails.  At best they will become fully established hives with better genetics for surviving these horrible Michigan winters!

Until next time, thanks for reading!

Monday, June 2, 2014

First Inspection of the year : 2014-06-01

Twenty one days since I installed my two packages and I finally opened the hives up to take a look.  I should have done so much sooner but it sure seems like everything needs to be done all at the same time during the late spring.  It is always exciting to dive in and see what the girls have decided to do inside the hive despite the guidance the beekeeper has given them!  Bees don't read beekeeping books to figure out what they are suppose to do  =)

Green Hive:

The one nice thing about the inspections early in the year is that there aren't as many bees as there are during summer.  It makes it much easier to pull frames and move things around when there aren't bees covering everything.  You also don't need to use as much smoke since a few puffs can easily get most of the bees to move.  I was able to pull the first three frames quickly since the bees hadn't even touched them.  They are foundationless frames, so they are completely empty and the bees haven't thought about drawing out new comb on them yet.  I reached frame 4 and I could see the beginning of the honey and pollen storage. 

First inspection of Green Hive

Frame 5 had more pollen and honey and frame 6 was the first brood frame.  Interesting pattern on this frame with bits of pollen scattered among the brood cells.  About a third of the frame (on the right side of the photo) was all drone brood.

Brood frame

A little spotty so far but not something I'm too concerned about at this point.  It can be common in new queens.  I'm happy the queen is raising brood and she is fertile enough to have worker brood.  Next frame over was almost identical with drone on one side and worker brood on the other.  I spotted a queen cup but it was empty.  It is not uncommon to see queen cups.  The bees like to make them just in case they need them.  Frame 8 had some new, white comb drawn by the bees and they were starting to bridge it over into the next frame.  This is one of the struggles of letting the bees build their own comb.  They don't always build it in perfectly straight sections.  I cut some of the comb out and mashed some more together to try and make it straight.  I also swapped frame 9 with 8 in the hopes that they would make the small amount of comb there straight.  The last frame was empty. 

I did not spot the queen and I didn't specifically see any eggs but they seem to be going along pretty well.  As long as I see some new larva during my next inspection, I'll know the queen is still there.

So, besides doing my first inspection on Green Hive, I was also ready to deploy my Smart Hive Arduino system I have been working on.  It was a bit of a pain to run the one sensor through the inner cover without having someone to hold it but I was able to position it between frame 5 and 6.  Now I can only hope the bees don't chew through the wire insulation or decide to build bridge comb all around it and make a mess.  The second sensor goes out the side vent hole to measure the outside temp and humidity.  The third sensor rests near the Arduino in the vent board.

Arduino deployment

I'm looking forward to posting the first data points in my next blog entry!!

White Hive:

 The frames in the White Hive are fully drawn out plastic Honey Super Cell frames.  They fit much tighter in the box than the wooden frames in Green Hive do.  I have a "J-Hook" hive tool and it really helps to pull that first frame out.  A few bees danced across the frame I removed and I began to pull the second frame out.  For some reason, I did a mental double take and picked the first frame back off the ground where I had set it.  My eyes popped open when I realize there was the queen!!!  Running around on the frame with only a handful of other bees there!  Very unusual since the queen usually has a group of bees around her taking care of her needs at all time.  I quickly picked the frame up and hovered it back over the middle of the hive until I saw her walk off the frame and back down into the box.  That could have been bad if she had walked off into the grass or dirt somewhere!

The next two frames were empty like the first but on frame 4 I found the first scattering of brood.

Drone comb on plastic frames

On the bottom of this frame you can see that the bees decided to build some comb off of the bottom of the plastic frame.  Since the bees cannot enlarge the plastic cells, they have to build spots of comb with cells large enough for the queen to lay drones in. The next frame had a little brood on it and some nice colored pollen in the upper cells........plus the queen I almost squashed earlier!

Hi queenie!
Can you spot the queen the frame?  Starting from the middle bottom, about a third of the way up, just a bit to the right of center she sits in all her glory.  I pulled the next frame and was pleased to see it was solid brood!  A really nice pattern with very few cells still empty.  To my surprise, the next two frames were packed with brood too!  Wow!!  This queen is really a good egg layer.  I pulled frame 9 and it looked almost entirely empty until I held it up with the sun at my back.  When the light revealed the bottom of the cells, they were filled with tiny eggs.  This hive is going to be booming in a short period of time with this queen!

It is looking like a nice start to the 2014 beekeeping season.  The first new bees should start hatching any day now so the currently diminishing population of bees will make a nice turn the other direction building up to the hive's peak population in the summer.

Until the next inspection report, thanks for reading!


Thursday, September 5, 2013

Performance Anxiety: 09-02-2013

White Hive has been closed up and left alone since the last inspection on 8/6, almost a full month ago.  The last few times I walked by the hive I have seen an ever increasing number of bees flying in and out so my hope is that the new queen is performing well!  Knowing that there were larva and eggs during the last inspection, there should have been plenty of bees that have been born since.  Going back to our trusty "bee math", an egg laid today will hatch into a worker bee in 21 days.  It has now been ~25 days and since a queen can lay around 2000 eggs in a day, that is a lot of new bees!  Well, what is suppose to be and what is are two different things.  The only way to see for sure it to open it up.

I had some help with the inspection this time when my friend Casey came over to give me a hand.  It is always beneficial to have an extra set of hands to hold frames, take pictures, use the smoker, etc.  Plus, I love teaching others about bees.  Especially when they are as excited as I am about them!

If you recall from the last inspection, I had added a second brood chamber onto White Hive.  Now it consists of two brood chambers and one honey super.  Since the second brood chamber was totally empty, I eagerly checked to see if the bees had begun to use it.  When I opened it up, the bees were covering 5 frames in the center of the box.  That is a pretty good sign right away.  I only moved in about 3 frames and spotted the queen on a frame of mostly capped brood!


Awesome!!  It is great to be able to spot the queen but even better when you get to show someone else!  I also noticed quite a few grey colored, slightly shriveled looking, fuzzy bees.  I believe those are the bees that have recently hatched.  They take a few days for their exoskeleton to harden and then they begin their first duties.  It usually takes around 22 days before a bee even leaves the hive for the first time!

Want to learn more?  Check out these links:
Honey Bee Jobs
Worker Bee Activities

If you ever see a honey bee buzzing around one of your flowers, you know they are an "old" bee!  Sometimes you can even see that the tips of their wings look shredded.  A honey bee pretty much works herself to death during her 6 week summer life span.

Back to the inspection: After finding the queen I did find a few more frames there were almost completely SOLID brood!  This is a great sign as she is doing her job and laying eggs and making more bees.  It is really important that they are producing strong numbers this late in the summer since a lot of these bees will be the ones that begin the winter cluster.  More bees = more warmth during the winter!

This early in the inspection I have seen pretty much everything I needed to.  The rest of the time I used as a teaching opportunity.  There is so much to show and often times when you teach, you end up learning too.

As I closed up the hive and talked to Casey about what he had seen, it was pretty clear that he was gung-ho about becoming a beekeeper himself!  Catch the buzz!  =)

To complete this post, let me leave you with some sad evidence of the impending demise of summer:


Nothing says "fall" like Goldenrod in bloom.  This bumble bee was taking a nap on these flowers, enjoying the sun and warmth.......while it lasts.

Until next time, thank you for reading!

Wednesday, August 7, 2013

Anti Robin Hood: 08-06-2013

You've all heard of Robin Hood, who robs from the rich and gives to the poor, right?  Well, in the bee world, their hero is the Anti Robin Hood!  They rob from the poor and give to the rich and powerful!  This is the sight I beheld as I approached the split hive to begin my inspection.

Split Hive:

As I came upon the split hive I immediately noticed a cloud of bees swirling around the outside of the hive.  Instantly odd since the population was so low that even basic in and out traffic was not very prolific.  The other thing that was odd was the majority of the cloud of bees were attempting to enter the hive under the telescoping cover instead of the actual entrance.  These were all signs that the hive was in the process of being robbed.  When a strong hive finds a weak hive that cannot defend the supply of honey they have, then they overpower the guard bees and steal the honey.  Not a good situation since bees are killed during the fighting and the weak hive can either be greatly damaged or destroyed.

Here is a photo of what a honey frame looks like when it has been robbed.  The cells have been torn open during the frantic raiding and have a very jagged appearance.
Robbed Frame
I had placed the entrance reducer on the smallest setting when I first set up the split hive and I thought that would be enough.  Not only did I made a mistake by putting the split into a full sized deep box (instead of a 5 frame nucleus hive), but adding a second box of honey wasn't good either.  I set them up to fail by giving them way too much space to defend with way too few bees.  Learning from mistakes are the best lessons, right?

Upon opening the hive it was obvious to me that the only bees present were the ones robbing out the honey.  There was very little honey left in any of the frames and I quickly went through both boxes looking for any sign of the virgin queen that was spotted two inspections ago or any sign of eggs or larvae.  She was no where to be found and the small cluster of about 50 dead bees on the bottom board told me that if I did find her, she would probably be amongst the dead.  I combed through the dead bees and did not find her.  I did find a dead yellow jacket and a bee with its stinger and venom sac exposed.  No doubt, she died in battle.

With nothing else left to do with the split hive (or ex-split hive), I decided to add the now mostly empty brood box onto White Hive.

White Hive:

My goal this time with White Hive is to verify that what I thought might have been eggs really were freshly laid eggs.  As you may recall, I spotted the queen during my last inspection.  If she was from the queen cell I installed, I wouldn't have known for sure that she had flown out and successfully mated.  If I find eggs that tells me that she did.

The first few frames were honey with some pollen as I expected, but as I pulled frame 4 I hit the jackpot.

Larvae!
Since I know the "bee math" http://www.bushfarms.com/beesmath.htm, I know that when an egg is laid it takes 3 days to hatch, spends 6 more days as an open larvae before it is capped (total of 9 days) and then 12 more days before a new bee emerges (total of 21 days).  This photo shows big fat open (uncapped) larvae that will be capped any day now.  So they are probably somewhere between 6 to 8 days old and that places them as eggs during my last inspection on 7-30!  I love it when I can actually figure things out!

On the other side of frame 4 I was able to spot a baby bee emerging from her cell (dead center), some very tiny larvae (two cells down to the left) and what looks like a tiny grain of rice......an egg (one cell down to the left and another one two cells down to the right)!

Eggs and Larvae
Now that I know the Queen is laying for sure, I can stop worrying so much about White Hive.  She should really be cranking out those eggs, possibly 2-3 THOUSAND every day!  More than her own body weight!

Continuing on, I found what I think was one of the old Queen Cups that the bees decided they do not need anymore.  They look like they are in the process of tearing it down.


The remaining frames had more honey, pollen, open larvae, capped larvae and a small patch of drone brood that is just about to hatch on frame 7.  White Hive looks really good and with a new Queen going full bore, they should be very strong going into Winter. 

Speaking of changing seasons, I saw some Goldenrod in bloom.  That sure heralds the end of summer doesn't it?  Lame!

Until next time, thanks for reading!

Thursday, August 1, 2013

Post Action Assessment: 07-30-2013

Task number one during this inspection was to check the split hive and hopefully find evidence of a laying queen or at least find the (hopefully) non-virgin queen.  Task number two was to check White Hive to see if the queen cells spotted last time were completed or destroyed and if I actually have a laying or virgin queen in that hive as well.

Split Hive:

The population in this hive is still very low.  I had put the extra box of honey on the hive to make sure they had enough but I think I have given them too much space for too few bees.  There are lots of ants roaming around unchallenged eating honey.  They don't bother the bees but in a strong hive they wouldn't be in there at all.  The low population does make it much easier to inspect the hive and spot a queen though!  I quickly went through the box of honey and found a few bees but no queen (nor did I expect to find her there).  Going through the brood box I found some honey and nectar and a tiny bit of pollen but I found no evidence of a queen (virgin or otherwise) and no evidence of eggs, or larvae.  Based on the "bee math" I provided a link to in the last blog post, it could still be a bit early for the hatched queen to have flown out, mated and returned to lay eggs.  I'm really hoping that we did not scare her off during our last inspection and she did not come back!  At this point, I will give it one more week before I take some other action.  It is pretty late in the season, so the only practical option may be to just recombine this hive back into White Hive.

White Hive:

One of my goals this year was to keep better records.  But I am finding that I just don't have enough hands to record things on paper, plus take pictures, all while trying to manipulate frames and smoke, etc.  So this time I tried to just take a photo of each side of every frame.  It was still very clumsy but I made it happen.  Photos are great because you can often spot things that you did not see while inspecting the frames.

Inspecting the top box, it was mostly filled with honey along with a few frames of foundation that the bees have barely touched.  Having a filled frame next to an empty one just makes the bees want to draw out the filled frame even more, so I have some giant frames of honey in there!  I'll pull those for sure this fall.

The bottom box also had a lot of honey and the pollen stores seemed much larger this time.  Possibly this is because there are no larvae to feed the pollen to! 
Honey and Pollen on frame 2

I kept moving through the frames hoping to find the hatched queen or the queen cups I had spotted last time.  I hit frame number four and there was the queen!
Queen Spotting can be challenging!
Can you see her?  It always gives me a jolt when I finally spot her. 

She is in the middle of the frame a few inches down from the top.  Here she is a bit closer:

I spotted the queen, but is she the old queen or the new queen?  And what about those queen cups I saw last time?  To answer these questions I need to see if this queen is laying eggs and if the bees destroyed the queen cups.  Onward!

I continued to find patches of brood that have not hatched yet as well and large open areas with nothing in them.  Some pollen and honey on almost every frame though.  On frame 7 I hit a small patch of drone brood and this is the frame I spotted the queen cups on.

This picture wasn't as good as the one from last time, but you can see they are still open and have not been capped and turned into full queen cells.  It looks to me like the bees removed the two larvae that were in these cups.  I assume they realized they had a queen and no longer needed to raise a new one.  This is a good sign!  My main goals accomplished, I finished inspecting the remaining frames and closed up the hive.  I looked very closely at each frame and I could not find any eggs or larvae for sure.  On the photos for frame 6, if I zoom in very closely, I can see what MIGHT be a few eggs but I'm not sure.  I guess I will know which frame to look on during the next inspection to see if those phantoms have turned into larvae!
Possible eggs in the empty area to the right of the capped brood?
All in all I was pretty happy to "bee" back on track with at least one hive!  We shall see what the next inspection reveals!

On a side note, I planted some Borage this year in my garden because I had read that bees really like it.  I'd never even heard of the plant before, but as you can see in the photo, they like it!

Until next time, thanks for reading!

Thursday, June 6, 2013

Hive Inspection: 06-04-2013

It is always fun for me to be able to share my beekeeping experiences with people.  During this inspection I had a friend of mine along to help.  I also enjoy teaching "newbees" all about the different miracles in the hive.  This inspection allowed me a lot of opportunities to do so!

We saw pollen, nectar, capped honey, open brood, capped brood, drone brood, hatching baby bees, queen cups and the queen!  I'm not sure what else there would be in a hive that I would even want to show someone.  It is really hard to see eggs and I don't care to show someone Varroa mites!

I've come to realize that people judge the strength of their hive by how many frames the bees are actually covering.  So I made sure to take note of this.  As of last inspection, I knew the queen was in the top honey super after the long, cold winter and there was plenty of brood there.  I was hoping all the brood had hatched out (new egg to hatching = 21 days) and the queen had moved down into the bottom two brood boxes.  Well, I had half of it correct.  She has moved down and been laying in the bottom boxes but she must have also laid a few more eggs in the honey super as well.  Here is a really weird brood pattern because of this:

Not only is there uncapped nectar and pollen scattered around, but there are little pockets of brood here and there and a few drone cells along the bottom edge toward the right.  I was hoping all the brood would be out of there so I can use these frames for honey later in the year.  I could use this frame as a part of the split I plan to do in the next week or so.

One of the greatest things in the hive to witness is a new bee being "born" or emerging from its cell for the first time.  Watching them poke out and move their antennae around is amazing!  Look right in the center patch of capped brood and you can see two little heads poking through and looking around!

 The bees were only covering about 5 / 10 frames in the top box and most of the empty frames hadn't really been built out much.  So, onto the next box!

It took me a while to figure out how to get the first frame out without squashing a bunch of bees, but with a little smoke and hive tool manipulation, I was able to get it started.  On this frame I was very pleased to see a SOLID patch of open brood.  You can see right along the center of the photo a whole bunch of pearly white glistening larvae!  Nice!

I would suspect the queen is probably actively laying eggs somewhere in this box.  I was really hoping to spot her too so that I could show my friend the queen in all her glory.  On the very next frame I pulled out, there she was!

Can you spot her?  No?

How about now?
I know, they all look like "bees", right?  Well, if you still can't spot her, she is just slightly above dead center in the photo.  Her abdomen is darker brown and less striped looking.  Also, her abdomen sticks out way past her wings.  Hopefully you spotted her!

At this point in the inspection I decided not to go through every frame in the box.  And I decided not to go into the very bottom box either.  I had seen and shown all the really important things and the inspections always take longer than you'd like to think.  The bees were probably covering 8 / 10 hives so that box was pretty strong.  I closed the hive up and called it a day. 

I was happy to see that the queen was strongly laying in the lower box and that there were a few drone cells dotting the bottom of some frames.  I did not see any drones walking around but I'm sure they will be out within a few days for sure.  This is important because I intend to split the hive and have them raise their own queen.  A new virgin queen will need drones and if there aren't any around then she isn't going to be properly mated.  Not that she would mate with her own drones, but if you have drones in your own hive, then there are probably drones out in the wild too!

Next post I hope to be showing you my new split.  Until then, thanks for reading!