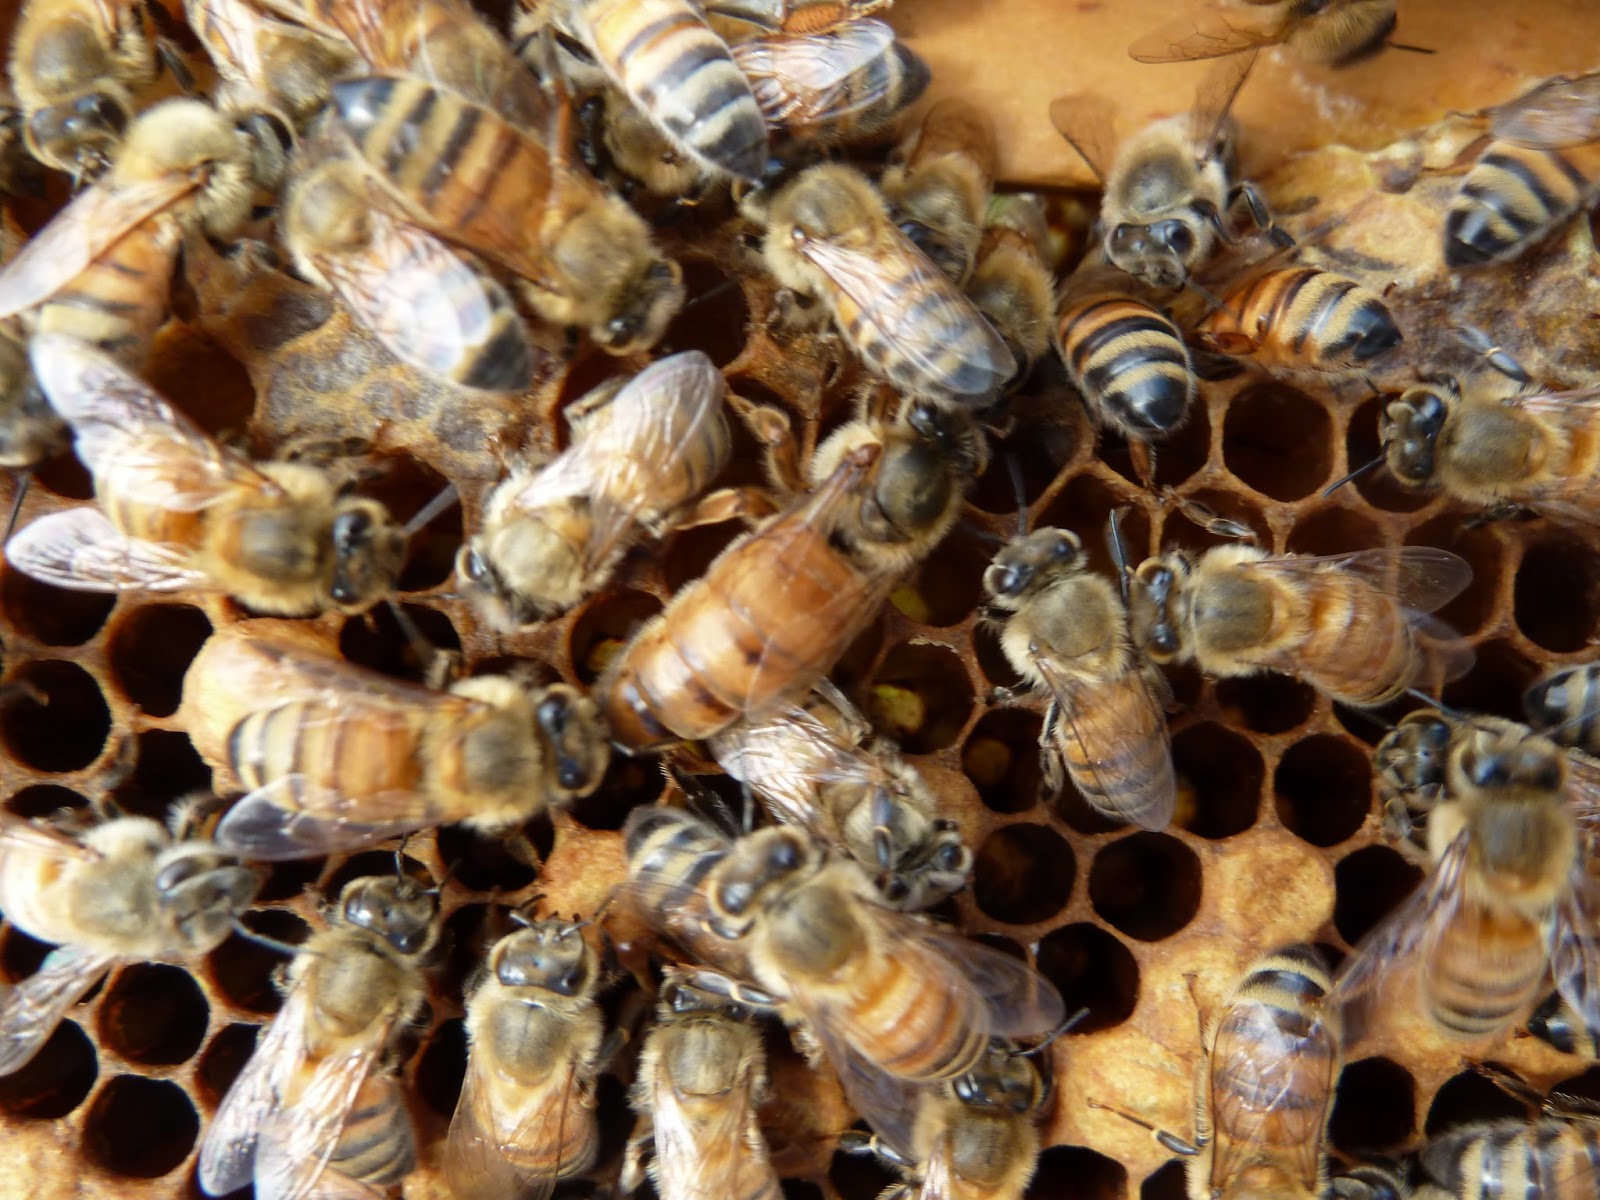
I hate to even talk about this because just the thought of mites sucking the blood (hemolymph) out of my bees and perhaps transferring diseases to them pisses me off!! But the Varroa Mite, is now an integral part of any beekeeper's management and there is no escaping their impact. So, what to do? I long ago decided I want no antibiotics or chemicals in my hives, so those kind of treatments are out. This leaves me with various IPM (Integrated Pest Management) techniques to use. Before you use any of those techniques, you need to determine what kind of mite load your hive is currently dealing with. Of course, there are numerous ways of doing mite sampling and there is a great article here scientificbeekeeping.com about the different techniques and why you would or wouldn't use them. I decided to start my sampling by doing the sticky board drop test. It isn't perfect, but it is quick and easy and a good place to start!
Mite Drop Test:
All you do to perform this test is put a board with a sticky substance on it underneath a hive that has a screened bottom. You leave this on for a few days and then take it off and count the mites.
I put some vegetable oil on the board (next time I'll use vaseline) and put the board under the hive for 48 hours and this is what I found:
What you end up seeing is a plastic sheet covered by bee debris. The debris consists of pollen, dripped honey, dust, dirt, a bee leg or two and some mites. This is one of the reason you don't leave the board on for too long....you can't spot the mites because of all the debris.
Here is a close up of the debris:
See any mites? The big chunks of pollen are pretty easy to spot but telling the difference between a piece of dirt and a mite is a bit more difficult. Here are the mites:
If you look very closely you can see the legs sticking out from their body. Once you get a feel for the size, shape and color, they become easier to spot.
Counting the mites, I ended up with a total of 21. Divide that by the number of days and you get just over 10 dropped per day. There doesn't seem to be any rule set in stone that says "if you have this many then you need to do this", so right now this will be a baseline number that I use as a comparison. I believe this is a relatively "low" number for this time of year, but I will plan on doing more tests in the future. It is easy enough to clean off the board and put it back on the hive for a few days.
I would like to try the powdered sugar jar sampling method in the future. That sounds interesting, you don't end up killing the bees, and you end up with a bunch of powdered sugar covered ghost bees walking around your hive for a while!!
Until next time, thanks for reading and I hope my mite numbers go down!
Thursday, September 12, 2013
Monday, September 9, 2013
Busy Bees: 09-08-2013
I decided to take my camera and record a little video at the hive entrance. The activity here is the definition of the phrase "busy as a bee". Note the bright orange pollen coming in on quite a few of the bee's legs. I would think that with all the Goldenrod in bloom right now, that it would be the source of the pollen. But the pollen isn't yellow in color at all. Hmmmm, what else is in bloom?
Enjoy the video:
White Hive Activity
Enjoy the video:
White Hive Activity
Thursday, September 5, 2013
Performance Anxiety: 09-02-2013
White Hive has been closed up and left alone since the last inspection on 8/6, almost a full month ago. The last few times I walked by the hive I have seen an ever increasing number of bees flying in and out so my hope is that the new queen is performing well! Knowing that there were larva and eggs during the last inspection, there should have been plenty of bees that have been born since. Going back to our trusty "bee math", an egg laid today will hatch into a worker bee in 21 days. It has now been ~25 days and since a queen can lay around 2000 eggs in a day, that is a lot of new bees! Well, what is suppose to be and what is are two different things. The only way to see for sure it to open it up.
I had some help with the inspection this time when my friend Casey came over to give me a hand. It is always beneficial to have an extra set of hands to hold frames, take pictures, use the smoker, etc. Plus, I love teaching others about bees. Especially when they are as excited as I am about them!
If you recall from the last inspection, I had added a second brood chamber onto White Hive. Now it consists of two brood chambers and one honey super. Since the second brood chamber was totally empty, I eagerly checked to see if the bees had begun to use it. When I opened it up, the bees were covering 5 frames in the center of the box. That is a pretty good sign right away. I only moved in about 3 frames and spotted the queen on a frame of mostly capped brood!
Awesome!! It is great to be able to spot the queen but even better when you get to show someone else! I also noticed quite a few grey colored, slightly shriveled looking, fuzzy bees. I believe those are the bees that have recently hatched. They take a few days for their exoskeleton to harden and then they begin their first duties. It usually takes around 22 days before a bee even leaves the hive for the first time!
Want to learn more? Check out these links:
Honey Bee Jobs
Worker Bee Activities
If you ever see a honey bee buzzing around one of your flowers, you know they are an "old" bee! Sometimes you can even see that the tips of their wings look shredded. A honey bee pretty much works herself to death during her 6 week summer life span.
Back to the inspection: After finding the queen I did find a few more frames there were almost completely SOLID brood! This is a great sign as she is doing her job and laying eggs and making more bees. It is really important that they are producing strong numbers this late in the summer since a lot of these bees will be the ones that begin the winter cluster. More bees = more warmth during the winter!
This early in the inspection I have seen pretty much everything I needed to. The rest of the time I used as a teaching opportunity. There is so much to show and often times when you teach, you end up learning too.
As I closed up the hive and talked to Casey about what he had seen, it was pretty clear that he was gung-ho about becoming a beekeeper himself! Catch the buzz! =)
To complete this post, let me leave you with some sad evidence of the impending demise of summer:
Nothing says "fall" like Goldenrod in bloom. This bumble bee was taking a nap on these flowers, enjoying the sun and warmth.......while it lasts.
Until next time, thank you for reading!
I had some help with the inspection this time when my friend Casey came over to give me a hand. It is always beneficial to have an extra set of hands to hold frames, take pictures, use the smoker, etc. Plus, I love teaching others about bees. Especially when they are as excited as I am about them!
If you recall from the last inspection, I had added a second brood chamber onto White Hive. Now it consists of two brood chambers and one honey super. Since the second brood chamber was totally empty, I eagerly checked to see if the bees had begun to use it. When I opened it up, the bees were covering 5 frames in the center of the box. That is a pretty good sign right away. I only moved in about 3 frames and spotted the queen on a frame of mostly capped brood!
Awesome!! It is great to be able to spot the queen but even better when you get to show someone else! I also noticed quite a few grey colored, slightly shriveled looking, fuzzy bees. I believe those are the bees that have recently hatched. They take a few days for their exoskeleton to harden and then they begin their first duties. It usually takes around 22 days before a bee even leaves the hive for the first time!
Want to learn more? Check out these links:
Honey Bee Jobs
Worker Bee Activities
If you ever see a honey bee buzzing around one of your flowers, you know they are an "old" bee! Sometimes you can even see that the tips of their wings look shredded. A honey bee pretty much works herself to death during her 6 week summer life span.
Back to the inspection: After finding the queen I did find a few more frames there were almost completely SOLID brood! This is a great sign as she is doing her job and laying eggs and making more bees. It is really important that they are producing strong numbers this late in the summer since a lot of these bees will be the ones that begin the winter cluster. More bees = more warmth during the winter!
This early in the inspection I have seen pretty much everything I needed to. The rest of the time I used as a teaching opportunity. There is so much to show and often times when you teach, you end up learning too.
As I closed up the hive and talked to Casey about what he had seen, it was pretty clear that he was gung-ho about becoming a beekeeper himself! Catch the buzz! =)
To complete this post, let me leave you with some sad evidence of the impending demise of summer:
Nothing says "fall" like Goldenrod in bloom. This bumble bee was taking a nap on these flowers, enjoying the sun and warmth.......while it lasts.
Until next time, thank you for reading!
Labels:
Brood,
Fall,
Inspection,
Larva,
Queen,
White Hive
Wednesday, August 7, 2013
Anti Robin Hood: 08-06-2013
You've all heard of Robin Hood, who robs from the rich and gives to the poor, right? Well, in the bee world, their hero is the Anti Robin Hood! They rob from the poor and give to the rich and powerful! This is the sight I beheld as I approached the split hive to begin my inspection.
Split Hive:
As I came upon the split hive I immediately noticed a cloud of bees swirling around the outside of the hive. Instantly odd since the population was so low that even basic in and out traffic was not very prolific. The other thing that was odd was the majority of the cloud of bees were attempting to enter the hive under the telescoping cover instead of the actual entrance. These were all signs that the hive was in the process of being robbed. When a strong hive finds a weak hive that cannot defend the supply of honey they have, then they overpower the guard bees and steal the honey. Not a good situation since bees are killed during the fighting and the weak hive can either be greatly damaged or destroyed.
Here is a photo of what a honey frame looks like when it has been robbed. The cells have been torn open during the frantic raiding and have a very jagged appearance.
I had placed the entrance reducer on the smallest setting when I first set up the split hive and I thought that would be enough. Not only did I made a mistake by putting the split into a full sized deep box (instead of a 5 frame nucleus hive), but adding a second box of honey wasn't good either. I set them up to fail by giving them way too much space to defend with way too few bees. Learning from mistakes are the best lessons, right?
Upon opening the hive it was obvious to me that the only bees present were the ones robbing out the honey. There was very little honey left in any of the frames and I quickly went through both boxes looking for any sign of the virgin queen that was spotted two inspections ago or any sign of eggs or larvae. She was no where to be found and the small cluster of about 50 dead bees on the bottom board told me that if I did find her, she would probably be amongst the dead. I combed through the dead bees and did not find her. I did find a dead yellow jacket and a bee with its stinger and venom sac exposed. No doubt, she died in battle.
With nothing else left to do with the split hive (or ex-split hive), I decided to add the now mostly empty brood box onto White Hive.
White Hive:
My goal this time with White Hive is to verify that what I thought might have been eggs really were freshly laid eggs. As you may recall, I spotted the queen during my last inspection. If she was from the queen cell I installed, I wouldn't have known for sure that she had flown out and successfully mated. If I find eggs that tells me that she did.
The first few frames were honey with some pollen as I expected, but as I pulled frame 4 I hit the jackpot.
Since I know the "bee math" http://www.bushfarms.com/beesmath.htm, I know that when an egg is laid it takes 3 days to hatch, spends 6 more days as an open larvae before it is capped (total of 9 days) and then 12 more days before a new bee emerges (total of 21 days). This photo shows big fat open (uncapped) larvae that will be capped any day now. So they are probably somewhere between 6 to 8 days old and that places them as eggs during my last inspection on 7-30! I love it when I can actually figure things out!
On the other side of frame 4 I was able to spot a baby bee emerging from her cell (dead center), some very tiny larvae (two cells down to the left) and what looks like a tiny grain of rice......an egg (one cell down to the left and another one two cells down to the right)!
Now that I know the Queen is laying for sure, I can stop worrying so much about White Hive. She should really be cranking out those eggs, possibly 2-3 THOUSAND every day! More than her own body weight!
Continuing on, I found what I think was one of the old Queen Cups that the bees decided they do not need anymore. They look like they are in the process of tearing it down.
The remaining frames had more honey, pollen, open larvae, capped larvae and a small patch of drone brood that is just about to hatch on frame 7. White Hive looks really good and with a new Queen going full bore, they should be very strong going into Winter.
Speaking of changing seasons, I saw some Goldenrod in bloom. That sure heralds the end of summer doesn't it? Lame!
Until next time, thanks for reading!
Split Hive:
As I came upon the split hive I immediately noticed a cloud of bees swirling around the outside of the hive. Instantly odd since the population was so low that even basic in and out traffic was not very prolific. The other thing that was odd was the majority of the cloud of bees were attempting to enter the hive under the telescoping cover instead of the actual entrance. These were all signs that the hive was in the process of being robbed. When a strong hive finds a weak hive that cannot defend the supply of honey they have, then they overpower the guard bees and steal the honey. Not a good situation since bees are killed during the fighting and the weak hive can either be greatly damaged or destroyed.
Here is a photo of what a honey frame looks like when it has been robbed. The cells have been torn open during the frantic raiding and have a very jagged appearance.
| Robbed Frame |
Upon opening the hive it was obvious to me that the only bees present were the ones robbing out the honey. There was very little honey left in any of the frames and I quickly went through both boxes looking for any sign of the virgin queen that was spotted two inspections ago or any sign of eggs or larvae. She was no where to be found and the small cluster of about 50 dead bees on the bottom board told me that if I did find her, she would probably be amongst the dead. I combed through the dead bees and did not find her. I did find a dead yellow jacket and a bee with its stinger and venom sac exposed. No doubt, she died in battle.
With nothing else left to do with the split hive (or ex-split hive), I decided to add the now mostly empty brood box onto White Hive.
White Hive:
My goal this time with White Hive is to verify that what I thought might have been eggs really were freshly laid eggs. As you may recall, I spotted the queen during my last inspection. If she was from the queen cell I installed, I wouldn't have known for sure that she had flown out and successfully mated. If I find eggs that tells me that she did.
The first few frames were honey with some pollen as I expected, but as I pulled frame 4 I hit the jackpot.
| Larvae! |
On the other side of frame 4 I was able to spot a baby bee emerging from her cell (dead center), some very tiny larvae (two cells down to the left) and what looks like a tiny grain of rice......an egg (one cell down to the left and another one two cells down to the right)!
| Eggs and Larvae |
Continuing on, I found what I think was one of the old Queen Cups that the bees decided they do not need anymore. They look like they are in the process of tearing it down.
The remaining frames had more honey, pollen, open larvae, capped larvae and a small patch of drone brood that is just about to hatch on frame 7. White Hive looks really good and with a new Queen going full bore, they should be very strong going into Winter.
Speaking of changing seasons, I saw some Goldenrod in bloom. That sure heralds the end of summer doesn't it? Lame!
Until next time, thanks for reading!
Thursday, August 1, 2013
Post Action Assessment: 07-30-2013
Task number one during this inspection was to check the split hive and hopefully find evidence of a laying queen or at least find the (hopefully) non-virgin queen. Task number two was to check White Hive to see if the queen cells spotted last time were completed or destroyed and if I actually have a laying or virgin queen in that hive as well.
Split Hive:
The population in this hive is still very low. I had put the extra box of honey on the hive to make sure they had enough but I think I have given them too much space for too few bees. There are lots of ants roaming around unchallenged eating honey. They don't bother the bees but in a strong hive they wouldn't be in there at all. The low population does make it much easier to inspect the hive and spot a queen though! I quickly went through the box of honey and found a few bees but no queen (nor did I expect to find her there). Going through the brood box I found some honey and nectar and a tiny bit of pollen but I found no evidence of a queen (virgin or otherwise) and no evidence of eggs, or larvae. Based on the "bee math" I provided a link to in the last blog post, it could still be a bit early for the hatched queen to have flown out, mated and returned to lay eggs. I'm really hoping that we did not scare her off during our last inspection and she did not come back! At this point, I will give it one more week before I take some other action. It is pretty late in the season, so the only practical option may be to just recombine this hive back into White Hive.
White Hive:
One of my goals this year was to keep better records. But I am finding that I just don't have enough hands to record things on paper, plus take pictures, all while trying to manipulate frames and smoke, etc. So this time I tried to just take a photo of each side of every frame. It was still very clumsy but I made it happen. Photos are great because you can often spot things that you did not see while inspecting the frames.
Inspecting the top box, it was mostly filled with honey along with a few frames of foundation that the bees have barely touched. Having a filled frame next to an empty one just makes the bees want to draw out the filled frame even more, so I have some giant frames of honey in there! I'll pull those for sure this fall.
The bottom box also had a lot of honey and the pollen stores seemed much larger this time. Possibly this is because there are no larvae to feed the pollen to!
I kept moving through the frames hoping to find the hatched queen or the queen cups I had spotted last time. I hit frame number four and there was the queen!
Can you see her? It always gives me a jolt when I finally spot her.
She is in the middle of the frame a few inches down from the top. Here she is a bit closer:
I spotted the queen, but is she the old queen or the new queen? And what about those queen cups I saw last time? To answer these questions I need to see if this queen is laying eggs and if the bees destroyed the queen cups. Onward!
I continued to find patches of brood that have not hatched yet as well and large open areas with nothing in them. Some pollen and honey on almost every frame though. On frame 7 I hit a small patch of drone brood and this is the frame I spotted the queen cups on.
This picture wasn't as good as the one from last time, but you can see they are still open and have not been capped and turned into full queen cells. It looks to me like the bees removed the two larvae that were in these cups. I assume they realized they had a queen and no longer needed to raise a new one. This is a good sign! My main goals accomplished, I finished inspecting the remaining frames and closed up the hive. I looked very closely at each frame and I could not find any eggs or larvae for sure. On the photos for frame 6, if I zoom in very closely, I can see what MIGHT be a few eggs but I'm not sure. I guess I will know which frame to look on during the next inspection to see if those phantoms have turned into larvae!
All in all I was pretty happy to "bee" back on track with at least one hive! We shall see what the next inspection reveals!
On a side note, I planted some Borage this year in my garden because I had read that bees really like it. I'd never even heard of the plant before, but as you can see in the photo, they like it!
Until next time, thanks for reading!
Split Hive:
The population in this hive is still very low. I had put the extra box of honey on the hive to make sure they had enough but I think I have given them too much space for too few bees. There are lots of ants roaming around unchallenged eating honey. They don't bother the bees but in a strong hive they wouldn't be in there at all. The low population does make it much easier to inspect the hive and spot a queen though! I quickly went through the box of honey and found a few bees but no queen (nor did I expect to find her there). Going through the brood box I found some honey and nectar and a tiny bit of pollen but I found no evidence of a queen (virgin or otherwise) and no evidence of eggs, or larvae. Based on the "bee math" I provided a link to in the last blog post, it could still be a bit early for the hatched queen to have flown out, mated and returned to lay eggs. I'm really hoping that we did not scare her off during our last inspection and she did not come back! At this point, I will give it one more week before I take some other action. It is pretty late in the season, so the only practical option may be to just recombine this hive back into White Hive.
White Hive:
One of my goals this year was to keep better records. But I am finding that I just don't have enough hands to record things on paper, plus take pictures, all while trying to manipulate frames and smoke, etc. So this time I tried to just take a photo of each side of every frame. It was still very clumsy but I made it happen. Photos are great because you can often spot things that you did not see while inspecting the frames.
Inspecting the top box, it was mostly filled with honey along with a few frames of foundation that the bees have barely touched. Having a filled frame next to an empty one just makes the bees want to draw out the filled frame even more, so I have some giant frames of honey in there! I'll pull those for sure this fall.
The bottom box also had a lot of honey and the pollen stores seemed much larger this time. Possibly this is because there are no larvae to feed the pollen to!
| Honey and Pollen on frame 2 |
| Queen Spotting can be challenging! |
She is in the middle of the frame a few inches down from the top. Here she is a bit closer:
I spotted the queen, but is she the old queen or the new queen? And what about those queen cups I saw last time? To answer these questions I need to see if this queen is laying eggs and if the bees destroyed the queen cups. Onward!
I continued to find patches of brood that have not hatched yet as well and large open areas with nothing in them. Some pollen and honey on almost every frame though. On frame 7 I hit a small patch of drone brood and this is the frame I spotted the queen cups on.
This picture wasn't as good as the one from last time, but you can see they are still open and have not been capped and turned into full queen cells. It looks to me like the bees removed the two larvae that were in these cups. I assume they realized they had a queen and no longer needed to raise a new one. This is a good sign! My main goals accomplished, I finished inspecting the remaining frames and closed up the hive. I looked very closely at each frame and I could not find any eggs or larvae for sure. On the photos for frame 6, if I zoom in very closely, I can see what MIGHT be a few eggs but I'm not sure. I guess I will know which frame to look on during the next inspection to see if those phantoms have turned into larvae!
| Possible eggs in the empty area to the right of the capped brood? |
On a side note, I planted some Borage this year in my garden because I had read that bees really like it. I'd never even heard of the plant before, but as you can see in the photo, they like it!
Until next time, thanks for reading!
Labels:
Brood,
Drone Brood,
Flowers,
Honey,
Inspection,
Pollen,
Queen,
Queen Cells,
Split,
White Hive
Monday, July 22, 2013
Mistakes Were Made: 07-21-2013
Sunday was a great day to work the bees for a number of reasons. First off, my son-in-law Chris and my daughter are visiting from California and he wanted to dive into the hives with me! Second, the weather was just perfect. Temps in the 70s, clear and sunny. If any of you other beekeepers out there are anything like me (and I'm sure you are), then you love teaching others about bees. This was a great opportunity, even though I didn't expect to be able to show Chris any stages of brood development (see the last two posts). As you are about to read, this was not the case!!
Since the split and insertion of the two queen cells during my last inspection, my plan was to get in and first check to see if they have hatched. Hopefully I could spot a virgin queen running around in the process. I already know that the split hive has significantly less bees in it, as there is very little activity at the hive entrance. Because of this, I also planned on either moving a frame of bees into the split hive or just shaking them off the frames and into the split hive. With plan in place, Chris and I suited up, lit the smoker and headed out to the split hive.
Split Hive:
This was going to be a good training and teaching hive because there were not going to be a lot of bees and it would be much easier to point things out. Plus, not having a bunch of bees flying around your head is a bit less intimidating for someone's first time. We opened the hive and I was able to go through the honey super pretty quickly. There were only a few bees there and solid honey frames all look the same after seeing a few. I removed that box and started digging through the brood box, eager to get to the frame with the queen cell on it! After prying back the fourth frame, I could see the bottom of the queen cell was opened so the queen was out somewhere! We removed the queen cell and started in on the next frame and BAM there was the hatched virgin queen! I pointed her out to Chris and in the 10 seconds it took to get the camera out to grab of picture of her........she as gone. I flipped the frame over and back again a few times and she was no longer there. She must have gotten spooked and flew off. Camera shy I guess. We went through the rest of the frames and we found a bunch more honey, but I was concerned that I didn't find any stored pollen. That might be OK for the moment, but if the virgin queen does fly out and mate, comes back and starts laying eggs, there had better be some pollen in there to feed the baby bees! We put the honey super back on the hive and put the inner cover back on. I left the telescoping cover off at this point in case the queen came back she could get back in the hive a bit easier. On to White Hive.
White Hive:
We opened up this hive and there were a lot more bees here as expected. After a bit more smoke into the hive (Chris was my head smoker and picture taker) we dove in and quickly went through the honey super and set it to the side. After a bit of coaxing I was able to get the first frame out and begin the inspection. With the first few frames inspected, I was really pleased to see some pollen and "bee bread" packed into the cells.
After inspecting the next few frames, we came across a frame that had a bunch of drones and a queen cup on it.
I love spotting drones, especially when I am trying to teach someone about bees. They are easy to distinguish because their large size and big eyes stand out so much. Can you spot the drones in this picture? There is a hole close to the middle of the frame with two drones above it and a queen cup to the right.
I checked inside the queen cup just to make sure there was nothing in it, and there was nothing in there. I continued on and began checking the next frame in line. I slowed down a bit since the closer I was to the frame with the queen cell, the higher the probability that I would be able to spot the emerged virgin queen (if she was there at all). I pulled the frame with the queen cell and sure enough, she had hatched. The bottom of the cell was open and hopefully she was running around inside the hive. I proceeded to move the frame out of the way and pulled the next frame out and I find..........BROOD?!?!?! What??
At first I thought it must be all drone brood and perhaps I had laying workers but after seeing this on the next two frames and spotting a few actual drone cells, this must be worker brood. How is this possible? Well, the answer is that I screwed up. I must have missed the eggs and larvae in these frames during my last few inspections and/or I simply didn't pull the frames that had the brood on them, so I never spotted it. So now what? I would think that if there is a laying queen in this hive, that she would have instantly killed the virgin queen inside the queen cell. This wasn't the case because the virgin hatched out and was not dead inside the cell. Perhaps the laying queen didn't spot the queen cell until after the virgin hatched and they eventually found each other and fought to the death? Which one survived? By this time I am scrutinizing every inch of each frame trying to find either queen. I pull the next frame and I spot this....
If you look closely, not only are there two queen cups here, but this time they are full of royal jelly and I can spot a larvae in one of them (no doubt there is a larvae in the other one as well). What the heck is going on? If there is an existing laying queen, why were the bees trying to create a new queen? If there are larvae in these queen cups, then that means they are somewhere between 4 and 8 days old (http://www.bushfarms.com/beesmath.htm) right around the time I placed the queen cell in this hive. Coincidence? I think I need to give Sherlock Holmes a call because I can't quite sequence the timing and all the possibilities together to form a rock solid answer to what is going on. Usually, queen cells built in the center of the frame like this are considered Supercedure cells. This means the bees have decided that the old queen is beginning to fail and they have determined to replace her. Maybe that is what was going on and my timing was just really bad? Who knows?
We finished inspecting the remaining frames and failed to spot either the old queen or the virgin queen. At this point there wasn't much left to do but close up the hive. I did take two of the frames out and after closely inspecting them (and not finding any queens), I took them over to the split hive and shook the bees into it. Hopefully that will give them a few more bees to supplement their numbers until the virgin queen mates and starts laying eggs to make new bees!
Hopefully, I will open the hive in another week and what I find will give more answers to the mystery. All in all it was a very educational inspection, not only for "newbee" Chris but for me as well!!
Thanks again for reading
Since the split and insertion of the two queen cells during my last inspection, my plan was to get in and first check to see if they have hatched. Hopefully I could spot a virgin queen running around in the process. I already know that the split hive has significantly less bees in it, as there is very little activity at the hive entrance. Because of this, I also planned on either moving a frame of bees into the split hive or just shaking them off the frames and into the split hive. With plan in place, Chris and I suited up, lit the smoker and headed out to the split hive.
Split Hive:
This was going to be a good training and teaching hive because there were not going to be a lot of bees and it would be much easier to point things out. Plus, not having a bunch of bees flying around your head is a bit less intimidating for someone's first time. We opened the hive and I was able to go through the honey super pretty quickly. There were only a few bees there and solid honey frames all look the same after seeing a few. I removed that box and started digging through the brood box, eager to get to the frame with the queen cell on it! After prying back the fourth frame, I could see the bottom of the queen cell was opened so the queen was out somewhere! We removed the queen cell and started in on the next frame and BAM there was the hatched virgin queen! I pointed her out to Chris and in the 10 seconds it took to get the camera out to grab of picture of her........she as gone. I flipped the frame over and back again a few times and she was no longer there. She must have gotten spooked and flew off. Camera shy I guess. We went through the rest of the frames and we found a bunch more honey, but I was concerned that I didn't find any stored pollen. That might be OK for the moment, but if the virgin queen does fly out and mate, comes back and starts laying eggs, there had better be some pollen in there to feed the baby bees! We put the honey super back on the hive and put the inner cover back on. I left the telescoping cover off at this point in case the queen came back she could get back in the hive a bit easier. On to White Hive.
White Hive:
We opened up this hive and there were a lot more bees here as expected. After a bit more smoke into the hive (Chris was my head smoker and picture taker) we dove in and quickly went through the honey super and set it to the side. After a bit of coaxing I was able to get the first frame out and begin the inspection. With the first few frames inspected, I was really pleased to see some pollen and "bee bread" packed into the cells.
After inspecting the next few frames, we came across a frame that had a bunch of drones and a queen cup on it.
I love spotting drones, especially when I am trying to teach someone about bees. They are easy to distinguish because their large size and big eyes stand out so much. Can you spot the drones in this picture? There is a hole close to the middle of the frame with two drones above it and a queen cup to the right.
I checked inside the queen cup just to make sure there was nothing in it, and there was nothing in there. I continued on and began checking the next frame in line. I slowed down a bit since the closer I was to the frame with the queen cell, the higher the probability that I would be able to spot the emerged virgin queen (if she was there at all). I pulled the frame with the queen cell and sure enough, she had hatched. The bottom of the cell was open and hopefully she was running around inside the hive. I proceeded to move the frame out of the way and pulled the next frame out and I find..........BROOD?!?!?! What??
At first I thought it must be all drone brood and perhaps I had laying workers but after seeing this on the next two frames and spotting a few actual drone cells, this must be worker brood. How is this possible? Well, the answer is that I screwed up. I must have missed the eggs and larvae in these frames during my last few inspections and/or I simply didn't pull the frames that had the brood on them, so I never spotted it. So now what? I would think that if there is a laying queen in this hive, that she would have instantly killed the virgin queen inside the queen cell. This wasn't the case because the virgin hatched out and was not dead inside the cell. Perhaps the laying queen didn't spot the queen cell until after the virgin hatched and they eventually found each other and fought to the death? Which one survived? By this time I am scrutinizing every inch of each frame trying to find either queen. I pull the next frame and I spot this....
If you look closely, not only are there two queen cups here, but this time they are full of royal jelly and I can spot a larvae in one of them (no doubt there is a larvae in the other one as well). What the heck is going on? If there is an existing laying queen, why were the bees trying to create a new queen? If there are larvae in these queen cups, then that means they are somewhere between 4 and 8 days old (http://www.bushfarms.com/beesmath.htm) right around the time I placed the queen cell in this hive. Coincidence? I think I need to give Sherlock Holmes a call because I can't quite sequence the timing and all the possibilities together to form a rock solid answer to what is going on. Usually, queen cells built in the center of the frame like this are considered Supercedure cells. This means the bees have decided that the old queen is beginning to fail and they have determined to replace her. Maybe that is what was going on and my timing was just really bad? Who knows?
We finished inspecting the remaining frames and failed to spot either the old queen or the virgin queen. At this point there wasn't much left to do but close up the hive. I did take two of the frames out and after closely inspecting them (and not finding any queens), I took them over to the split hive and shook the bees into it. Hopefully that will give them a few more bees to supplement their numbers until the virgin queen mates and starts laying eggs to make new bees!
Hopefully, I will open the hive in another week and what I find will give more answers to the mystery. All in all it was a very educational inspection, not only for "newbee" Chris but for me as well!!
Thanks again for reading
| Chris and Mark about to embark on an adventure! |
Labels:
Brood,
Honey,
Pollen,
Queen Cells,
Queenless,
Split,
White Hive
Thursday, July 18, 2013
Swinging for the Cheap Seats: 07-17-2013
I scrambled around the last few days trying to find a queen producer that actually had queens for sale. I found a few places online that are still producing and selling queens but it seems that shipping them is pretty risky. Who knows how much they'd get thrown around or squashed in transit or how hot or cold they would get! Not to mention, shipping isn't cheap.........and I'm cheap. I talked to a guy I work with and he suggested talking to the same person I bought my initial packaged bees from. Duh! So, I called Kline's and they didn't have any queens but they did refer me to someone that might. I called that guy and he was sold out BUT he did have some queen cells AND he lived right in between where I live and where I work!
For those of you unaware of the differences and risks involved, basically you can buy a mature queen that is mated and actively laying eggs and you can introduce her into your hive via a cage and over the course of a few days the bees in the hive will accept her as their new queen. Once this happens you can release her from the cage (otherwise the bees would kill her). With a queen cell, it is an unhatched, virgin queen. This means you can just put the cell in the hive and she will hatch out in a few days and smell like all the other newly hatched bees. But she is a virgin and will then have to fly out and mate and then return to the hive.....all without getting eaten by a bird or smacking into a car windshield.
Since I'm kind of in a bind being queenless and I don't want to take the risk of shipping (and extra time waiting for shipment), I decided to go with the queen cells. To mitigate some of the risk, I bought two. My thought was that I would split my queenless hive and put one queen cell in each box. In this way, if only one queen hatches and mates successfully, I could easily re-combine the two hives back into one. Or, I could even move frames of brood from the new queen hive to the queenless one and eventually have them raise a new queen. Worst case scenario is that both queen cells do not produce a mated queen. Best case is that both do.
Temperatures were forecast to be in the mid 90s, so I went early in the morning to pick up the queen cells. The guy was great and showed me around his entire operation. He showed me all his hives and had me suit up so he could show me his queen builder colonies and how he did his grafting and queen rearing. Very cool stuff! The only bad thing is that is was 11 AM and already 88 degrees by the time I left. Once I was home, I think it was about 92 degrees and I was not excited to put on my bee suit. I put out some cinder blocks and a hive bottom board and began to split the hive. Honey super and top brood box off. Bottom brood box off and carried over to the new hive bottom board. Hive tool moves two of the middle frames apart, hold the queen cell in and push the two frames back together. Put a honey super on that was partially filled from last year and close up the new hive. Back to the old hive, put the brood box on the hive bottom board and in goes the queen cell. Honey super back on and close it up. All told I think it took me 15-20 minutes but I think I must have lost about 50 pounds sitting in my bee suit baking in the sun. Ugh. I finished up by putting some grass clipping on the landing board of the new hive to cause the bees trying to leave the hive to re-orient themselves. This will hopefully prevent them from returning to the location that they remembered as home........the old hive location.
Now the waiting begins. The cells should hatch in a day or two (assuming there are alive queens in those cells). The new queens will emerge and take a few days to relax and get to know everyone. Then they will begin their mating flights. The latest studies show that a virgin queen will mate with 15+ drones before returning to the hive to begin her reign. So, within the next approximately two weeks I should find brood in the two hives. Don't hold your breath until the next inspection, I'm already holding mine!
Thanks again for reading.
For those of you unaware of the differences and risks involved, basically you can buy a mature queen that is mated and actively laying eggs and you can introduce her into your hive via a cage and over the course of a few days the bees in the hive will accept her as their new queen. Once this happens you can release her from the cage (otherwise the bees would kill her). With a queen cell, it is an unhatched, virgin queen. This means you can just put the cell in the hive and she will hatch out in a few days and smell like all the other newly hatched bees. But she is a virgin and will then have to fly out and mate and then return to the hive.....all without getting eaten by a bird or smacking into a car windshield.
Since I'm kind of in a bind being queenless and I don't want to take the risk of shipping (and extra time waiting for shipment), I decided to go with the queen cells. To mitigate some of the risk, I bought two. My thought was that I would split my queenless hive and put one queen cell in each box. In this way, if only one queen hatches and mates successfully, I could easily re-combine the two hives back into one. Or, I could even move frames of brood from the new queen hive to the queenless one and eventually have them raise a new queen. Worst case scenario is that both queen cells do not produce a mated queen. Best case is that both do.
Temperatures were forecast to be in the mid 90s, so I went early in the morning to pick up the queen cells. The guy was great and showed me around his entire operation. He showed me all his hives and had me suit up so he could show me his queen builder colonies and how he did his grafting and queen rearing. Very cool stuff! The only bad thing is that is was 11 AM and already 88 degrees by the time I left. Once I was home, I think it was about 92 degrees and I was not excited to put on my bee suit. I put out some cinder blocks and a hive bottom board and began to split the hive. Honey super and top brood box off. Bottom brood box off and carried over to the new hive bottom board. Hive tool moves two of the middle frames apart, hold the queen cell in and push the two frames back together. Put a honey super on that was partially filled from last year and close up the new hive. Back to the old hive, put the brood box on the hive bottom board and in goes the queen cell. Honey super back on and close it up. All told I think it took me 15-20 minutes but I think I must have lost about 50 pounds sitting in my bee suit baking in the sun. Ugh. I finished up by putting some grass clipping on the landing board of the new hive to cause the bees trying to leave the hive to re-orient themselves. This will hopefully prevent them from returning to the location that they remembered as home........the old hive location.
Now the waiting begins. The cells should hatch in a day or two (assuming there are alive queens in those cells). The new queens will emerge and take a few days to relax and get to know everyone. Then they will begin their mating flights. The latest studies show that a virgin queen will mate with 15+ drones before returning to the hive to begin her reign. So, within the next approximately two weeks I should find brood in the two hives. Don't hold your breath until the next inspection, I'm already holding mine!
Thanks again for reading.
Subscribe to:
Posts (Atom)