Tuesday, December 8, 2015

2015-12-08: BroodMinder Has Arrived

I'm very excited to say that my electronic hive temperature and humidity monitoring devices, aka the BroodMinder, have arrived!  If you've been reading this blog you know that I've been playing around with my own electronic hive monitoring electronics using an Arduino.  Although it worked, I couldn't really find a good way of deploying it and keeping it powered.  Well, some very talented people have done a lot more (and better) thinking about this and have made it a reality.  The weather is looking good this weekend and hopefully I will have them installed!


You can read all about how they work in the link to their Indiegogo page above, but basically you place the device right below your inner cover (above the brood) and using low power blue tooth it transmits the data to an app on your smart phone.  Pretty sweet!


BroodMinders ready to go!
I bought three of them and plan to place them on the cutout hive, the split (combined) hive and either the Green or White hive.  They both have the same number of boxes but one has an Italian queen and the other has the queen I bought from the Northern Bee Network.  I guess you'll find out which one I decided on after I deploy them.


The App
Hopefully these little gems will help me to monitor the hives over the winter without opening them. 


Until next time, thanks for reading!

Monday, November 23, 2015

2015-11-21: Winter Is Here

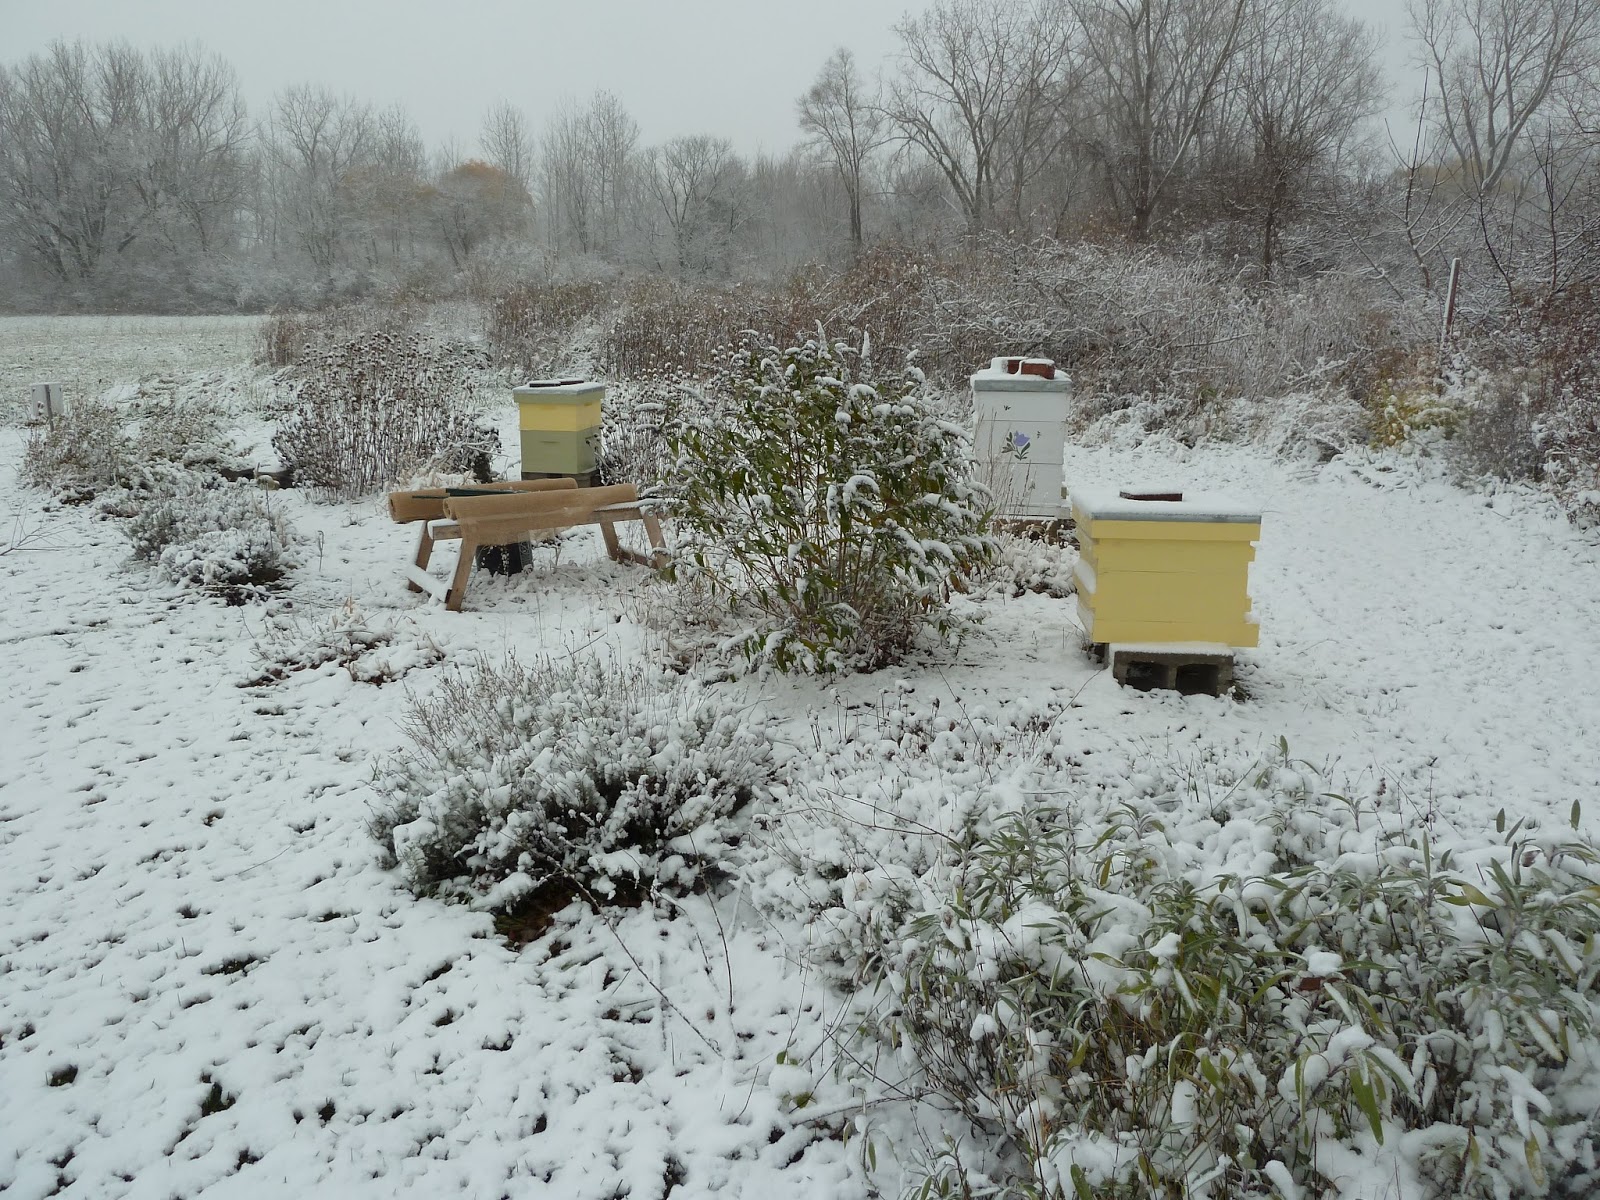
I guess there is no avoiding it now.......Winter is here.  Our first real snow that stuck started today and hasn't stopped yet.  Not sure if the snow will last but there is no denying that we are sliding into the cold.  Some of the things I wanted to do to the hives before Winter set in for good was to add mouse guards, windbreaks, candy boards and/or ventilation boards. 

Cold hives!
After searching around on the interwebs and seeing many different schemes for windbreaks, I decided on using burlap.  It was cheap and could be used for other purposes once Winter was over.  I picked up two rolls, hammered some posts into the ground and rolled out the burlap using zip ties to attach it to the posts.  


Wind break added
The idea isn't to surround the hives, but to address the prevailing wind directions.  Typically this is wind from the North and West so I built it in those two directions.  With my cutout hive and my combined nuc hive being short, the three foot tall roll seemed adequate.  But for the two established hives with two deep boxes and one honey super on, it seemed too short.  I think I'm going to pick up a few taller stakes and two more rolls of burlap to complete the job.

My next task was to put on some mouse guards.  I took some #4 hardware cloth, bent it into an L shape and stapled them across the entrance to each of the hives.


Cut out hive with mouse guard added

White and Green hives with mouse guards added

Combined nuc hives with mouse guard added
All in all I think it turned out well, didn't take too long and was inexpensive.  I sure hope it helps the bees get through the next four months of Winter!

Until next time, Happy Thanksgiving and thanks for reading!

Monday, October 26, 2015

2015-10-25: Winter Prep

We've finally hit a few nights of freezing temps so that means it is time to complete any winter prep that needs to be done on the hives.  I have empty feeder jars that need to be removed, boxes with no stores in them that need to be taken off (the bees don't need a bunch of extra space that serves no purpose) and mouse guards to be placed on.  I also need to decide what to do with my newly established nuc hives.

Old Nucs - Yellow/Green hives:

These are the splits I made some time ago that were moved into full sized boxes last month.  They've been feed 2 quarts of syrup each in the hopes that they would draw the empty frames with wax and start filling them up.  If I found 10 good frames then I was thinking to take two nuc bodies (5 frames each) and stack them.  It is suppose to be easier for the bees to move up in the winter and it would be easier for the bees to cover 5 frames at a time instead of 10.

Yellow Nuc:

I had suspicions during the last inspection that I had waited too long to transfer this nuc to a full sized hive and they decided to swarm (I saw some torn open queen cells).  The bees seemed "flighty" and the only brood I saw were drones.  The number of drones walking around the frames was high, especially since they should all be kicked out of the hive by now!  I did spot some eggs and developing larva but something was telling me that this was not right. 
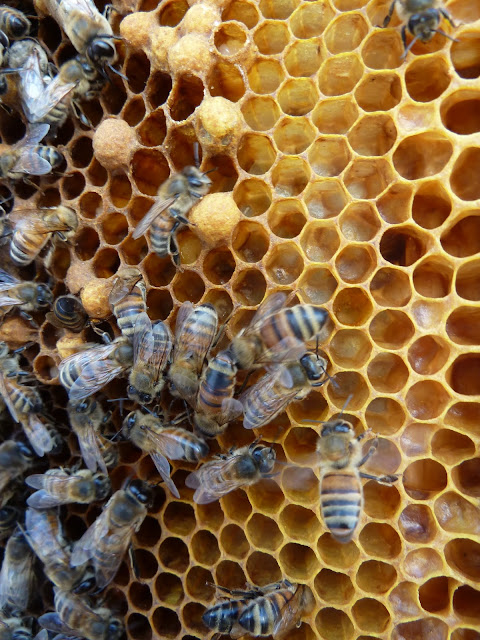
Drones, lava and eggs but no queen

So, either I have the start of laying workers or I have a queen laying all drones.  On top of that, the bees had not touched a single new frame that I had placed into the hive.  Stay tuned for more on the Yellow Nuc during my inspection of the Green Nuc....

Green Nuc:

I was a bit annoyed after pulling the first few frames since the bees had not touched them at all.  Thankfully the original 5 frames that were moved into the hive looked pretty good.  Lots of capped honey and worker brood!  Two more frames in and I spotted the queen with her pretty green dot. 

Queen with a pretty green dot

I was even nicely surprised that after I moved past these 5 frames the bees were actually drawing out one of the new frames! 

Drawing out a frame with new wax
Have I mentioned how I love festooning bees before?  =) 

Festooning bees
 Based on my findings between both nucs, I decided the one was probably queenless and had the start of laying workers and the other was queen right.  I thought it would be a good idea to take two 5 frame nuc boxes and stack them with the best frames from each hive.  I unscrewed the bottom from one of the nuc boxes and stacked it on top of another nuc box.  Crap!  They are not made to stack.  There was a large gap between the two that would be open to the air.  Ugh.  I guess I need to deal with the full sized boxes instead.  I decided to do a newspaper combine and thankfully I had one sheet of newspaper left!  I placed it across the top of Green nuc, picked up the Yellow nuc off of its bottom board and placed it on top of the Green nuc.  The bees will eventually chew through the paper and this slow integration will hopefully prevent any fighting between the bees before they merge together into one happy family.  I'm just hoping that there wasn't some drone laying queen that I didn't spot in the Yellow nuc that ends up battling with Green nuc's queen.

Newspaper combine complete

Where did that orange pollen come from?
Yellow Hive:

This is my cutout hive that has made some really good progress over the summer.  I removed the empty feeder jar and took a look through the top box.  The bees were covering about 6 frames and had most of them drawn out. 

Yellow Hive bees

Quite a few were filled with capped honey.  Looking down into the box below I saw lots of bees and some rubber bands still on the frames from the cutout!!  They typically chew through them and dispose of them but I'm guessing they've propolised them right onto the frames now.  I'll have to remove them during the first inspection in the Spring.

Green Hive:

The top honey super on this hive was filled with drawn combs that were completely empty.  I thought for sure that when I added them that the bees would fill them quickly with the Goldenrod flow.  No such luck.  I pulled this box off after clearing a few stray bees off the frames.  I pulled a few frames from the next honey super and at least there was some capped honey there.  Looks like that box will stay on for the Winter.

White Hive:

Looking at the top honey super on this hive I could see that it was packed.  I knew this from my last inspection but I had also seen a large pile of dead bees in front of the hive.  I was concerned that this hive had been robbed out by other bees.  Well not a single frame of honey appeared to be touched so this hive should have some great stores going into Winter.  It also had a nice population of bees and when I looked closely at the pile of dead bees I saw numerous dead yellow jackets in the pile.  Maybe they tried to raid the hive and picked the wrong one to screw with!

Battle aftermath
To complete my tasks I needed to put the mite sampling boards back into the hives that had screened bottoms to prevent any wind drafts blowing up from the bottom of the hives.  With that done I also wanted to put my mouse guards on but with the entrance reducers on it didn't really look like they would fit properly.  Based on http://www.honeybeesuite.com/what-size-hardware-cloth-is-best-for-beehives/ it looks like #4 hardware cloth is the proper size for a mouse guard.  So I think I'll grab some and use that instead.

I'm also considering getting or building some candy boards that come with a top entrance.  This would allow the bees to leave the hive for a cleansing flight during the Winter if the bottom entrance happened to be plugged up with dead bees.

With four hives going into Winter and some diversified genetics (one Italian, one cutout wild open mated and two "northern" queens), I'm hoping to have some better luck overwintering this year.  Wish for a mild Winter and wish the girls luck!

Until next time, thanks for reading!

Friday, September 18, 2015

2015-09-17: Hive Inspection

I had a number of tasks that needed to be accomplished for a while now.  My top priority was to get the nuc hives transferred to full sized hive bodies so they can build up enough stores to last the Winter.  I'm hoping they can both build up to two full deeps in time.  Believe it or not, Winter is coming.  Especially in honey bee terms.  Second on my list was to make sure the cutout hive is built up to four full medium boxes.  Last on my list was to check the status of Green Hive's honey supers and if the top one was full remove it for processing.  I have to thank Byron for coming out to help me again.  Having an extra set of hands is always appreciated!

Nuc hives:

The nucs are each currently resting on a single cinder block.  So we had to throw down another cinder block and level it to the existing one to make room for the full sized hive bodies.  Byron was able to unstrap each nuc and move it a few feet out of the way while I set the other block in place and checked it for level.  With a little adjusting and stomping on the blocks, they were level.  The new hives were set in place and frames removed to make room for the five frames from the nucs.  All that was left was to remove the frames from the nucs and put them into the new hives.

Byron transferring frames
This went really fast since I wasn't really focused on inspecting every frame.  But I did notice a number of queen cups and what looked to be a torn open queen cell on one of the frames.

Queen cups
I did not spot the queen during the transfer of these five frames.  It is quite possible that they actually swarmed....taking my new purchased queen with them.  She should have been easy to spot since she was marked.  I'll need to check this one closely next time and see if I can spot the marked queen or if they requeened themselves.  If they did swarm there isn't much hope for that swarm to establish and overwinter this late in the year.

After we finished moving the frames over, the inner cover went on and a jar of sugar syrup went on top of that to feed them.  This should give them the sugar they need to draw out the empty frames in the new hive.

The second nuc went just as quickly.  Thankfully this time I was able to spot the queen and there were no queen cups to be found on any of these frames.  Can you find her in the picture below?

Spot the queen with the green dot on her back!
The were some really nice frames in both nuc hives with plenty of honey and pollen.  Hopefully they have the resources to increase their populations and expand like crazy!

Drawn frame with honey and capped brood
Cutout Hive:

We opened up the cutout hive and checked to see how many of the existing frames had been drawn out.  I was a little bummed to see that they only had about 7 of the frames drawn.  I thought for sure with all the Goldenrod blooming around my house that they would have tons of nectar to make wax and honey.  Maybe these bees don't like the smell of sweaty gym socks because that is what Goldenrod nectar smells like!

I decided to add the fourth box to the hive and put a sugar syrup feeder on as well.  Go bees go!

Green Hive:

A quick look into the top honey super on this hive did not give me what I wanted.  The entire super had only one frame with any honey in it and a number of the frames were still undrawn.  Looks like no honey for harvest this year.  The second honey super wasn't much better.  That box was given all drawn frames and there were only a few frames with any honey or nectar in them at all.  I'll probably have to combine the best frames from the two honey supers into one box and feed this hive too.

White Hive:

This hive has one honey super on it and I expected to see the same lack of use.  I was so glad to be wrong!!  The bees had this super completely filled and capped.  Since this hive was the only one that wasn't requeened this year, I wonder if that is why they were able to make a surplus.  I know of a beekeeper's saying that may explain this - "You can make honey or bees but not both".

What's Next:

I will check the hives in a week to see how much of the feed they consumed and how many of the frames they are building up. 

Until next time, thanks for reading!!

Thursday, August 20, 2015

2015-08-20: Allergy Confirmed

Finally had my allergy test done and lucky me I'm allergic to honey bee venom! 

The test involved a series of small (very small really) injections of venom from the insects of the hymenoptera order.  I believe 8 different insect venoms were involved in ever increasing potency.  I had no reactions to any of them until the doctor hit 1:100 strength of the honey bee venom.  He continued on to full strength with all the other venoms and I had no reaction to any of them.  Why honey bees why?!?

The good news is that next week I will start the allergy shots.  Once a week for ten weeks.  I believe they increase the venom dosage each time.  After ten weeks if I show no signs of a reaction then they send in a blood sample.  If it comes back that I have no immune response then I'm "cured".  I would still need to keep going back for a shot once a month for the next five years to keep my body in tune with the venom.  The main thing I'm focused on now is the ten week goal.  I guess that would put me at the end of October.  Just in time for me to be doing nothing with the bees!  Hahahah  =)

Let the countdown begin!

Thursday, August 13, 2015

2015-08-10: Back In The Game

After my rather dramatic post last time, I just couldn't wait anymore and had to get out to see the bees.  I armed myself with some Benadryl, my EpiPen and my friend Keith and headed out to do some inspections!  I actually donned the FULL bee suit as well, which I haven't worn since I did the shed cut-out.  Dang is that thing hot!  My goals were to check and see if the cut-out hive had successfully re-queened themselves and to check the nuc hives to see how they were doing with the new queens in them.

Cut-Out Hive / Yellow Hive:

I had Keith do all the work and I just barked orders the entire time.  Thankfully Keith is a really good sport and was happy to help me out.  He removed the cover, took off the extra boxes that were covering the honey feeder and got into the first box.  The bees were pretty sparse here and there were only a few frames with any wax drawn at all.  And even those frames only had a few spots on them with any wax.  That box came off and we were into the next box.  Slightly more wax built out in this box but about half the frames were still untouched.  Finally after getting to the last three frames we were able to see some good drawn frames.

Plastic Frames being filled
About 3/4 of the frame was drawn and there was some capped honey and some nice pollen in the cells.  The next frame was very similar and I was able to spot some larva scattered here and there.  This was the first good sign that a queen was present.  We grabbed the last frame and look who we spotted!

Cut Out has a new Queen!
She's a beauty!  Look at how dark she is.  She definitely has some non-Italian genetics in her.  I'm hoping she has "Winter Survivor" written all over her!  I followed her around with the camera for a bit and if you zoom in on this photo you can see she has eggs in every cell.  Good job!

New Queen and Eggs
At this point I really didn't need to go into the last box since I know they were able to re-queen themselves.  I had Keith take a few frames from the top box that had some wax on them and swap them with some of the frames that had no wax on them.  Then we removed the top box entirely.  They have a lot of wax to draw still and they don't really need that extra space to police.  I also decided that since there weren't really a lot of bees in the hive that I would put the entrance reducer on.  We are probably due for a nectar dearth and I don't want the strong neighboring hives to bust in and rob this hive out.  I'll probably make up some syrup to feed them and this should get them to draw out some more wax.  I need them to fill out three medium boxes before Winter sets in.

Speaking of Winter, I see the Goldenrod starting to bloom in my area.  That always signals the approach of Fall.  Many of my late blooming flowers are also in full bloom.

Coneflowers in bloom
Green Nuc:

Since my Nuc hives only have 5 frames, it makes them really quick and easy to check.  Most of the honey frames that I put in are still full.  They have eaten a little bit and replaced it with pollen which is a good thing.  Two frames in and we hit the first solid brood frame.  The new queen looks like she is settling in nicely!

Solid brood pattern
The very next frame over I was able to spot her majesty.  The green dot on her back makes it a little too easy to spot her.

Queenie
This hive is doing pretty well with two frames of brood front and back and two frames of honey and pollen.  The one empty frame I had given them sadly remained empty.  They had a few blobs of comb ridges created but I didn't care too much for them.  I had Keith scrape some it off the frame.  I'm hoping when all these sealed brood start hatching out that there will be a lot of new bees that will be primed to start drawing wax.  I need to get busy building some boxes so I can move these nucs into full sized hives soon.

Yellow Nuc:

Very similar to the Green Nuc.  Two honey frames that the bees had eaten a little from and replaced with either pollen or more nectar.  Two pretty solid frames of capped brood.

Capped brood on Honey Super Cell plastic frames
This hive seemed to be much more interested in drawing some comb on the new plastic frames though.

New comb and brood
Since this was a medium sized frame that I placed into a deep sized box, the bees have drawn comb off the bottom of the frame to fill in the space.  Bees are sure efficient!

On the opposite side of this frame they decided to draw a few of the same ridges I described in the last nuc.  At least they've drawn plenty of normal looking comb too.

Comb ridges
I'm wondering if they were just stealing wax from one part of the comb to make this instead of drawing new wax? 

We spotted the queen on the next frame and that was the last thing I needed to see.  This was a very successful inspection.

Next Steps:

I plan on making some 1:1 sugar syrup to feed to the hives trying to draw new wax.  I need to get the full sized boxes ready to move the nucs into.  I also need to give Green Hive a check to see how much of the two honey supers they have filled and also to see if the new queen is doing alright in there as well.  I'd also like to do some Varroa monitoring with a powdered sugar shake.  That sounds like a lot to do and we are already half way through August!

As always, thanks for reading!
Monday, August 3, 2015

2015-08-01: Sting Reaction

I was showing my son-in-law some of my hives this past weekend when a poorly navigating bee landed behind my ear and accidentally stung me.  First off, if you watch bees fly for any length of time it can be quite hilarious how badly they seem to fly at times.  Secondly, it is obvious that one of my bees would never sting me on purpose, so therefore she must have accidentally got her stinger caught in my epidermis!  Believe what you want folks =)  Anyway, I scraped out the stinger and walked back up to the house.  All the time being "escorted" back by another bee.  When I got into the house I felt a bit itchy and soon noticed I had red splotches all over my chest and even some hives around my waistline.  Not good.  This is where the phrase "severe reaction" enters into the story.  Any kind of reaction outside of the sting area and anything more than your typical redness, swelling and/or itching.  Matter of fact, if you start looking on WebMD then you are getting into the anaphylaxis symptoms.  Trying not to panic at this point I took some Children's Benadryl that I had in the house and then showed my wife what was going on.  We decided to wait and see if the Benadryl took care of it since I wasn't having any other anaphylaxis symptoms.  Within a few hours the reaction had gone away and I started to relax a bit.  I went to the doctor the next day and she immediately called in an EpiPen for me and made me an appointment with the Allergist.  At this point I'm kind of freaking out and thinking that I have to give up beekeeping if I'm deathly allergic to them.  But I'm going to try and put off judgement until I get some more solid answers from the Allergist.  Quite an emotional roller coaster so far.  I am a little relieved to read on some beekeeping forums of quite a few other people that experienced the same thing.  Many of them were able to undergo desensitization therapy until they had no more reactions to stings.  So, I guess there is hope for me yet  <sigh>.